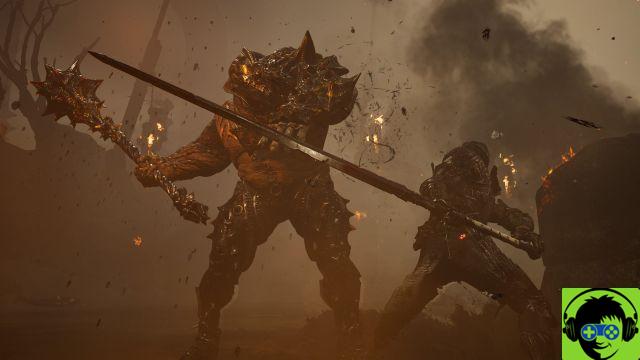
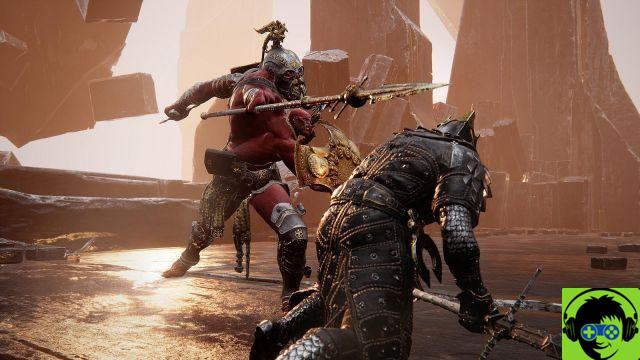
Mortal Shell offers the same kind of thrills you can find in a Dark Souls game, with heavy combat and difficulty high enough to make your average gamer scream. The cases are there to give you some options when it comes to protection.
However, if you are a player who cannot start a game without committing to collecting all trophies or achievements, the Forever Alone task, which requires you to complete the entire game without ever binding yourself to any of these seashells. , might make you think twice. .
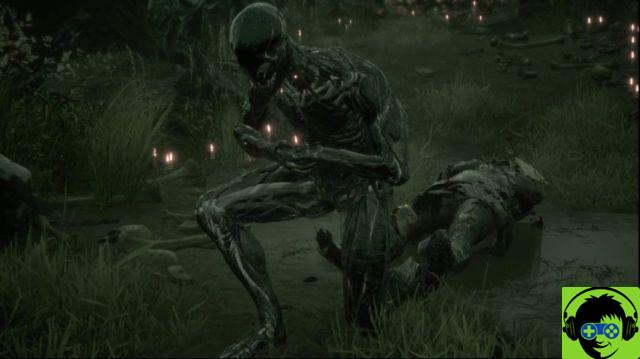
Why is this such a challenge? Well, as a character without a shell, you will die with one hit from any enemy in the game. Even if you are just hit by one of the big frogs near the river in Fallgrim, you will die. There are no upgrades you can acquire, and the glimpses are redundant because, traditionally, they are used by shells to remember echoes of their past.
The only advantage you have as a shellless creature is that you have almost unlimited stamina and good resolve, right behind Solomon's shell. In all other cases, the game will be more difficult. We strongly recommend that you take a standard reading first.
Don't be afraid, because there are ways to make the game as painless as possible. Here are our tips to help you complete the Forever Alone Trophy / Achievement.
Combine it with the secret success Life is Suffering
If your ultimate goal in completing the game is to simply provide a bigger challenge, or if you are playing the Epic Games Store version of the game on PC, you can skip this tip.
The Life is Suffering achievement requires you to complete the game as Dark Obsidian, a tarry version of the character you start with. For those who earn a Platinum Trophy or a 1000 player score, combining your game with the Life is Suffering task will not only kill two one-stone birds, but also give you some useful combat aid.
To activate this achievement, head to the Fallgrim river area, on the right as you exit the starting area, and follow it to the left. You'll encounter some resistance, so be sure to send in enemies or create enough space to get past them. If you come across a giant frog that you can talk to, you're headed in the right direction. Right after it you'll see an embankment you can walk on, and along the wall is a cave blocked by tree bark. Cut it and enter it.
In this cave you will find a shrine that will ask you to relinquish your humanity, removing any seashells you have been able to collect so far, and any progress you have made to improve them. To combine the two achievements, you can still activate the shrine even without having linked with a shell.
Complete this and you will enter the Black Obsidian form for the rest of the game. This does not grant you any stat boosts, but it will grant you the skill that will create an area of attack of effect if you use hardening in the air and crash into the ground. This can help you tremendously when making your way through dungeons to rack up damage, and it will allow you to accomplish both achievements at the same time.
Run if you can
A big difference between Mortal Shell and Dark Souls is that in the latter, once you have caught an enemy's attention (or "aggro"), they will continue to chase you until one of you are dead. In Mortal Shell almost all monsters have an aggro zone, where you will bring their attention to a certain position from where they start or patrol. This means that if you come across an enemy that you prefer to avoid, they will simply return to their spawn position if you get far enough away from the neighborhood.
This also applies to enemies inside the game's dungeon instances. If you pass the monsters quickly enough, they will eventually return to their spawn position. When it comes to going through dungeons, this will be your best way to progress.
That said, it's not advisable to skip the entire dungeon and head straight for the bosses each time. While the dungeons are filled with plenty of tough enemies, there are areas where chests full of extremely useful items reside. These include quenched acid, the main component of weapon upgrades, and scrolls that will help you get through inevitable combat situations.
However, for the most part, not committing where possible is the best way forward. Most enemies can be ignored, which will save you time in your quest for success, but planning your route is essential and you will have to face bosses and most of the mini-boss fights in the game.
Head to the Eternal Nathrex first
If you've played the game before, you'll know where the Eternal Nathrex is located and what to expect. This is the dungeon that sees you enter a huge palace-like structure before passing through huge boulders of tar floating in the sky. This is the largest of the three dungeons and you will see Crucix, The Twiceborn in the Shifting Archives facing off against each other. If you don't know where it is, seeing Eredrím's vision will help you with its location.
It is perhaps the most difficult of the dungeons due to the strength of its crowds and the size of the location. It's huge but also cramped as you progress through the floating blocks with less room to maneuver around enemies.
But clearing the hardest dungeon first isn't the main reason to go first. Unlocking the Hammer and Chisel and securing its upgrades is why you'll want to get here first.
While not everyone's weapon of choice, the Hammer and Chisel is by far the most agile weapon of the set. You can launch attacks with it very quickly, which means the window for dodging is much larger than with any of the other weapons. It suits a character who has high stamina, which makes the Shellless the absolute best with him in hand.
It also has one of the best abilities in the game which allows you to step forward and launch a burst of blades as you leap through the air. It's a devastating attack zone and a great last resort option if you find yourself surrounded. All of this is backed up by damage that is still comparable to other weapons once maxed out.
The Hammer and Chisel weapon is located inside the entrance to the Eternal Nathrex, so you can just earn Hadern's weapon and leave another one if you want, but like the items to unlock the ability of the weapon are here, the smartest approach is to just complete that instance first.
Master roll and harden or die trying
Dodging enemy attacks in Mortal Shell is actually quite easy. Dodge and roll will give you enough images of invulnerability to never take a hit when done correctly. Mastering its use is one of the keys to avoiding taking hits throughout your game. Rolling is especially important as it will give you enough distance to avoid further attack from most enemies.
Not all areas will be conducive to fighting the circles that revolve around everything, especially in the changing archives where platforms are narrow and falling will mean death. It's also not always easy to time a throw if you're booming a weapon, as it will have to finish first. This is another reason why hammer and chisel can work most favorably in this stroke.
Likewise, hardening is easily one of the best mechanics in the game as it can take you from a compromising position against an enemy to go on the offensive. It's a lifeline, but one that should be used in conjunction with dodging, as enemies that strike you while petrified will only stumble for a moment. If you are in the Dark Obsidian form, it can also provide a world of pain to monsters that target you.
Bringing these two together will help you survive. If you don't have access to the Balistazooka, some sections of the game will be impossible without your rolling and hardening timing being correct, so it is recommended that you do this as you progress.
You can skip the previews, but you still need to collect tar
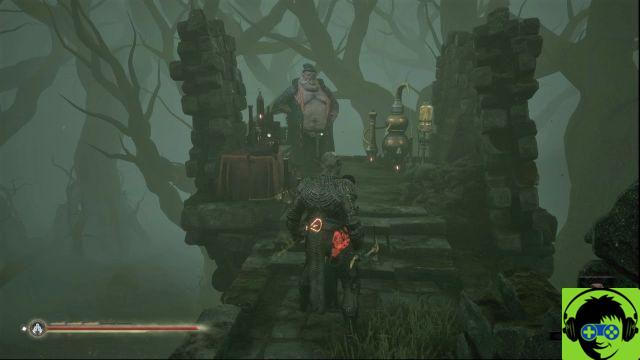
Speaking of the game provider, it can be easy to miss if you're not looking for it. It is located outside the Fallgrim Tower if you follow the building to the left from the upper floor. For a game like this, where you'll need all the help you can get, some of the vendor's items are essential.
This is where your tar collection kicks in. You don't need previews at all. In fact, when you pick them up, they just disappear because there is no shell to bind them to. But all the goods the seller has are paid for in tar.
All of the items in the vendor's inventory are useful, including scrolls and bells to increase your tar rewards on killing. The two main items that you will want are the two hardening acids and the tools. Both are expensive, with the acids coming in at 2500 souls each, and the toolkit a whopping 8.000. However, they will make your game immeasurably easier as the Acids will provide two potency increases to your weapon damage, while the Toolkit will repair your Balistazooka.
Although limited by the number of large bolts you've collected, the game's ranged weapon is very powerful and will come in handy in a number of areas of each dungeon. Use it sparingly and combine it with the other tips here and you should be able to successfully complete your run with minimal kills and get closer to that 100% completion.