Smartphone cameras can now be used on any occasion, especially if in possession of devices equipped with excellent lenses. Fortunately, Apple decides every year to improve this aspect on their iPhones, simplifying the life of all professional and non-professional photographers.
A small problem that many cannot solve, however, is certainly the poor quality of the shots during the night hours, or in any case in the presence of little light. Today we are going to see 10 simple tips to use to improve this situation.
Here is our video tutorial
Before leaving you to our guide, we want to remind you that we have also made a video where we talk about how to take pictures of the moon with iPhone but also of the stars and night photography in general!
Reduce the exposure
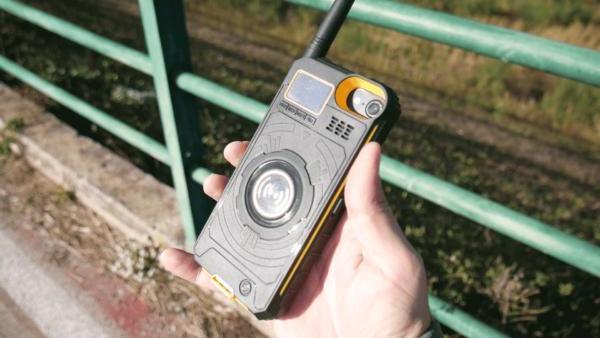
Have you ever tried to take a photo along a river surrounded by street lamps (of course at night)? The photograph is, in most cases, quite poor due to blurred halos around the few light sources. This happens because the lens tends to capture as much light as possible, thus increasing its proportions to illuminate the scene.
Obviously the situation can be improved by reducing the exposure, creating a darker shot, but with bright areas much more realistic and pleasing. To do this, all you need to do is touch on the smartphone screen (as if we wanted to focus) and start swiping your finger from top to bottom (or vice versa to go back).

Look for an illuminated place
Taking night photos does not mean having a dark memory, on the contrary, it could be the right opportunity to shoot a place, monument or object that it is illuminated only on those occasions. Obviously the advice is always to point towards the illuminated object while working with the exposure.
To capture portraits instead, it might be an excellent idea to position the subject in front of the light source, in order to use it precisely to give greater relief and more details to the portrait.
Keep iPhone as stable as possible
There is no denying it, the real drama of night photos is the blurring of the images. This happens because the shutter is slowed down to try to capture more light. However, this slowdown represents a problem when the smartphone starts to move. Every single frame is in fact captured by the camera creating a inaccurate result and somewhat annoying, caused by the overlapping of the aforementioned frames.
The best way to combat this problem is keep iPhone as stable as possible. To do this, you may need a tripod or even just a simple support base. The important thing is that the camera does not experience any movement when shooting.
Use the black and white filter
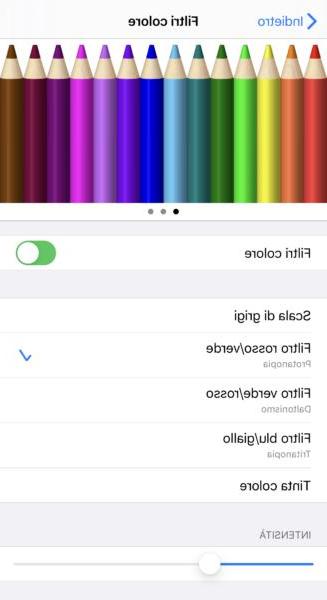
While being able to find an adequate light source, the colors in the photograph may still be poorly defined. Fortunately it is possible, through the filters, to go to render "Standard" the light and greatly improve the situation.
The most suitable filter is obviously the black and white one, great for further accentuate the contrast between areas of light and darkness. The aforementioned change can be applied both before and after shooting, using the standard iPhone camera settings or those present in specially developed applications available on the App Store.

Find a lighted road
Inside the gallery of any photographer (professional or not), we almost always find photos of a road, a river or any path infinite for the human eye. The same strategy can also be used during the night, where the real way forward will be the one indicated by the lights.
Among the most basic examples we have: merry-go-rounds, a street of street lamps or villas in a festive square. The goal is therefore to look for a path to follow even at night.
Use the iPhone 11 night mode
This point is dedicated exclusively to owners of iPhone 11 and iPhone 11 Pro. The aforementioned smartphones have the "Night mode", that is hardware and software upgrades capable of enclosing most of the recommendations listed above in a single command.
This is located at the top left, has a moon icon and is automatically activated when the lens realizes that it is in the presence of little light. Seconds will appear near the same moon to represent the "Exposition time", which is the time it takes to take the picture.

This will be set automatically after clicking on the moon icon, but it can be customized manually by acting in the settings below. Night mode will only work with 1X and 2X lenses, nothing for that 0,5X.
Take advantage of the instant before and after the night
This is a guide dedicated to shooting at night, but why not take advantage of the moments before and after the dark? We are obviously talking about Sunrise and Sunset, situations in which even the most harmless shot can turn into something beautiful. The little light emitted by the sun will in fact be able to invade the entire photo, transforming everything that is present, into dark and well-defined subjects.
Don't avoid the rain
Rain doesn't always represent a sad moment of the day. Especially at night in fact, the drops manage to capture and reflect the few lights artificial buildings of the city, creating an absolutely wonderful atmosphere.
Among the most photographs taken in rainy conditions, we certainly find those focused on car windows or house windows. All that remains is to wait for a bit of rain, focus on the drops stuck on a glass wall and wait for the lights in the background to create an effect. “Blur” unbelievable.
Use lights to emphasize a subject
The concept is similar to that already analyzed in the paragraph dedicated to sunrise and sunset. The only difference is that here we need to make the most of the artificial lights. By placing any subject next to the light source and using it as a background, you can create mysterious and unique shots.
Take advantage of the long exposure
The last piece of advice we feel we can share is to turn the disadvantages of night photos into advantages. So far we have tried to fix the exposure, shutter and light, but what if we tried instead of increase even more the effect that these create?
You will surely have often seen photographs of cars or trains that leave behind a luminous trail given by the lights of the same vehicle. Well, even with the iPhone it is possible to do something like this. In fact, it will be sufficient to use the mode of long exposition.

To do this, you will need to activate the “Live Photos” from the button at the top, stand still and take the photo of a passing vehicle. Immediately after, just open the gallery, select the photo, drag it from the bottom to the top and click on the effect "Long exposure".
Doubts or problems? We help you
If you want to stay up to date, subscribe to our Telegram channel and follow us on Instagram. If you want to receive support for any questions or problems, join our Facebook community. Don't forget that we have also created a search engine full of exclusive coupons and the best promotions from the web!