Come mai quell'aria così afflitta? Lasciami indovinare: hai cancellato per sbaglio delle foto dal tuo smartphone or dal tuo PC e sei disperato perché non sai come recoveré, giusto? È a classico, ma non ti preoccupare, with a pizzico di fortuna potresti riuscire a recuperare i tuoi scatti senza rivolgerti a centri specializzati.
If your device is brought to you, your photo will be at the moment of the backup system (in-house or on the cloud), and you will recover the immagini process through questi ultimi. Alternatively, if you do not backup your device, you will receive the photo that has been canceled by the user using the data recovery software: if you use the software that thoroughly analyzes hard disk, schede SD, chiavette and altre unità di memorizzazione e permettono di recuperare i file che sono stati cancellati su questi ultimi. How does this magic come about? Semplice. In realtà i file cancellati physically remains the fine disk when the porzione di memoria che li ospitava does not come sovrascritta with altre informazioni: agisci prima che come effettuata la sovrascrittura, puoi riuscire to recover the photo - in maniera totale or parziale - anche This seed was canceled in final maniera.
Allora, si può sapere che aspetti a cominciare? Più tempo lost and peggio è! Prenditi cinque minuti di tempo libero e scopri eat ripristinare photo cancellate thanks to the indications of this per darti. Non ti promised miracoli, ma assicuro che in un modo o nell'altro almeno qualche immagine dovresti riuscire to recover it. Buona lettura and in bocca al lupo per tutto!
Preliminary operation
As mentioned in the opening of the post, most smartphones, tablets and PCs now include backup systems that automatically store files locally (eg on external drives) and in the cloud, then on the Internet. Before moving on to heavy artillery and installing deleted data recovery software, take some time off and see if you can ripristinare photo cancellate ricorrendo to one of the tuoi backup.
Ripristinare foto cancellate da Android / Google Foto
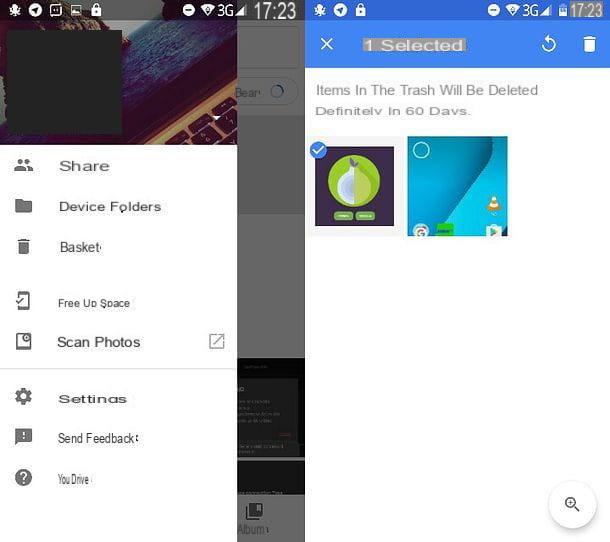
A terminal was used AndroidProbably, I managed the photo with Google Photo, which was a fungere da galleria permette di archiviare foto e video online senza limiti di spazio. When you cancel a photo from Google Photo, it does not come out of the box: it ends in a temporary poster (denominated Cestino) dove remains available for 60 giorni. Be your cancellato delle foto per sbaglio e non sono passati ancora 60 giorni dalla loro cancellazione, potresti trovarle own nel Cestino di Google Foto.
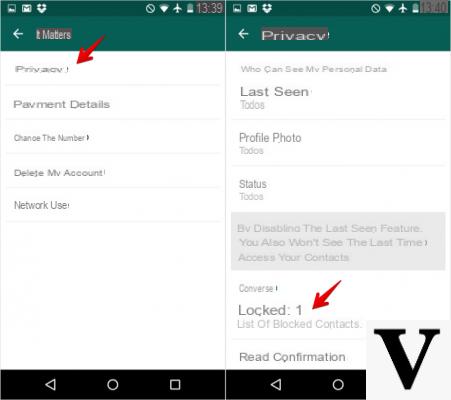
Provvedi dunque ad aprire l'applicazione di Google Foto, pigia sul pulsating ≡ che si trova in alto a sinistra e seleciona la voce Trash can dalla barra che compare sulla sinistra. Dopodiché has the first credit on the thumbnail of the first photo I will recover, it selects me by filing the segno di spunta accanto alle parrot anteprime e pigia sull'icona della arrow Che compare in high to destra per riportarle nel rullino del tuo device. Facile, see?
Please note: Google Photo is available for iOS and computer (Windows / macOS). Your iOS permette di will recover the photo in identical way to Android, your computer invece bisogna agire dal pannello Web of the service (accessibile with qualsiasi browser effet when l'accesso with il own Google account).
Ripristinare photo cancellate da iOS / iCloud
La app Gallery di iOS Include a sorta di Cestino in cui finiscono tutte le foto ei video eliminati dal own device. I contention stazionano lì per circa 30 giorni, dopodiché vengono eliminati in maniera final per liberare spazio sulla memoria.
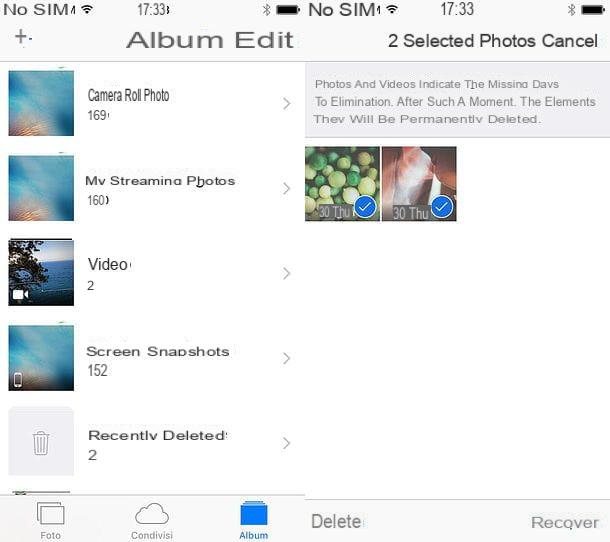
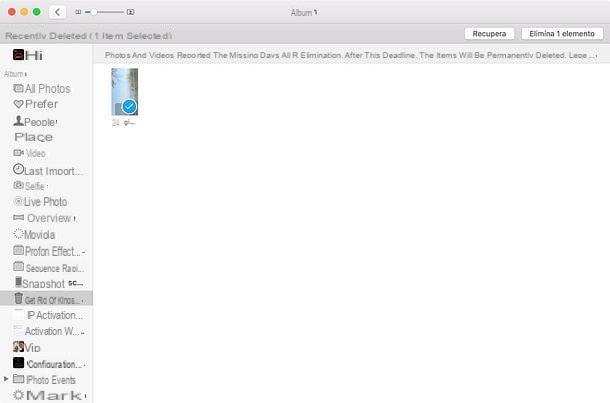
To view the contents of the iOS “Recycle Bin” and retrieve any images inside it, open the app Gallery on your iPhone or iPad, select the scheda Album che si trova in basso a destra e seleciona l'album Recently deleted. Successively, pigia sul pulsating Select located at the top right, select the thumbnails of the photos to be recovered and first “tap” the button Recover (bottom right) and then on the item Recover photo per confermare l'operazione.
If the services are active on your device Streaming Photo and / or ICloud Photo Library, which back up photos and videos to the cloud, you can recover deleted photos from iPhone and iPad also by working from the Web. All you have to do is connect to the iCloud website, log in with the ID Apple associated with the device from which you deleted the photos you intend to recover and click on the icon Gallery present nella schermata che si apre.
At this point, select the voice Recently deleted from the side bar of sinistra, using the combination of tasti Ctrl + click o cmd + click (your Mac) will select you immagini da ripristinare e clicca pulsado Recover at the top right to bring the selected items back to your iCloud master album.
Ripristinare photo cancellate da Windows Phone / OneDrive
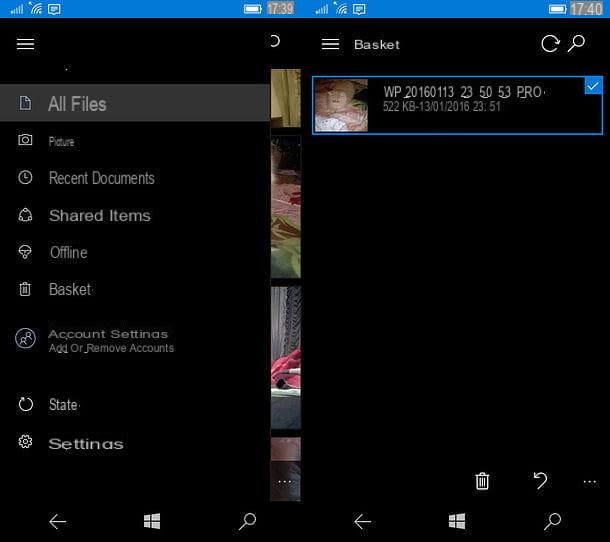
If you have one Windows Phone e hai attivata the funzione di synchronizzazione delle photo with OneDrive, I will recover i tuoi scatti (ei tuoi video) by sending the app di OneDrivepigging your pulse ? che si trova in alto a sinistra and selecting the voice regarding the Trash can give the menu check if you press.
Successively, select the miniature of the photo and the video that you intend to recover, pigia sull'icona della arrow collocata in basso a destra and il gioco è fatto.
Alternatively, if you prefer to act from a PC, you can access OneDrive from the browser with the Microsoft account you use on your phone, select the item Trash can from the side bar of the sinistra, it will select the image to recover and piggy back on the pulse Restore located at the top right. Easier done than said!
Ripristinare photo cancellate da Windows
A computer equipped with Windows 10 o Windows 8.x and you have activated the function of file timeline, puoi ripristinare the photo che hai cancellato per sbaglio recandoti nella cartella in cui quete erano custodite (es. Images) and selecting the voice Chronology from the card Home dell'Esplora File.
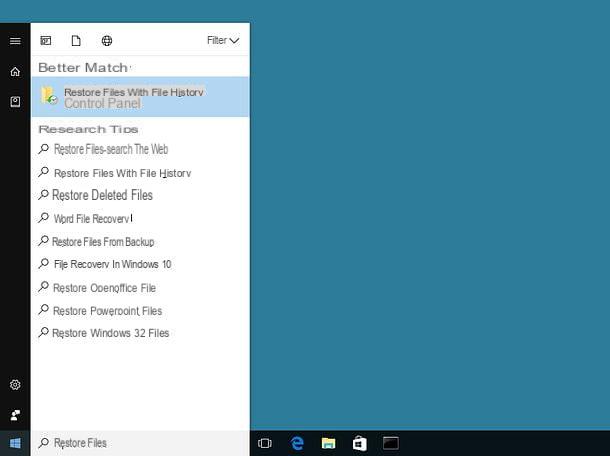
As an alternative, you would prefer to click on the button Home (the bandierina di Windows collocata nell'angolo in basso a sinistra dello schermo), close "Restore files" In the menu, if I learn and I will follow the procedure for ripristinare file with Chronology file by clicking sull'apposita icona present nei risultati della ricerca.
A PC equipped with Windows 7, I will try to recover the photo (and the file) using the backup function included in the operating system. Per maggiori informazioni a riguardo, see my tutorial on how to make Windows 7 backup.
If the backup is not available to you, I will be able to retrieve the program to retrieve the file that was trovi in one of the capitoli successivi of the tutorial.
Ripristinare photo cancellate da macOS
If you use a Mac, puoi provare ripristinare your photo following the strade: 1) using the Photo app di macOS 2) using i backup di time Machine 3) using il Cestino di iCloud.
The Foto di macOS app was used, puoi ripristinare the photo in maniera analoga rispetto to what seen your iOS. Avvia, although the Foto sul tuo computer app, select the album Recently deleted from the side bar of the sinistra, click on the miniature of the immagini to recover and click on the button Recover located at the top right.
Not using the Foto di macOS app? In this case I will enter in time Machine and attempt a "manual" recovery of the photos of your interest (provided that these are included in the backups you still have at your disposal). You find everything explained in my Time Machine tutorial.
If you then have the iCloud photo synchronization services active, you can access the iCloud website and retrieve your photos from the album Recently deleted Come you ho spiegato prima nel paragrafo dedicated to the recovery of the photo cancellate da iOS. If you do not have the backup of the photo at your disposal, I will be able to recover the file that has been canceled in one of the capitoli successivi of this tutorial.
Ripristinare photo cancellate da Dropbox
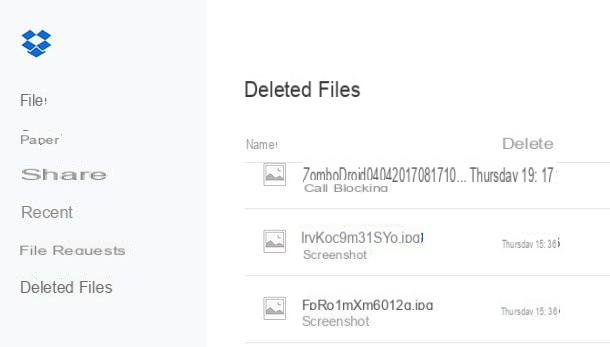
Hai attivato the synchronization of the photo with dropbox and / or have you accidentally deleted some images stored on this service? No problem. Connect to the web version of Dropbox, log in to your account and click on the item Deleted files present in the left sidebar. Then click on the icon of the photo to restore, press the button Restore And that's it.
Ripristinare photo cancellate da WhatsApp

Hai cancellato delle discussioni e / o delle foto da WhatsApp e non sai come recoverle? Panic. I know, as harsh, avevi attiva the funzione di backup delle chat, puoi recover tutto by uninstalling the app and reinstalling it on your smartphone. Trovi spiegato tutto in dettaglio nel mio tutorial su come ripristinare backup WhatsApp.
Programs to restore deleted photos from PC
Se non avevi dei backup delle tue foto da cui attingere, mi spiace, ma non ti resta altro che incrociare dita e sperare che i dati recovery software facciano il loro dovere. O meglio, I hope that the portion of the disk of your youngest ospitate will immagini you will recover not sia stata completely sovrascritta da altre informazioni. For this purpose, I will recover the photo that has the internal disk of your PC, but will not install the software that will directly retrieve your question: for the most part, I will cancel the photo by recording the set of the CD that I immagini. You provided the collector of the internal disk of your PC to an other computer or installed the software of the recovery of your secondary disk (if there was one). Fatta questa doverosa premessa, andiamo al sodo e vediamo quali sono i software di recupero dati ai quali puoi affidarti.
DiskDrill (Windows/macOS)
If you are looking for a quick and easy method to recover deleted photos from your computer, I can only recommend you Disk Drill: one of the most advanced and effective data recovery software, capable of combining advanced data recovery technology and a very simple and tidy user interface.
The software is available for both Windows and macOS and allows you to recover all major photo formats: JPG, BMP, PNG etc., including RAW files cameras. It also allows you to view previews of the data to be recovered and to prevent future accidental deletion of files and folders via Recovery Vault, a feature that allows you to keep your most important data in a reserved area of the disk, even in case of cancellation and subsequent emptying of the Recycle Bin.
Disk Drill can be downloaded and used for free in a version that offers all the functions just mentioned and allows you to recover up to 500MB of data. To get the full version of the software and recover more data, you need to purchase a license with prices starting from 94 euros.
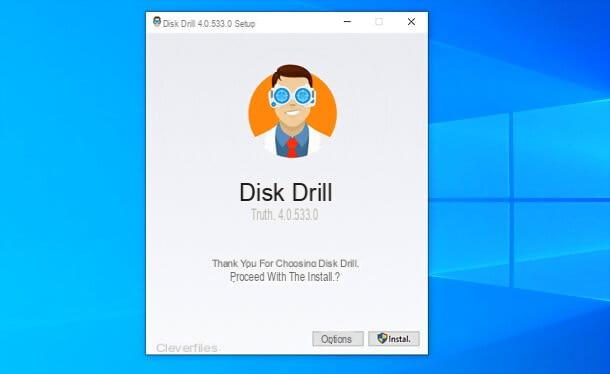
If everything is clear so far, let's move on to the practical side of the matter. To download Disk Drill on your PC, connect to the official website of the program and click on the button Scarica free. Afterward, open the .exe file obtained and click on the buttons Install it. e Yes, to conclude the setup. During installation, make sure you have an active connection (as you may need to download some components from the Internet). If you are asked to restart the PC, accepts.
Now, to recover deleted photos on your PC, launch Disk Drill e premi sui pulsnti Yes e Continue, then choose whether to activate the Recovery Vault data protection feature e / o if share anonymous usage data with the developers of the program and click on the button let's begin.
Select poi l 'unit and partition from which you intend to recover the deleted photos (e.g. the computer disk) and use the drop-down menu that appears on the right to choose the recovery method to use (All methods of recovery, Fast analysis, In-depth analysis, Search for lost partitions, Allocate existing file system data o Protected data not deleted). I advise you to choose All methods of recovery.
Once this is done, click on the button Search for lost data and wait a few seconds for all recoverable files to be scanned. You will be automatically shown a menu through which you can view the recoverable data based on the category to which it belongs: Images, Video, Audio, Documents, Archives o other files.
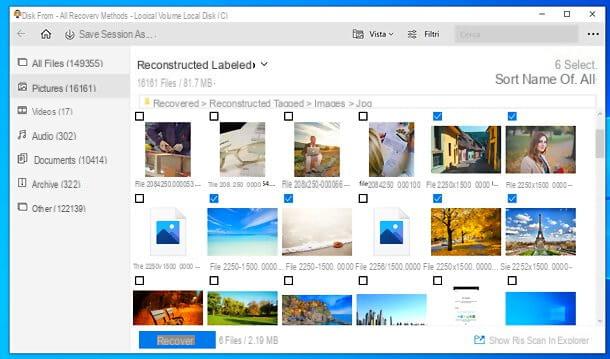
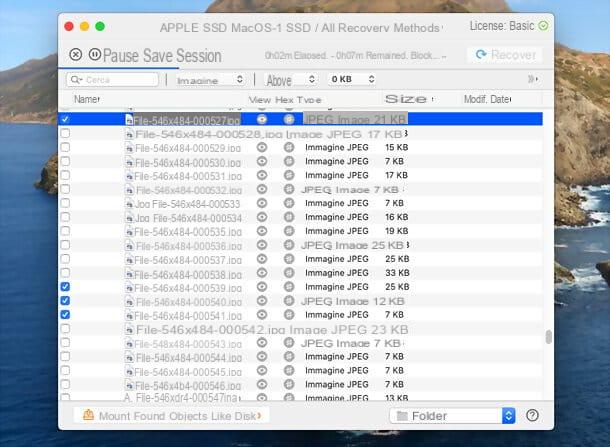
To recover the photos, select the icon Images, choose the type of view to use (via the menu Vista located at the top) and check the boxes relating to the shots of your interest. If you want, you can also filter your search results by dimensions o date of cancellation, calling up the menu filters placed at the top.
Finally, hit the button Recover, at the bottom left, select the destination path of the files to be recovered (by clicking on the folder) and the first button OK, to complete the procedure.
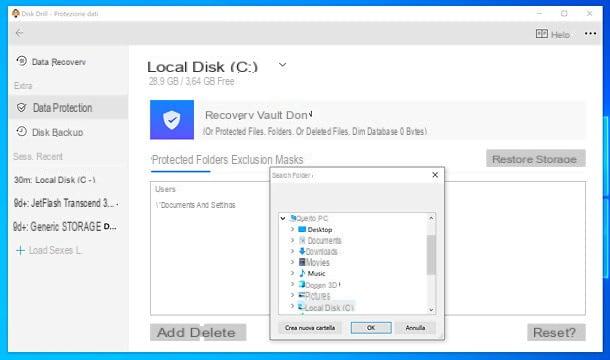
If you want to add files or folders to the Recovery Vault protection, so as to preserve them even in case of deletion and emptying of the Recycle Bin, select the item Data protection from the Disk Drill sidebar, click on the button OK, let's do it and, if necessary, move up ON the levetta relating to Recovery Vault. Then click on the button Add, select the elements to protect and that's it.
I use a Mac? In this case, you can download Disk Drill by connecting to the program's official website and clicking on the button Scarica free.
A download complete, apri il .dmg file ottenuto, trascina l'icona di Disk Drill in the folder Applications on your Mac and launch the program. Afterwards, accept the condizioni d'uso, follow her initial presentationclick on your button Start, type the Mac admin password and unlock Disk Drill in System preference following the instructions on the screen.
At this point, you can follow the same instructions I gave you just now for the Windows version of the program, since the steps to be taken are almost the same.
EaseUS Data Recovery Wizard (Windows / macOS)
EaseUS Data Recovery Wizard è a program for the recovery of the file cancellati che assicura a last compromesso tra efficacia e semplicità di utilizzo. È infatti dotato di un'interfaccia extremely intuitive (tradotta completely in British) ed è in Grado di operare su una vastissima gamma di dispositivi: smartphone, tablet, hard disk (sia interni che esterni), unità SSD (sia interne che esterne), schede SD, USB stick, fotocamere ecc. Funziona finanche your drive formattati / danneggiati e your RAW partizioni.
For what concerns the recovery of the photo, the program of EaseUS è in Grado di trattare tutti i principali formati di file grafici (JPG / JPEG, TIFF / TIF, PNG, BMP, GIF, PSD, CRW, CR2, NEF, ORF, SR2, MRW, DCR, WMF, RAW, SWF, SVG , RAF, DNG ecc.) And remain constant of visualization of the first prime of the ripristino.
Compatible sia with Windows that with MacOS, EaseUS Data Recovery Wizard is available in a variety version: one free, EaseUS Data Recovery Wizard Free, which will allow me to recover fine at 500MB of data (or 2GB, I know if it is part of the online software) and a payment, EaseUS Data Recovery Wizard Professional, it is limited by the amount of the data it will recover, which presents prezzi a partire for 66,69 euro. The Professional version is free for me, not if it works with the purchase of a license, but only for visualization and the file will be recovered and not exported.
Detto questo, passiamo all'azione. Per scaricare EaseUS Data Recovery Wizard Professional su Windows, go to the program's ufficiale site and click on the button Free trial. If, on the other hand, you prefer to download EaseUS Data Recovery Wizard Free, you have come to this page of the EaseUS site and click on the button Scarica free.
A complete download, check your abbia scaricato EaseUS Data Recovery Wizard Professional or Free, apri il .exe file got and answer Yes all'avviso che compare sullo schermo. Dopodiché assicurati che ci sia la spunta sulla casella relative alle EaseUS license (in basso a sinistra), premium pulsating Install now e attendi che vengano prima scaricati e poi installati tutti i componenti necesari al funzionamento del software. Se non vuoi inviare anonymous statistiche d'useclick sulla voce Personalizza l'installazione (in basso a destra) and the casella relative to quest'opzione deseleases.
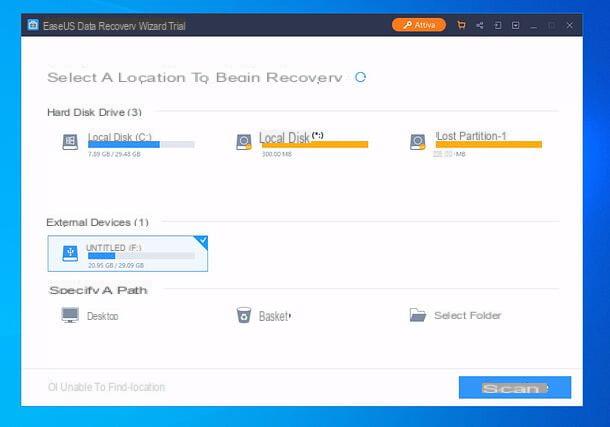
Pray for your pulse Sign up now, to access the main schermata of the EaseUS Data Recovery Wizard, select therelative icon all'unità from which you intend to recover the photo cancel and click on your button ScanIn basso a destra, per avviare la ricerca dei file recorabili.
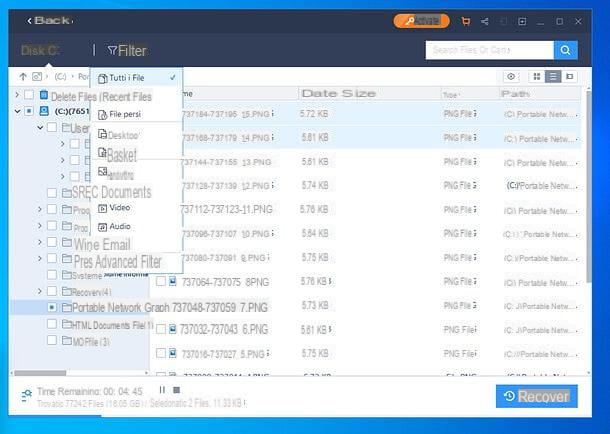
A scansione ultimata, per visualizzare only immagini nei risultati della ricerca, clicca sulla voce Filter collocata in alto e spunta l'opzione Graphs in the menu that opens. Then use the left sidebar to "browse" the folders in which the photo day will recover, select quelle di tuo interesse (spuntando le relative caselle) e premi sul bottone Recover (in basso a destra), but I will indicate the folder in cui export.
You will be visualized as a prime of the immagini prima di recupere, selecionale e clicca sull 'icona dell'occhio, located at the top right.
If you use a MacYou pointed out that you can scaricare EaseUS Data Recovery Wizard using i link che ti ho fornito in precedenza e cliccando sulla voce relative alla Mac version of the software. Per installare il programma, invece, devi aprire il package .dmg ottenuto e trascinare l'icona di EaseUS Data Recovery Wizard in the folder Applications from the Mac. Più facile di così?
Tenorshare UltData (Windows / macOS)
UltData di Tenorshare, azienda con oltre 10 anni di esperienza sulle spalle, è an ottimo recovery software dati per Windows e macOS che permette di agire su foto e tanti altri tipi di file, come video, music, email, documenti di Office (Word, Excel, PPT), PDF ecc. Può ripristinare file cancellati, persi o formattati dal Cestino di Windows o macOS, hard disk, USB device, schede SD / XD / CF, fotocamere digitali, flash drive e altri device.
Funziona in soli tre passaggi, senza richiedere conoscenze Avanzate all'utente: scansione, anteprima e recoco dei dati. If you can get it for free in a version, but only agree to visualize and recover it: per ripristinare effettivamente i file occorre acquistare una liceza, which your Windows has prezzi a partire da 45,99 euro / anno mentre su macOS a partire da 55,99 , XNUMX euro / year.
Detto ciò, passiamo all'azione. Per scaricare Tenorshare UltData for Windows o Tenorshare UltData for macOS, go to the website of the program and click on your button Free Download.
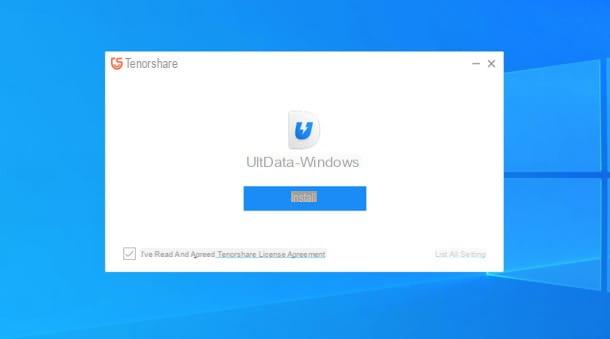
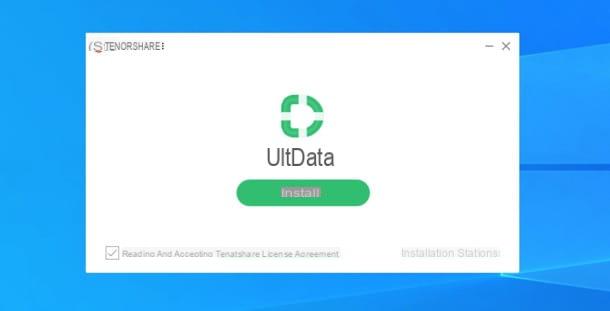
Next, a PC Windows, april il .exe file obtained and first click on Yes and then install, but will firstly download the tutorial and component if necessary to the software and the parrot installation on your PC. At the end, award your pulse Home, per avviare il programma. Se non vuoi inviare statistiche d'uso anonime, espandi la sezione Install Setting (in basso a destra) and togli la spunta dalla casella Agreed to participate in the customer experience improvement plan!.
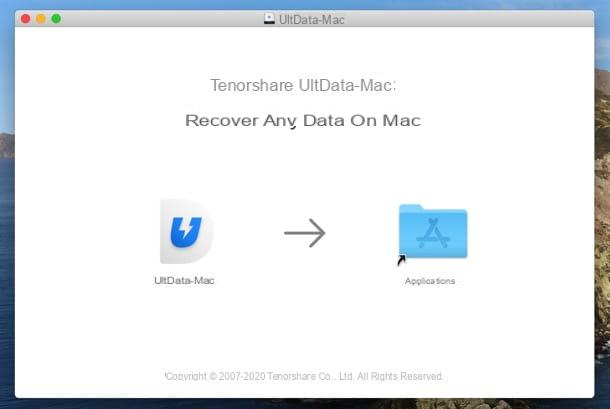
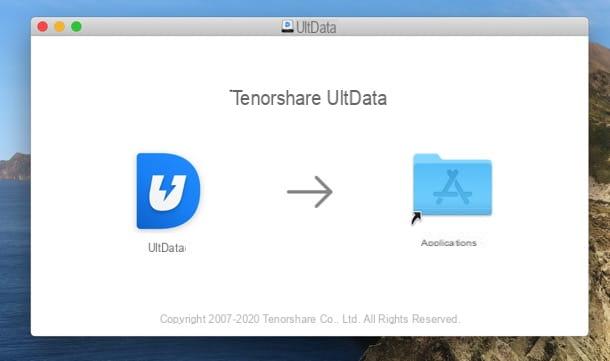
If you use a MacInstead, open the package .dmg che hai scaricato e trascina l'icona di Tenorshare UltData in the folder Applications from the computer: tutto qui! Dopodiché apri il software richiamando la sua icona and immettendo la administration password from the Mac.
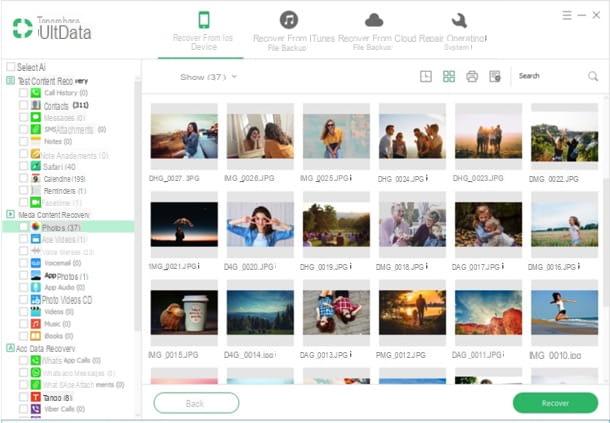
Adesso, but I will recover your photo (or maybe another file that has been canceled) from the internal disk of the computer or gives a sterile support (that is, a USB hard disk or a SD scheda), metti il segno di spunta accanto al nome dell'unità in cui si trovano i dati di tuo interesse e fai clic sul pulsado Scan (bottom right), to start scanning.
Alternatively, I will limit the scansione to a poster like desktop, the papers, the download for free or Trash can by selecting the icon ic si che trovano in basso.
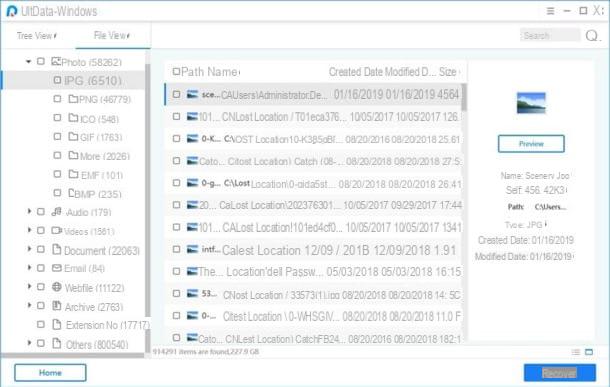
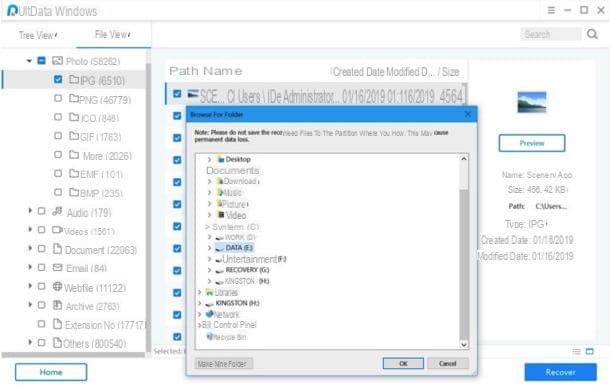
When you finish dell'analisi, use the button to check in high but will limit the ricerca to determinati tipi di file (es. Photo for the photo, Video for videos and so on), browse the cartelle che vedi nella barra laterale di sinistra e seleciona gli elementi da recuperare (di cui puoi visualizzare un'anteprima premendo sull'icona con i square collocata in basso a destra). Infine, premium pulsating Recover (in basso a destra), select the folder in which to save the recovered files and that's it.
Se la scansione non restituisce i risultati sperati, puoi provare con un'analisi più approfondita del disco, premendo sulla voce Didn't find the missing data? Try using Deep Scan che compare in basso, attending the fine della scansione e poi sfogliando i risultati ottenuti in base alla loro typology (nell'elenco di sinistra). For the recovery, it will always be necessary to select the file of your own interest and the first time you click on it Recover.
The Tenorshare UltData function is analogous to your Windows and your macOS, which is indicated to you by the data provided by the operating system.
Tuttavia, per agire sulle versioni più recenti di macOS (da macOS 10.13 High Sierra in poi), bisogna prima avviare il operating system in modalità di recupero (having first cmd + r in boot phase) and disattivare the SIP protection system, giving the command csrutil disable in terminal (accessibile proceeds il menu Utility, in high).
Dopo aver I use Tenorshare UltData, you consiglio di riattivare il SIP, riavviando il Mac in modalità di recupero e giving by command enable csrutil in the Terminal.
Tenorshare UltData for iOS (Windows / macOS)
You have lost files from your iPhonedal tuo iPad or give you iPod touch? Then I think you'd better try Tenorshare UltData for iOS: if you try other software, available for Windows than for macOS, thanks to the possibility of recovering the data from the iOS device and iPadOS in maniera molto semplice.
It supports all models of iPhone (from iPhone 4 onwards), iPad (including Air, mini and Pro) and iPod touch and all the most popular versions of iOS / iPadOS, allowing the recovery of photos and many other contents, such as messages and attachments, contacts, videos, Safari history, WhatsApp chats and attachments, Messenger chats and more. It also works in “desperate” situations, such as after jailbreak, update, factory reset etc.
Il programma si può scaricare e provare gratis, en una versione che permette di scoprire quali file risultano recorabili: per il ripristino vero e proprio dei dati è necessario acquistare una licence, which your Windows presents prezzi a partire da 49,95 euro / anno mentre your macOS gives 59,95 euro / year.
That said, to download Tenorshare UltData for iOS sul tuo computer, go to the website of the program and click on the button Free Download.
To its completeness, it was used Windows, april il .exe file obtained and first click on Yes and then Install, For the first time, download the tutorial and component if necessary to the correct functionality of the software and the parrot installed on your PC. At the end, award your pulse I will start, to launch the program.
Se non vuoi inviare statistiche d'uso anonime, espandi la sezione installation workstations (in basso a destra) and togli la spunta dalla casella Accetta di aderire to the program of experience utente!. Be the cousin avvio of the program compare la richiesta di download dei componenti Apple drive, attendi the procedure come portata to finish.
If you use a Macapri invece il package .dmg ottenuto, trascina l'icona di Tenorshare UltData in the folder Applications of the computer and avvia quest'ultimo, richiamando la sua icona and immettendo la administration password from the Mac.
Adesso devi scegliere comere recover i dati dal device iOS / iPadOS: I tried to recover i dati directly dal device, select the scheda Recover from iOS device, colleague il tuo iPhone / iPad / iPod touch to the computer through the cavo in dotazione and immetti il codice di sblocco of the device (Windows was used, assicurati di avere iTunes installato); it was made from the iTunes backup or the Finder salvati sul computer e vuoi estrapolare i dati da quelli, vai nella scheda Recover da File di backup iTunes and select the backup of your interest from the schermata che si apre, mentre se vuoi recorere i dati dai backup di iCloud, select la scheda Recover da File di backup iCloud, immetti credenziali you tuo account and poi se iliona il backup da cui attingere le informazioni.
Su Mac, the interface of Tenorshare UltData for iOS è a little different rispetto alla versione Windows and, to posto delle schede, with the sound of the pulsati per I will access the I recover data from iOS device, from iTunes backup and iCloud Backup.
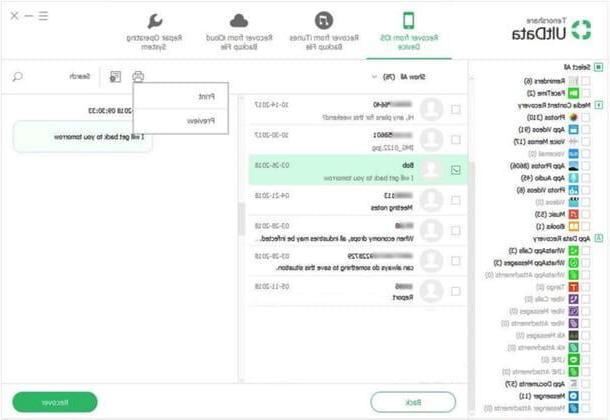
A volta selezionato il method di I recover the più congeniale, regardless of the operating system in use, spunta le caselle relative to i dati che intendi recover (es. Messaggi and Allegati, Contacts, reminder, Notes, Gallery, Video e Calendar) and click on your button Start Scan, to move forward.
At the end of the scansione, use the Lateral bar of sinistra per navigare tra le varie typologie di dati recuperabili, il top menu per filtrare tra file cancellati / esistiti, spunta le caselle relative ai file da recuperare, premi sul pulsado per avviarne il recovery (bottom right) and choose the folder to export them to. Easier than that?
In conclusion, you pointed out that Tenorshare UltData for iOS offered a function that included the operation of your iPhone, iPad and iPod touch in following the block to the Apple logo, the loop of the modality to recover schermo nero or the other problematic senza cancellare i dati. Per avvalertene, select l'opzione Riparazione operating system And his schermo followed him.
Wondershare Dr.Fone (Windows/macOS)
If you have accidentally deleted photos from your smartphone, I highly recommend you give it a try Wondershare dr.fone: a well known and reliable data recovery software, compatible with both Android (where it works even without root, albeit to a more limited extent) than with iPhone, able to I will recover photo, videos, audio files, messages, contacts, WhatsApp data and other data deleted from the devices in question. It is available for both Windows that for MacOS and it is very simple to use, in fact its user interface is extremely intuitive and it is fully translated into British.
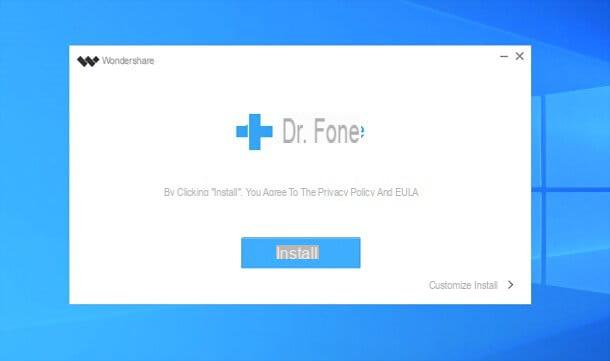
To download the trial version of Wondershare dr.fone, connect to the official website of the program and click on download button for Windows or macOS, depending on the operating system in use on your computer. Once the download is complete, if you use a PC Windows, april il .exe file obtained, click on the button install, wait for all the files necessary for the software to work to be downloaded from the Internet and press the button Start now to conclude the setup.
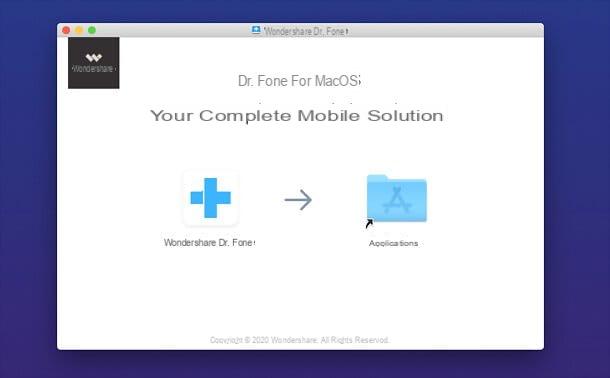
I invented a Mac, april il .dmg file downloaded, click on the button Accept and simply drag theWondershare Dr.Fone icon in the folder Applications say macOS.
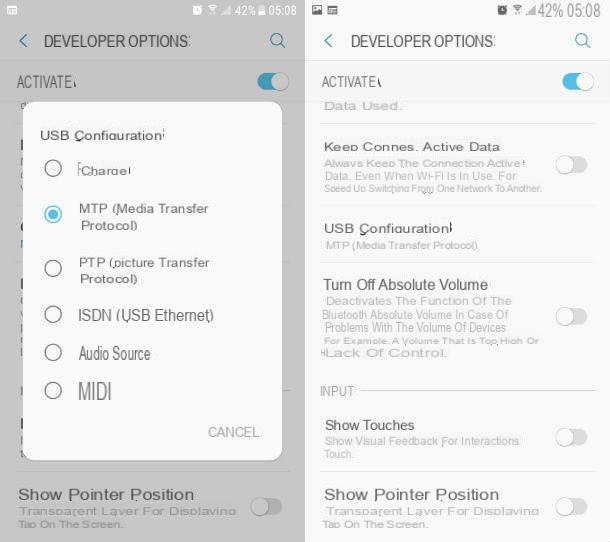
Now you just have to connect your smartphone to the computer, via cable, start Wondershare dr.fone, click on the button for the data recovery and wait a few seconds for the device to be recognized. If you use a iPhone, make sure your PC has iTunes installed (on Mac it is pre-installed; from macOS 10.15 Catalina onwards, however, it is not necessary as it has been replaced by the Finder). If you use a device Android, make sure instead of in the opzioni sviluppatore is activated USB debugging (as also shown on screen by dr.fone himself).
Afterwards, always if you use a terminal Android, accept the installation of Connector e Dr.fone on your smartphone (two apps necessary for Wondershare dr.fone to work properly), answer in the affirmative to the request for communication with the PC and, if you are rooted on your device, allow the relative permits.
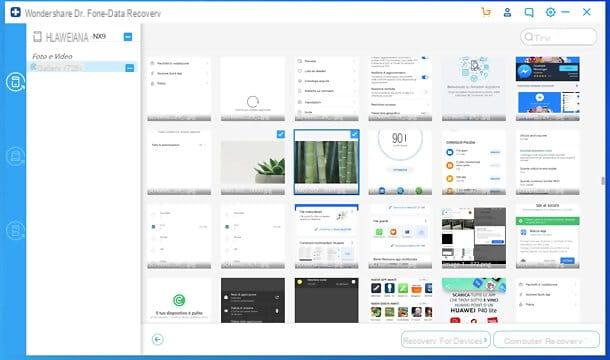
When the screen for choosing the data to recover appears, choose the tab for the Phone data recovery (the first in the left sidebar). Alternatively, I point out the possibility of running the data recovery from SD card, broken phone recovery and, in the case of the iPhone, the recovery from iTunes backups.
Then put the check mark next to the item Galleryclick on your button NEXT and wait a few seconds for the phone memory scan to complete. If you have a rooted device, check the box Scan for deleted, go ahead, grant i root permissions to dr.fone on your phone and wait for the device scan to complete.
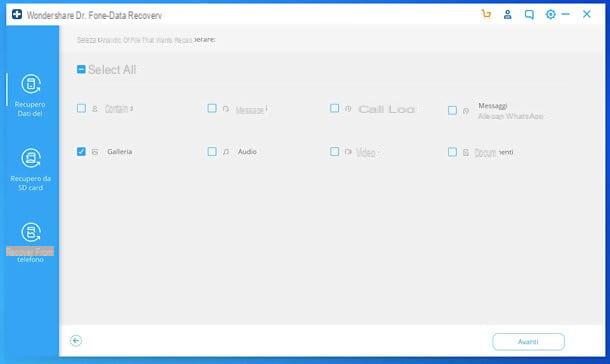
Per concludere, select thumbnails of the photos to be recovered, click on the button for recover data on the device or on that for recover data on your computer (depending on whether you want to save the recovered photos directly to your phone or computer), confirm and that's it.
I point out that the free version of Wondershare Dr.Fone allows you to view the recoverable data from the memory of your mobile device and recover some of them. To recover the deleted data without any limit, however, it is necessary to unlock the full version of the data recovery module, with prices starting from 39,99 euros. More info here.
PhotoRec (Windows / macOS / Linux)
PhotoRec is one of the best free data recovery software available. It allows you to recover photos, videos, documents and many other types of files from hard drives, flash drives, SD cards and other devices. It is quite easy to use and is compatible with all major computer operating systems: Windows, macOS and Linux. Its only drawback is that on macOS and Linux it comes without a graphical interface, so it must be used from the command line.
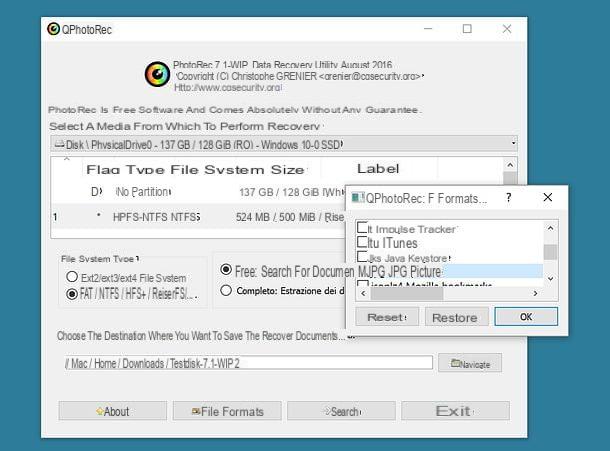
Ciò detto, per scaricare PhotoRec sul tuo PC non devi far altro che collegarti to the website of the program e cliccare sulla voce relative to the operating system in utilizzo his last. (io per il tutorial userò Windows). A download complete, apri il zip package che contains PhotoRec, estraine il contenuto in a cartella qualsiasi e avvia l'eseguibile qphotorec_win.exe. In the package you will also find TestDisk: another free application that allows you to recover lost partitions and restore disks that no longer start, but for the moment you don't care!
At this point, click on the button Yes, use the drop-down menu I will select a supporto dal quale eseguire l'operazione di recupero per scegliere l'unità relating to the device of which I intend to recover your photo and scegli the main partition of the device (che dovrebbe essere quella denominata FAT32, NTFS o exFAT).
Successfully, I apponi il segno di spunta accanto alle voci FAT / NTFS / HFS + / ReiferFS e Free, presses the button You may also like... and scegli the cartella in cui salvare le foto recuperate da PhotoRec. Superato anche questo step, pigia sul pulsating File formati, Then Reset (nella finestra che si apre) and select the file type trovare with PhotoRec. To recover the immagini JPG and PNG, select jpg JPG picture e png Portable / JPEG / Multiple Image Network Graphics.
Finally, click the buttons OK e Search, wait a few minutes for the scan to be completed and you will find all the photos recovered by PhotoRec in the folder you have chosen via the "Browse" button.
Recuva (Windows)
Recuva is one of the best data recovery software available for free on Windows. It allows you to recover any type of file from hard drives, USB sticks, SD cards and other storage units. To download it to your PC, connect to its official website and click on the button first free Download (below) and then up Download.
A download completo, apri il file rcsetupxx.exe, click here Yes and it carries to the end the process of the installation of Recuva selecting theBritish give the menu for the scelta della lingua (in alto a destra) and piggy sui pulsati Install e Launch Recuva.
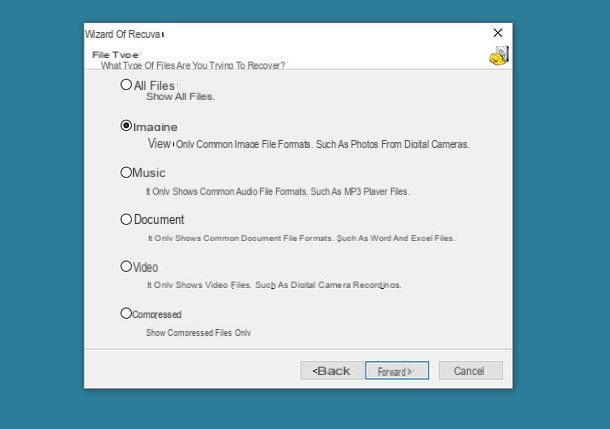
At this point you do not subtract any further, so I will follow the Guidata di Recuva procedure. Clicca dunque sul pulsating NEXT, scegli l'opzione per recuperere le Images, select the unit where you will recover the photo cancel and click on your NEXT and then starts per avviare the scansione of the device.
A scansione ultimata, metti il segno di spunta accanto alle foto da recuperare, clicca sul pulsat Recover I scegli the cartella in cui esportarle. Le immagini che non hanno delle anteprime visibili non sono recorabili perché danneggiate.
App to restore deleted photos from smartphones and tablets
For the first reason (the socrascrittura dei dati sul disco), I tend to recommend that you use the application to cancel your smartphone and tablet. In line with the mass and colleges of the phone or tablet on the computer and on the Internet, I am sure that it is not a reason to use the PC, but it is not the case of the app that has recovered and has been directly canceled by the device.
If you have a smartphone or a tablet AndroidYou have vowed to provide the DiskDigger that it is completely free (at least because it governs the photo JPG e PNG, but I will recover the tipi of the file bisogna acquistare a versione to payment of the app that costs 3,37 euro) and nei miei test if è rivelata molto efficace. It works with the internal memory with the SD schede, but it will be necessary for me root (leggi mia guida su come effettuare il root su Android se non sai di cosa sto parlando).
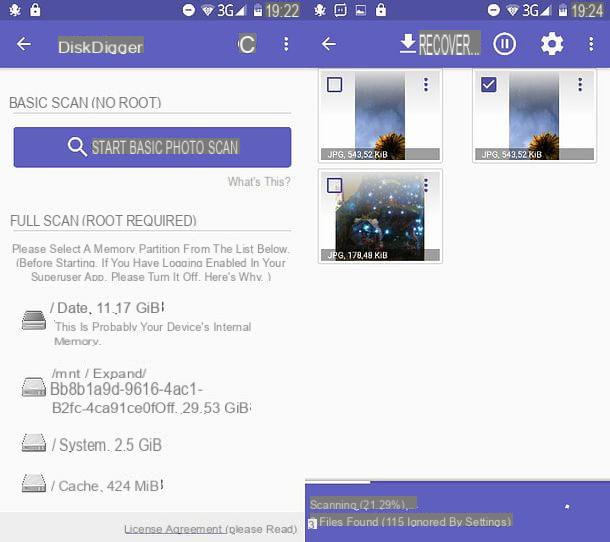
Root to part, il funzionamento della app è di a semplicità disarmante: dopo averla installata sul tuo device, non devi far altro che grant him i permessi di root (piggyndo sul pulsating Conceded che compared to the center of the schermo), rifiutare il passaggio alla versione a pagomento (pigging his No, thanks) and select the voice related to the memory of the scansionare (dovrebbe essere quella in grassetto, es. date ).
At this point, metti il segno di spunta accanto alle voci JPG e PNG (I will recover anche gli screenshot and the immagini delle app oltre che le foto scattate with the device) and pigia sul pulsado OK per avviare the scansione of the device. Ad operazione completata, metti il segno di spunta accanto alle miniature delle foto da recuperare, pigia sul pulsating Recovery che si trova in alto e scegli l'icona della folder per esportare the immagini in a cartella di tua scelta oppure l'icona della nuvola per caricarle its a cloud service.
Qualora DiskDigger non dovesse soddisfare appieno le tue necessità, puoi provare Undeleter che è anch'essa free and works in mode abbastanza simile.
Anche Undeleter is exclusively available for Android. Purtroppo per iPhone e iPad non esistono soluzioni simili. If you have received a photo cancel on an iOS device, try using EaseUS MobiSaver or backup iCloud as spiegato in precedenza.
Article made in collaboration with Cleverfiles, EaseUS, Tenorshare and Wondershare.
Come ripristinare photo cancellate