iCloud Drive is an online storage service that allows you to store various multimedia data in your possession, ranging from simple photos, through audio files and ending with videos made using Apple devices. This allows you to not consume the memory of the Mac by storing photos on iCloud.
But how to store photos on iCloud?
To do this, there are several methods, more or less simple, depending on the user's needs.
The first useful way to store photos on iCloud is also the simplest one. Specifically, you can use the default "photo streaming" service present on Apple devices. The service platform "photo streaming”Can store approximately 1000 photographs at a time for a maximum period of 30 days.
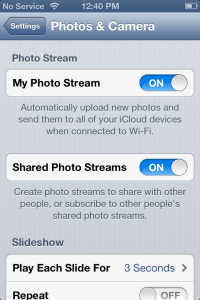
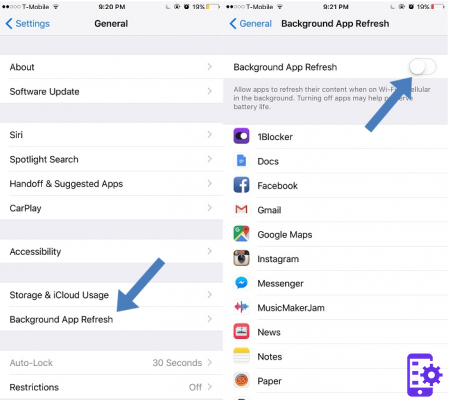
The application automatically syncs uploaded images with all Apple devices linked to your Apple ID. To activate the service you need to access the “iOS Settings” section, first select the “iCloud” item and then “Photos”. So you just have to move the lever to "ON" and the service will be active.
From the version of iOS 8.1, Apple has introduced the "Library" function, the only difference from the "photo streaming" version is that it is unlimited in terms of the number of content that can be uploaded online. The Library uses the storage space on iCloud Drive and therefore requires a monthly subscription to iCloud. As with its previous version, the Library syncs with multimedia content on the user's devices. To activate the Library, go to the “iOS Setup” section, select “iClouder”, “Archive”, “Change storage plan”, then “Settings”, “iCloud” and “Photos”. Once this is finished, you need to put the lever on the “ON” item and thus activate the Library. Once activated, you will be able to see your multimedia files also from another browser by accessing the iCloud site.
As a third option to store photos on iCloud you can use the function of sharing files on iOS. This feature is completely free and does not require a monthly subscription for iCloud storage usage. To take advantage of this option, you need to start the “Photos” program of your device, select the “Shared” tab and click on the “+” button. Done? Now you need to assign a name to the album, click on “Next”, choose the users to share it with and click on “Create”. At the end just choose the album created, click again on the "+" button and select the multimedia files to add to the album. To make the album public on the web, you will need to change the privacy options. To do this you have to choose the “Shared” tab in the photo application. To finish the procedure, simply select "People" and put the lever on "ON" near the "Public website" option.
32