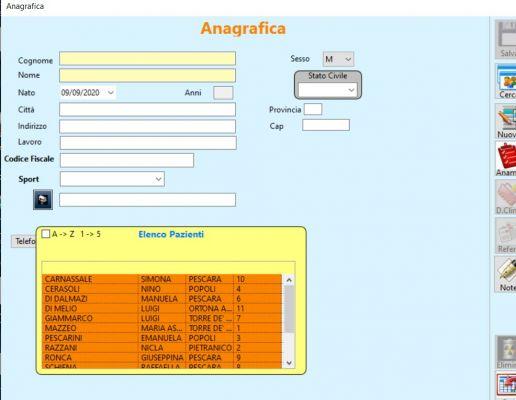
We continue to improve our “Personal Expenses” application, so we now use ListBox's ability to display data hierarchically (ie with various levels of indentation).
This will now allow us to show in the ListBox all the expenses grouped in each of the categories to which they belong, with the possibility of expanding or collapsing each of the categories of the list as desired.
Therefore, we will gain organization when it comes to showing the user the different items corresponding to each of the expense categories.
In fact, ListBox is one of the most powerful and flexible UI controls you can find in the Xojo IDE library. If you take a look at the documentation on this component (https://docs.xojo.com/ListBox), you will realize to what extent you can customize the behavior of the list, both from a graphical point of view (remember from previous chapters that Graphics is the class that gives us everything we need to "paint" our user interface), in addition to behavior.
During the course we have already seen some of its capabilities, such as that corresponding to sorting the data in each of the columns, as well as how we can add data to the different columns of a new row, access a specific data, etc.
Well, in this chapter we will focus on other methods available in the ListBox, these are the ones that allow us to indicate to the ListBox that we want to add a new row of data with the "expandable" behavior via the AddExpandableRow method (https: //docs.xojo .com / ListBox.AddExpandableRow).
Doing so also gives us the ability to add ExpandRow (https://docs.xojo.com/ListBox.ExpandRow) and CollapseRow (https://docs.xojo.com/ListBox.CollapseRow) event handlers.
These are the events that will be triggered in the control each time the user clicks on the arrow widget (graphic element) associated with each of the expandable rows on which you can act.
Given that, for example, in ExpandRow we receive as a parameter the number of the row we want to display, this will be the one we will use to fill in (and therefore make visible) the rest of the rows (or items) corresponding to the expenses of the category that we have just finished. deploy.
Another interesting method of ListBox, when using hierarchical lists, is RowDepthAt (https://docs.xojo.com/ListBox.RowDepthAt).
This will allow us to know the value of the indentation, or "depth" in the hierarchy of the list, corresponding to the line number we pass as an argument. So, for example, a top-level row will return the value zero (0), while if the row hangs directly from a higher level of the hierarchy it will return the value one (1), and so on as you go deeper into the hierarchy of a root or top-level row.
Perhaps at this moment it seems more complex than it really is; but I'm sure that when you see the tutorial, and put it into practice, you will realize that this is not the case.
You will soon start using hierarchical lists in your projects!
Also, importantly, it is not necessary to limit yourself to using drop-down rows only at the first level of the hierarchy, but you can embed drop-down rows within the hierarchy of any other item that is also drop-down.
A good example of this type of behavior in action, which I recommend you take a look at, is the one you can find in the "FileBrowser" sample project included in the Sample Projects> Desktop> Controls> ListBox folder.
-
Javier Rodriguez
- Xojo engineer
- Twitter: @xojoes
- Facebook: http://facebook.com/xojoes/
- Download the latest version from www.xojo.com
- Xojo Resources in Spanish: https://docs.xojo.com/spanish