Are you looking for a way to "lighten" the images to upload to your blog? Do you want to make some disk space by compressing the photos you have uploaded to your PC? How do you say? Not very familiar with the PC and afraid of not being able to complete such a feat? If you answered yes to these questions, you can count yourself lucky: you've come to the right place at the right time!
In the next paragraphs, in fact, I will explain to you how to compress photos through some ad hoc programs and some free online services. And if you intend to act directly from your mobile devices, you will find the list of apps in the last part of the tutorial very useful. You will see, even if you have little or no familiarity with technology, you will have no problem reducing the weight of your photos, I promise!
Now, no more chatter and let's get straight to the point. Are you ready to get started? Yup? Perfect! Make yourself comfortable, identify the solutions that can be right for you and then proceed to compress the photos by carefully following my "tips". I just have to wish you good reading and, above all, good work!
Compress photos on Windows
You use a PC Windows and you want to know how to compress photos on the latter? Take a look at the solutions listed below, use the ones that seem best suited to your needs and you will see that you will not regret it!
IrfanView
One of the first solutions that I invite you to consider to compress photos on Windows is IrfanView: a very famous image viewer that integrates numerous functions that are also useful for converting various types of files, even in batches (thus acting on entire blocks of files).
Before discovering how IrfanView works, you need to download the program on your PC: then connect to its official website, click on the button Download located under the heading 32-bit o 64-bit (depending on the version of Windows in use on your PC) and, on the page that opens, click on the button Download Now. When the download is complete, open the file .exe just downloaded and complete the installation procedure by clicking on the button first Yes, Then NEXT for four consecutive times and finally on Done.
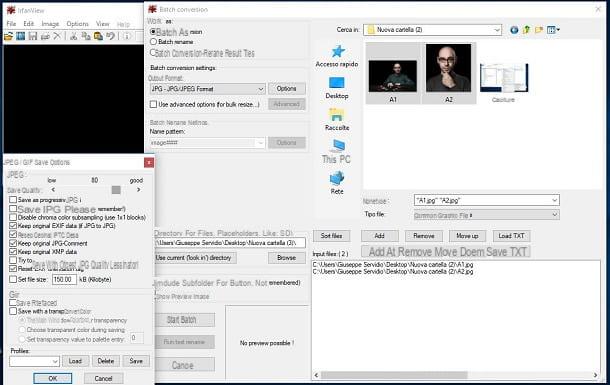
After installing and starting IrfanView on your PC, click on the item Batch Conversion / Rename from the menu Fillet and, in the window that opens, put the check mark next to the item Batch Conversion (actually it should already be checked), select the format in which to export the photo from the drop-down menu Output format and click your bottone Options to adjust the image compression parameters.
In the box that appears on the screen, you will have to carefully choose the image compression rate. I advise you never to go below the value 80 (set by default) to avoid lowering the visual quality of the photos too much.
As soon as you have finished setting the conversion values of the photos, click on the button OK, drag the photos you want to compress in the box at the bottom right of the IrfanView window, select the folder to export the output files by clicking on the button KATEGORIEN and start saving files by clicking the button Start Batch. Più facile di così ?!
Cesium
Another solution you can consider is Cesium: it is a free and open source image compression software that can also be used for commercial purposes. It supports all major graphic file formats (JPG, PNG and BMP), is very intuitive and is also available in a portable version that can be run from any hard drive or USB stick without going through tedious installation procedures.
The developers promise a degree of image compression of up to 90% but, effectively, unless you decide to degrade the quality of the photos more than necessary, it is difficult to exceed 60–70% (which is still an excellent result. ).
To download Cesium on your PC, connected to its official website, click on the link Downloads located at the top, click on the purple button Download placed in correspondence with the item Portable and, on the page that opens, click on the link Download Caesium Image Compressor Portable.
When the download is complete, open the archive caesium-xxx-port.zip, extract its contents to any folder and start the program Cesium.exe. Then click on the button Add present in the window that opens (bottom left) and select all the photos you want to compress.
At this point, set the level of quality that you want to keep in the output images using the adjustment bar located at the bottom left (I do not recommend going below the80% if you do not want to degrade the visual quality of the photos); choose from the drop-down menu Size the type of file you want to obtain after compression (you can opt for a conversion to JPG, PNG, BMP or leave the same file format as input) and click on the button (...) located on the right to choose the folder in which to save the compressed images.
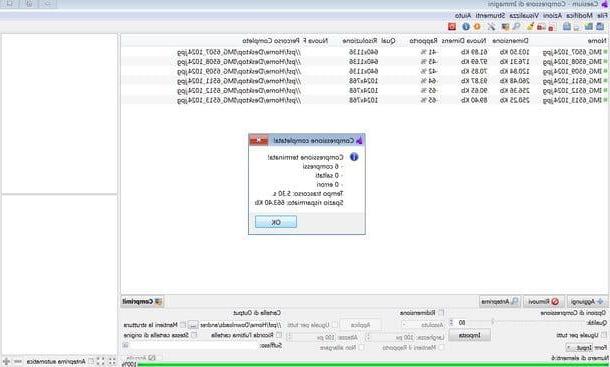
Per finire, click on your button Compress! and wait for all files to be processed (usually the compression process takes a few seconds). At the end of the operation, Cesium will indicate the degree of compression of each image. Not bad, right?
Compress photos on macOS

Possiedi a Mac and you would love to know how to compress photos on macOS? No problem. Also in this case you can resort to various free solutions that will certainly be useful to you.
Preview
One of the first solutions that I invite you to consider to try to reduce the weight of your photos is to contact Preview, the program included “standard” on macOS that allows you to view images and make countless changes to them quickly and easily.
To compress a photo with Preview, you must first open the photo you intend to act on by double clicking on it. If you have changed some macOS settings and Preview is not the default player, right click on the photo and then click on the items Open with> Preview on the menu if you press.
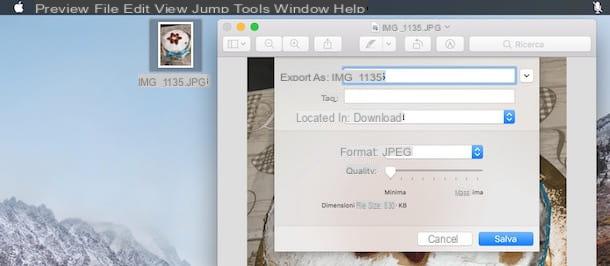
As soon as you have opened the photo you want to compress, click on the entry Export ... from the menu Fillet and select the format in which you want to export the photo to reduce its weight using the drop-down menu located next to the item Size. Then move the cursor on the adjustment bar located next to the item Quality to reduce the weight of the photo: by moving the slider towards the wording Minima, you will minimize the weight of the photo.
You will then be able to view the calculation relating to the weight of the same in correspondence with the wording File size. As soon as you are satisfied with the result, indicate the position in which you intend to export the photo by clicking on the drop-down menu located next to the item located in and finally click on the button Save.
If you want to compress multiple images at the same time using Preview, turn on the display of the miniature by selecting the appropriate item from the menu Vista which is located at the top. Then drag all the images to be compressed into the bar that appears on the side, select them using the mouse or the combination of keys cmd + a and select the item Export selected images from the menu Fillet (up).
Nella finestra che si apre, fai clic sul pulsado options, set the parameters of the output images as I explained before, select the folder in which to export the files and press the button Choose but I will complete the procedure.
ImageOptim
Do you want to compress photos using third-party solutions? If so, I suggest you turn to ImageOptim: a completely free, open source program that supports JPG, PNG and GIF files.
To download ImageOptim on your computer, connect to the program's website and click on the green button Download for Free located in the center of the screen. Once the download is complete, extract the contents of the archive to any folder ImageOptim.tbz2 and drag the software icon to the folder Applications of macOS. Then right click on the program icon and select the item apri from the menu that appears (this procedure must be done only at the first start of ImageOptim to "bypass" the restrictions that Apple applies to programs from non-certified developers).
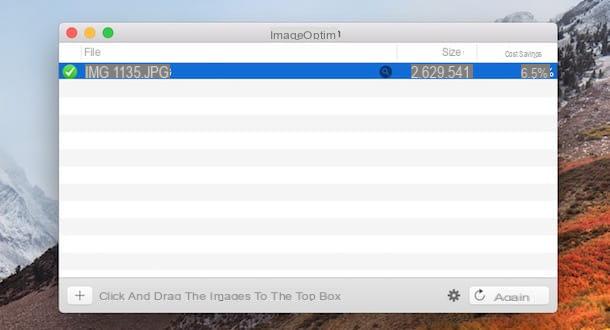
After starting ImageOptim, drag the photos you want to work on in the software window and wait a few seconds for the process to be completed. As soon as the compression procedure is completed, the original photos will be overwritten and the percentage of compression applied to them will be shown in the column Savings. If you want to further compress the uploaded photos, select them and then click the button More until you are satisfied with the result.
Caution: ImageOptim overwrites the original images, it is advisable to make a backup copy of them before feeding them to the software.
Compress photos online
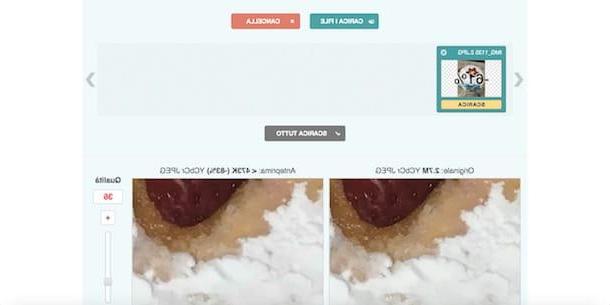
want compress photos online? There are numerous free Web services that allow you to reduce the weight of images directly from the browser, without downloading other programs on your PC. One of the best on the square is Optimizilla, a completely free service that offers several advantages: it allows you to easily compress both JPG and PNG files, offers the possibility of working up to 20 elements at the same time and also allows you to adjust the output quality of each uploaded photo.
To compress photos with Optimizilla, connected to its home page, click on the button Upload files and select the images you want to act on or, if you prefer, drag them to the box where the wording is present Drop your files here.
As soon as you have uploaded the photos you want to compress, the compression procedure will start automatically. Once finished, you will be shown the percentage of compression that was applied by the service. You can download the files to your computer by clicking on the yellow button Download located below the preview of each photo or, alternatively, by clicking on the gray button Download everything (in this case a ZIP archive will be downloaded).
Before proceeding to download the compressed photos, you can customize the quality of the photos using the slider located next to the wording Quality (it's located at the bottom right) and preview what the final result will be. As soon as you are satisfied with the work done, click on the button OK to complete the procedure and download the compressed files.
App to compress photos
You want to compress photos directly from your device Android o iOS? If so, you can turn to some app to compress photos, such as those listed below. They are all free (at least as far as their basic functions are concerned) and easy to use: seeing is believing!
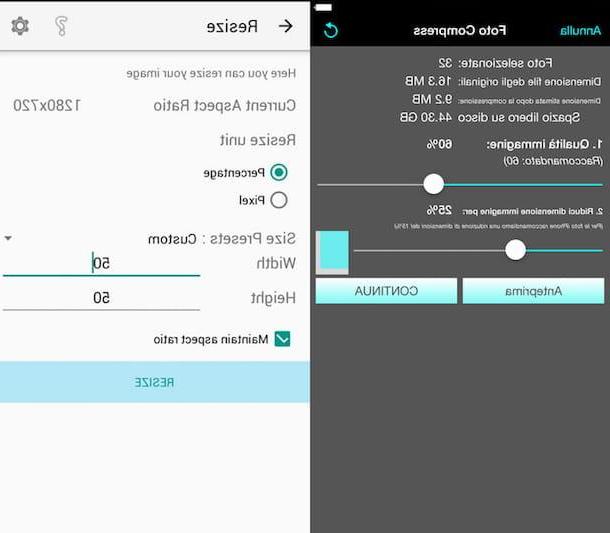
- Photo Compress 2.0 (Android) - this is an application that allows you to resize and compress photos without losing much quality. It is completely free.
- Photoczip – compress resize (Android) - this app offers the ability to easily compress photos in JPG and PNG format and then easily share them via email, cloud storage services or via social media. Photoczip is also completely free.
- Photo Compress (iOS) - is an application that allows you to compress single photos, multiple photos and even entire albums. The free version of Foto Compress allows you to reduce up to a maximum of 50 images; to break down this limit it is necessary to purchase the full version of the app, which costs 5,49 euros.