Whenever someone tries to take a picture of you, do you run away because you're afraid you're not very photogenic? I must admit that I understand you a little, but we mustn't get down! Everyone, absolutely everyone, can look good in photos: just pay attention to some simple details when taking the shot and, after the photo has been taken, use some apps that allow you to improve the appearance of digital images.
What are the applications I am referring to? I'll tell you shortly, but first let's try to understand how to look good in photos adopting the right strategies and tools. I assure you that once you understand some simple key concepts you will solve most of your photogenic problems, making your “fear” of the lens disappear, I hope forever.
So, what do you think? Are you ready to get started? If your answer is affirmative, make yourself comfortable, carefully read the "tips" I am about to give you and try to put them all into practice. I am sure that you will gradually overcome all your fears and will very gladly accept to participate in group selfies with your friends. Happy reading and have fun!
- Fix the photo on smartphone / tablet
- Fix the photo on the computer
Before taking the picture
The beauty of a photo very often depends on whether or not you pay attention to some factors: the right lighting, the right clothing, the choice of camera, etc. Not paying attention to the factors in question means starting on the wrong foot and doing so can seriously compromise the beauty of the final shot. If you want to avoid all this, read carefully the tips below and put them into practice.
Choose the right lighting
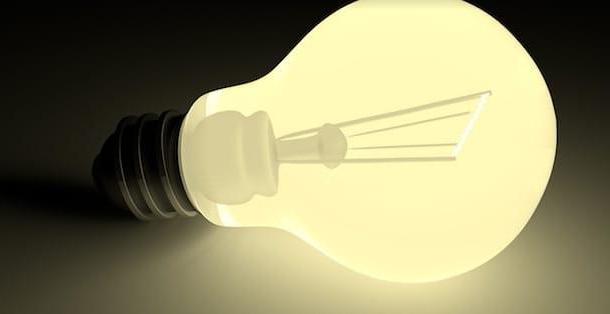
One of the main factors to take into consideration before taking a photo is to find theright lighting. Without adequate lighting, it will be useless to follow all the other advice I will give you in the following paragraphs.
Lighting is the foundation of a good photo, so choose a place that is bright enough to take good quality photos. If you take a photo in a dimly lit place, your shots will not benefit and you will not be at all satisfied with the final result. However, be careful not to choose a spot that is too bright. In this case the photo could be "burned" or, even worse, it could highlight all the imperfections of your skin: wrinkles, blackheads, etc. You don't want that to happen, do you?
If you are in an outdoor environment, try not to take the photo in too bright locations: avoid direct sunlight, position yourself so that the light evenly covers your face and body and do not take photos with one too bright background (especially if you have the sun or another particularly intense light source behind you).
If you are indoors, on the other hand, use the lamps, the flash (if your camera or smartphone has one) and the windows to illuminate the room where the photos will be taken as much as possible.
If you need to take pictures in low light conditions, adjust the ISO value of your camera (in the following chapters of this tutorial I will explain better what it is) and to slightly increase the exposure times.
Choose the right clothing
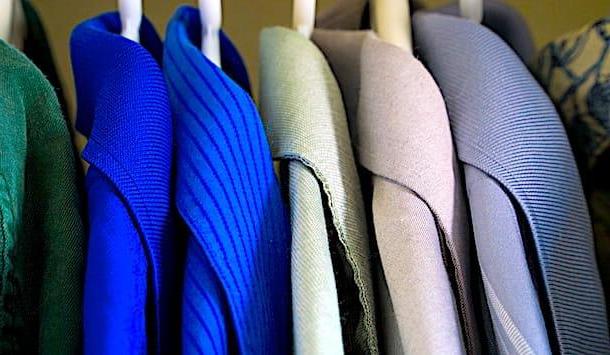
It will also be true that the dress does not make the monk, but for look good in photos you have to choose theright clothing. Therefore, before you take a picture, do not put on the first thing that happens to you ... choose your clothes carefully and you will see that thanks to this little trick you can show off shots of excellent quality.
When choosing clothing you have to take into account several factors. For example, don't choose a garment just because it is trendy: try to understand if it actually enhances your features or if, instead, it makes you look not very photogenic. If you have a few pounds too much, go for dark clothes, they will make you look slimmer and help make your shots more uniform. If, on the other hand, you are particularly thin, avoid wearing clothes that are too loose: they will make you look slimmer than you already are. Choose clothes in light and bright colors and, above all, the right size!
Once you've chosen a particular garment, go to the mirror and see if there is something to improve on your appearance. And, why not, also ask a friend or trusted friend for advice. As they say… four eyes see better than two! In any case, choose the clothing you like: it is important that you feel comfortable when your photo is taken!
Choose the right device
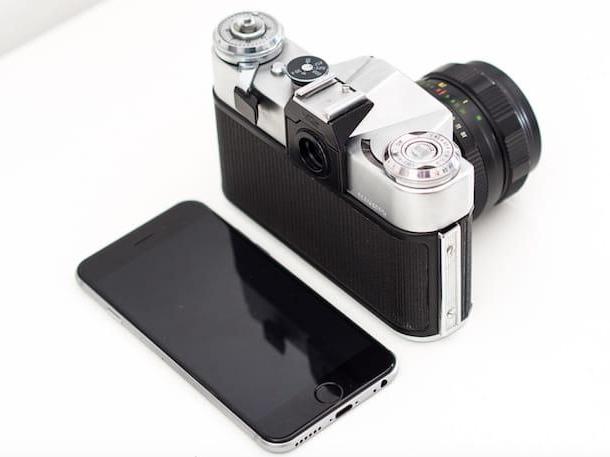
Of course you can't expect to look good if you don't use one camera or one smartphone that is able to guarantee a certain photographic quality. Therefore, before experimenting with the advice I gave you in the previous paragraphs, make sure that the device you use to take pictures is equipped with the right features.
For example, if you are going to use a camera to take pictures, make sure you choose the right camera. There are several types on the market, including.
- Compact cameras — they are particularly handy and transportable machines, as well as economical, but they do not offer a particularly high shooting quality.
- mirrorless - these cameras allow you to take excellent quality photos, especially the high-end models, without sacrificing portability. Some models are even superior to the much vaunted Reflex.
- reflex - are the cameras that professionals in the sector prefer to use. The quality offered by the DSLRs is truly superb, but to buy such a machine you have to put your hand to your wallet and you have to give up the portability guaranteed by mirrorless and compact cameras.
If you do not have the faintest idea which camera is right for you, read the guide I have prepared in this regard: in this way you will know which camera to buy and how to choose the model that best suits your needs.
When choosing a camera, be it a DSLR, a mirrorless, a compact or even the camera integrated in a smartphone, various technical parameters must be taken into consideration. Below I show you the most important ones.
- Megapixel (MP) - this is the number of pixels (expressed in millions) that make up the images generated by the camera. The higher this value, the "bigger" the photos you can get, but bigger doesn't mean better quality! Not necessarily having a sensor with many megapixels is equivalent to obtaining good quality shots. There are, in fact, other characteristics that must be taken into consideration, one above all the size of the sensor.
- Sensor - is one of the key components of a camera, i.e. a chip that transforms the image captured by the lens into digital format. There are various types and different sizes: Full Frame (which measures 24 x 36mm and is equivalent to 35mm film format), APS-C (which measures 23 x 15 mm and has a conversion ratio of 1.5: 1 or 1.6: 1) e Four thirds (which measure 17 x 13 mm and have a conversion ratio of 2: 1). The larger the sensor, the more light the camera is able to capture, so the higher the quality of the shots you can get.
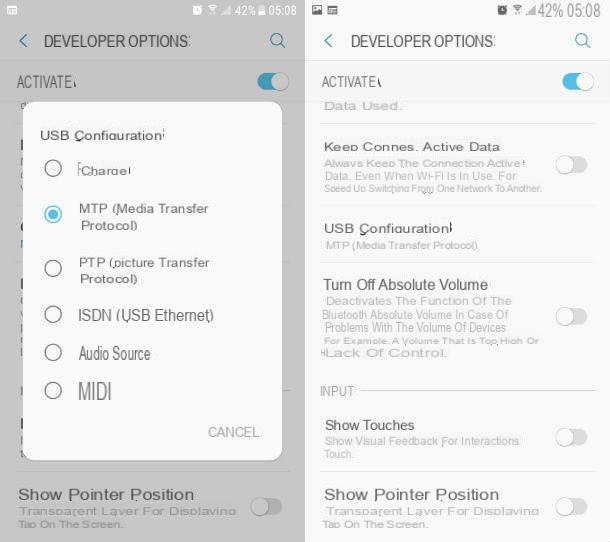
- ISO sensitivity - it is a value that indicates the “brightness” level of the sensor, or better, the degree of amplification of the electrical signal sent to the cells. Raising this value (which many cameras and smartphone apps allow you to manually adjust) you can get clear photos even in low light conditions. But be careful, increasing the ISO value too much (generally over 400) you seriously risk seeing noise appear in the image. To adjust the ISO sensitivity on your smartphone you can use the manual adjustments of the camera app or third-party applications such as Camera FV-5 (Android) or ProCam (iOS).
- Maximum aperture of the diaphragm - this value indicates the amount of light that passes through the lens and is measured in F-stop (e.g. f / 1,5 or f / 2,5). The lower the value expressed in F-stops, the more light enters, therefore the clearer the shots obtained.
If you have not already done so, read my in-depth analysis on which camera to buy, as it contains a comprehensive explanation thanks to which you will be able to better understand what characteristics your camera must have to take pictures of a certain quality.
If, on the other hand, you prefer to use your smartphone to take pictures, make sure it has the right features thanks to which you can look good in photos. Also in this case what has been said for cameras applies: the quantity of megapixels, the size of the sensor, etc. are the values you need to look at to understand if your device is capable of taking good quality photos or not.
If you've just noticed that you don't take a good picture because your smartphone is the “culprit”, you may be tempted to buy a new one, especially if the device you currently have is starting to feel the weight of age. If you need some "tips" before buying your new smartphone, consult my buying guide dedicated to the best smartphones of the moment.
While shooting
Now the time has finally come to "go on stage"! After putting the preliminary operations above into practice, be careful when you take the shot and try to follow these other tips I'm about to give you.
Choose the right pose
look good in photos it is critically important to choose one right pose. First of all, relax, avoid stiffening your limbs or assuming an unnatural body position. For example, you might bend your arms and fingers slightly, and flex your legs as well.
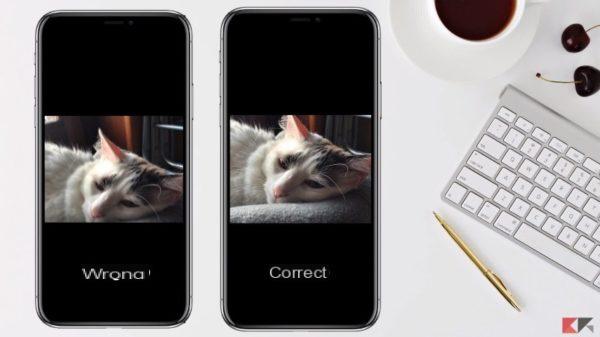
Another trick you should pay attention to when taking the photo is to avoid frontal photos. Unless you're taking a passport photo for ID, avoid front-facing photos as they will make you look unnatural and won't stand out your physique. Therefore, turn your torso slightly in front of the lens - you will look a little thinner and the photo will look more spontaneous. Also try rotating your face not looking straight into the lens. Obviously I'm not telling you that you have to turn your head somewhere else, just that you have to slightly rotate your head: this will help create nice contrasts of light and shadow and, in addition, will slim your face.
Another piece of advice that I hope will come in handy is to bring your forehead slightly forward. This operation will stretch the neck, cheeks and emphasize the jaw so that you have a more refined look in the photo, both front and slightly in profile (for photos totally in profile, however, the forehead should not be worn in forward or you risk having a completely unnatural appearance).
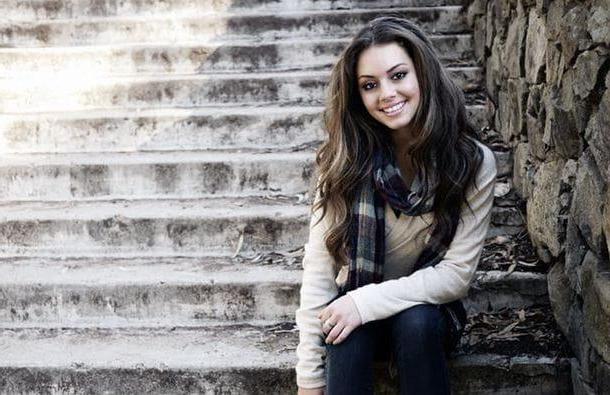
You smile
Do you want to take good in photos? You smile! It may seem like a trivial piece of advice, but smiling is the best way to enhance your features and to look more attractive. It should be noted, however, that there is a way and a way to smile. Here are some practical tips you should pay attention to when taking a photo:
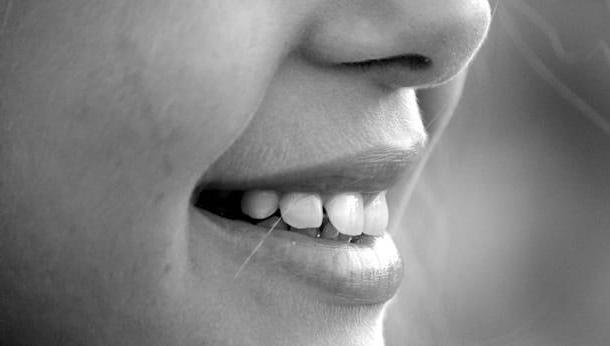
- Avoid smiling with your mouth closed, it could look too serious, especially if those who smile around you are showing their teeth.
- While smiling, slightly uncover the upper arch of your teeth: doing this will make your smile brighter.
- Smile naturally by engaging all the muscles of your face.
- Squint your eyes - you will make your smile more natural.
To avoid making your smile seem unnatural, think of something that arouses feelings of joy in you and without a shadow of a doubt you will be able to implement all the tips I have just indicated.
Other precautions
In addition to the aforementioned tips, I also recommend that you pay attention to other details that will help make you more photogenic:
- Make sure it background of your photo stands out your body: avoid, for example, to be photographed while you have particularly decorated walls behind you with too many details.
- Take aunty photo: Doing this will allow you to choose which shot is best.
- If you want to take a photo outdoors, avoid times of the day when sunlight is particularly intense. Better take pictures shortly after sunset or shortly after sunrise.
- Study and get informed! If you really want to look good in photos and take quality shots, take a lot of free time and do a full immersion among manuals, tutorials on YouTube and other tips that can help you improve the photos you take and / or that you do.
After taking the photo

After taking a photo, you can do a lot to improve it and correct any small or large flaws in it. For example, you can use some app to apply various filters and corrections which will make your photo even more beautiful. Which? I'll tell you right away.
Fix the photo from your smartphone / tablet
If you want to edit an image on the fly, the best solution is to install an app that allows you to do this directly from your smartphone or tablet. There are many, both free and paid. Below I recommend some of the best.
Snapseed (Android / iOS)
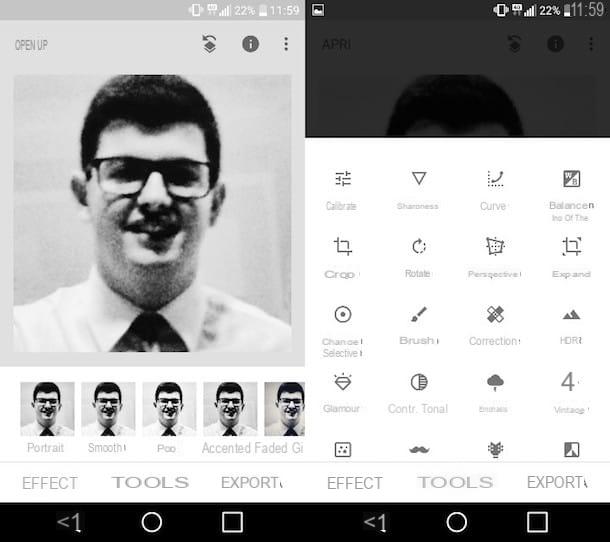
One of the best apps for correcting your shots is Snapseed: it is an application made by Google that can be downloaded for free on Android and iOS devices and can be used to correct many of the defects in the photos, since it allows you to use numerous tools and effects suitable for every need.
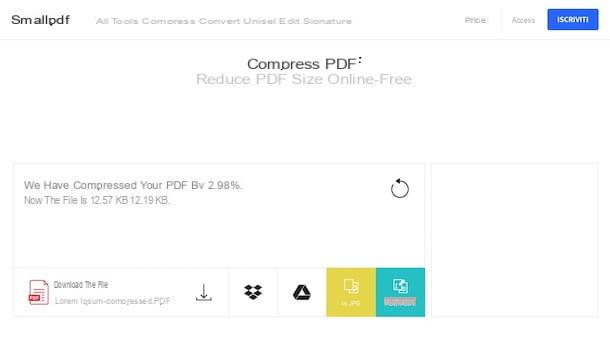
After installing Snapseed on your device, start the app, press the button apri (top left) and select from the gallery of your device the image you want to modify to insert it in your spreadsheet. Therefore, he presses on his voice Effects to apply one of the many filters available, or tap on the item Instruments to manually act on the image parameters using one of the many tools included in Snapseed: Calibra, to calibrate the brightness, contrast and all the other main parameters of the photo you are retouching; Sharpness / Details, to change its sharpness; Cut out, to cut it out; Wheel, to rotate or overturn it; Prospective, to change its perspective, etc.
Every time you make a change, remember to save it by pressing on checkmark located at the bottom right. When finished, then tap on the item Export and choose one of the available save or share options.
Autodesk Pixlr (Android/iOS/Windows)
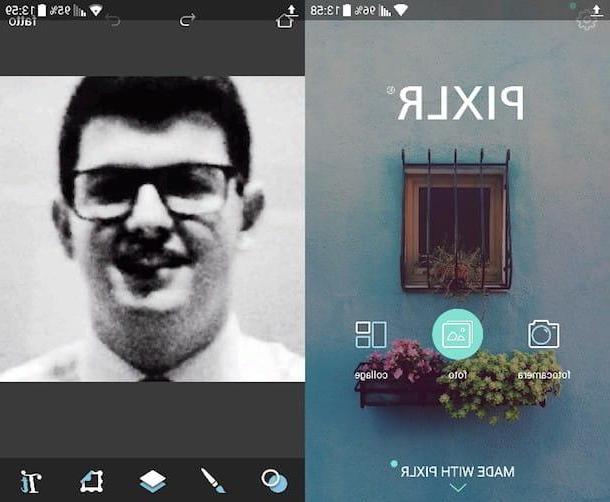
A good alternative to SnapSeed is Autodesk Pixlr, an app available for Android, iOS and Windows Phone that provides users with numerous tools including filters, brushes and frames.
After completing the Pixlr download on your device, start the app, press the option Gallery and select the image to edit from the gallery of your device. Subsequently, to access the editing tools included in the application, press the icon with the two circles which is located at the bottom and tap on one of the tools available in the menu that opens (eg. cuts, wheel, double exposure, Etc.).
Pressing on thepaintbrush icon you can use the darken / lighten, pixelated and drawing effect, while by tapping on the other icons you can apply predefined effects, frames and add text to the image. As soon as you are satisfied with the improvements made to the photo, you can save the changes by clicking on the option done and choosing where to save or share the resulting image.
Fix the photo from your computer
If the screen of your smartphone or tablet seems too limiting, you can improve the quality of your photos also by using computer programs. Here are some of the best suited for the purpose.
Photoshop (Windows / Mac)
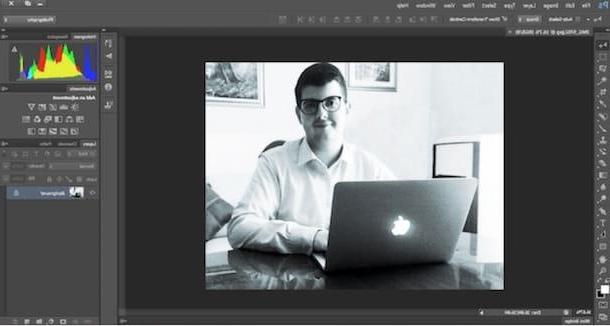
If your photos have pretty major flaws, try using Photoshop: the king of photo editing programs created by Adobe, the most complete in its category, which is also used by professionals (who, as you can well imagine, have far more complex needs than you have at the moment).
Available for both Windows PC and Mac, Photoshop has an interface full of multiple functions that, if used correctly, allow you to achieve amazing results even if you are not a professional photo editing (i.e. the process of correcting / revising your photos). Images).
Being a professional software, Photoshop is not free. To download the program, a monthly subscription to the service is required Creative Cloud what it costs 12,19 € (or it is possible to subscribe to an annual subscription of 145,52 euros). I know, these days even such an expense could be considered burdensome for your pockets. However, you don't have to despair at all. In fact, I'm happy to tell you that you can use it for 7 days the free version of this service.
You understood well! For a whole month you can use Photoshop without paying absolutely anything. You will agree with me that 7 days is enough to edit your photos and to understand if this software is right for you or not. At the end of this trial period, you will be able to evaluate whether to subscribe to the Adobe Creative Cloud service monthly or not. What do you say then? Are you willing to take this test?
Well, now that I have convinced you to try the Photoshop trial, I must also explain what you will need to do to download the program on your Windows PC or on your Mac. First of all connected to this web page and click on the item Free trial version which, as you may have noticed, is located at the top right. Done? Well now you will be asked to log in with your Adobe account. If you haven't created one yet, use the form provided by entering your e-mail address, creating a secure password and accepting the terms of service.
After completing the registration procedure on the Adobe site and logging into your account, all you have to do is answer the short questionnaire that is proposed to you and proceed to download Creative Cloud. Adobe Creative Cloud is a program that allows you to manage the download and installation of all Adobe Creative Cloud suite software, Photoshop in the first place.
Once the Creative Cloud download is complete, use your credentials (username and password) to log into your Adobe account and wait patiently for Photoshop is actually installed on your computer. I warn you, the download and installation procedure may take a long time, so arm yourself with patience.
Once the procedure is complete, you can use Photoshop to edit the photos that need some "retouching". To use all the tools made available by the program, use the toolbar that you find on the left, i menu that you find at the top and the panels for the management of levels e chronology that you find on the right.
If you have difficulty using Photoshop and / or want more information on how the program works, don't hesitate to read my guides on how to use Photoshop and how to photoshoot photos. I am sure you will be able to do great things with this program!
GIMP (Windows / Mac / Linux)
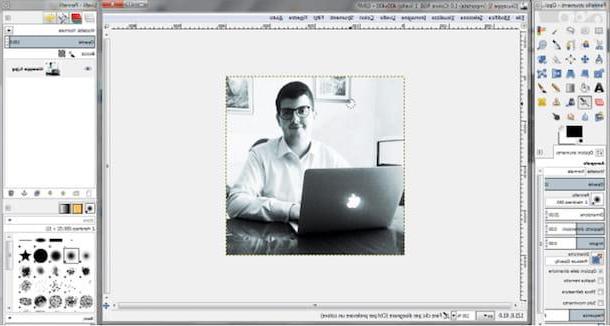
If you have no intention of using Photoshop or other paid programs, especially if you do editing very infrequently, then I think it's best to switch to a free alternative. If you are wondering how to edit photos without putting your hand to your wallet, then the program that I am about to offer you is the most suitable solution for you and especially for your pocket. I'm talking about GIMP, a software that I started using several years ago and that over time has proved to be a trusty travel companion. This software is open source, so anyone can use and modify it freely. Plus it's multi-platform - it works the same on Windows, macOS, and Linux.
GIMP has many features that are present on major paid editing programs, primarily Adobe Photoshop, although it lacks some more advanced features. That said, it should be just fine for your needs. To download it to your PC, connect to its official website and press the button Download, which also indicates the latest version of the program currently available (eg. version 2.8.22). Once the download is complete, open the GIMP installation package and follow the program installation procedure (just click on NEXT) to be able to start using the program.
To use GIMP, click on the entry Apri ... present in the menu Fillet (top left), choose the image you want to edit and use all the tools included in the software to apply the desired edits to the photo. On the left you can find the panel with the brushes, the selection tools etc., on the left the panel for managing the levels, while at the top there is the menu for managing files and applying filters.
If you find it difficult to use the GIMP and / or want more information on how it works, check out my tutorial on how to use the GIMP. I hope it will be useful for you to edit your photos and make them more beautiful.
How to look good in photos