


Having seen on the Internet some suggestive shots that had drops of water as “protagonists”, you decided to take some photos of this type using your Reflex or your smartphone. Not being a professional photographer, however, you do not have the faintest idea of how to succeed in this undertaking and so you would like me to give you a hand to take the shots in question. Did I guess? Well, then let me tell you: you are in the right place at the right time!
In this tutorial, in fact, I will have the opportunity to explain you in detail like photographing drops of water. If you decide to shoot with the help of a DSLR, I will guide you in choosing the most suitable lens, in setting the correct shooting parameters and, of course, I will provide you with ideas and suggestions on how to prepare the scene and take the picture. . If you decide to use the smartphone, however, I will provide you with practical suggestions that should allow you to obtain appreciable results, despite the hardware limitations of these devices.
If you're ready to get started, I'd say ban the chatter and get started right away. Come on: make yourself comfortable, take all the time you need to concentrate on reading this guide and, more importantly, try to implement the "tips" that I will give you, so as to be able to take appreciable photos. There is nothing left for me to do, except wish you good reading and wish you a big good luck for everything!
How to photograph drops of water with the Reflex
Iniziamo questa disamina for sale like photographing drops of water with the Reflex. Below you will find tips on choosing the lens and shooting parameters, as well as advice on the actual shooting phase.
Choose the most suitable lens
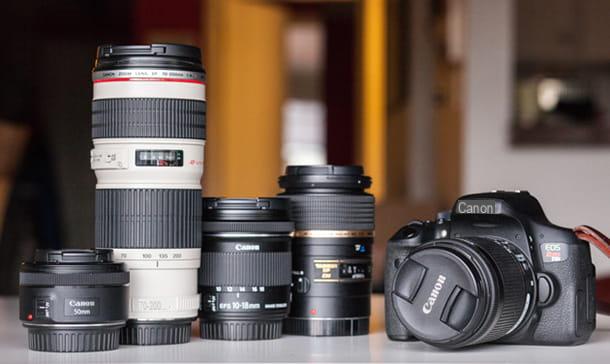
Choose the most suitable lens it is essential if you want to take pictures of the drops of water. Since to take pictures of close subjects you need to have one short focus distance, the choice must necessarily fall on macro lenses, which are perfect for capturing very close subjects.
These lenses, as their name suggests, are designed to magnify very small subjects (such as the water droplets you want to photograph) in detail, resulting in photographs in which the image projected on the camera sensor is the same size as the subject. immortalized, with a 1 ratio: 1.
Below are listed some macro lenses compatible with the main cameras, which you can buy directly on Amazon.
See offer on Amazon See offer on Amazon See offer on AmazonIf you want further information on which lens to buy, I suggest you consult the buying guide that I have entirely dedicated to the subject, so as to choose the one that best suits your camera, be it Canon, Nikon, Sony or otherwise.
Given the particular type of photo you want to make, moreover, I recommend that you equip yourself with a tripod and a remote control for remote release, because when you try your hand at macro photography, the risk of running into blur or micro-blur is quite high. Below you will list some of them.
See offer on Amazon See offer on Amazon See offer on Amazon See offer on AmazonSet the shooting parameters
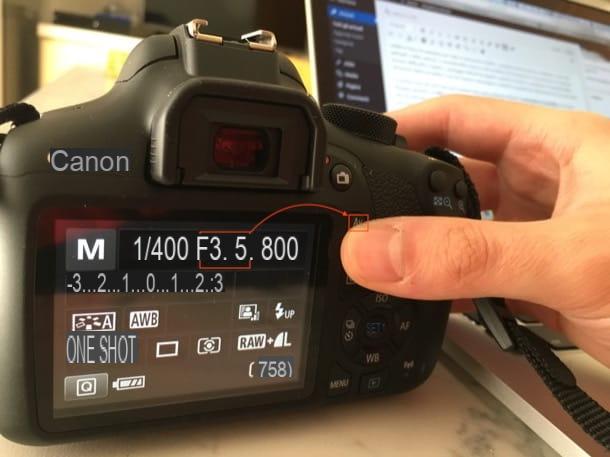
Now let's move on tosetting shooting parameters. If you haven't already, you need to first turn on the camera and set the manual shooting mode (M), so as to be able to “manually” adjust all the parameters.
After that I suggest you to set the ISO value as low as possible (eg. 100), so as to avoid digital noise, and to use a very small aperture, with an opening between f / 11 ed f / 16. By doing so, the water droplets will be in sharp focus. Furthermore, I advise you not to resort to autofocus, but to manual focus (just move the lever present on the lens from AF a MF).
Regarding the exposure time, if you want to take pictures with "static" water droplets, such as those that might be on a glass plate, you can set slower shutter speeds, as 1 / 60 1 / 40; if you want to "freeze" a drop that falls on the water, creating the iconic "crown" or the so-called "stem" around it, you must necessarily use very short shutter speeds, such as 1/250, 1/500 and so on. Also, I recommend you to set the multi-shot o "Burst", so you can be sure you get the desired result.
If you do not know how to manually adjust the aforementioned shooting parameters, I suggest you consult the guide in which I explain how to use a DSLR and, if necessary, also the user manual of your camera.
Prepare the scene and take the picture
Now let's move on to the funniest part of the tutorial: the one that consists of prepare the scene and take the picture. The approach to use varies according to the type of photo you intend to make.
If you just want to photograph water droplets "Static", which may be lying on a surface, you have to compose the photo, focus on the drops and, when you are ready to do so, press on the shutter button, to immortalize everything.
If, on the other hand, you want to photograph drops that, impacting the water, create particular geometric shapes (such as the crown and stem which I mentioned a few lines above), you have to use a different approach and prepare a real photographic set.
First, therefore, fill a basin with water (possibly transparent), place it on one flat surface (e.g. a table) and place a colored cardboard that acts as a background to the drop (maybe you can fix it to the basin with adhesive tape).
I also recommend you photograph water drops with glycerin: by adding a little glycerin or sugar to the bowl, in fact, the liquid will be denser and, therefore, more elastic, which is essential for obtaining a good final result. Also, if you want photograph colored water drops, remember to add a little bit of to the water food coloring, so as to achieve the desired effect.
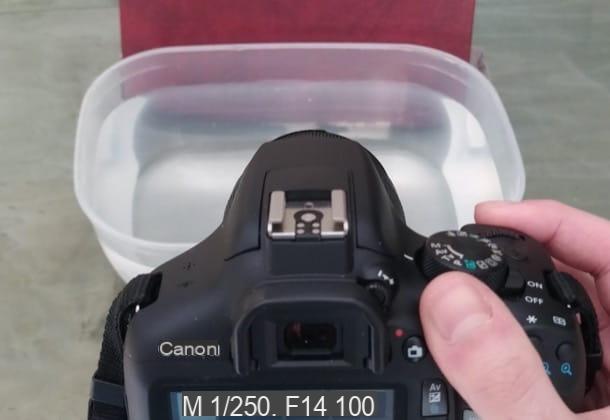
Then prepare the camera, placing it in front of the container (at the height of the latter), housing it on the tripod and tilting it by 20-25 degrees to the maximum, so that it is oriented towards the body of water (i.e. the basin).
If you have gods spotlights to illuminate the scene (or, even better than the external flashes synchronized with the camera), position them in such a way that the scene is well lit, so you can use faster shutter speeds, which is essential to “freeze” the scene.
Now, perhaps with help from a friend or family member, pick up with one pipette (or, in the absence of the latter, with a drinking straw) a few drops of water from the bowl and place the latter perpendicular to the bowl itself.
Finally, compose the photo and, trying to be as quick as possible, press on shutter button on the remote control for remote shooting the moment you let the drop fall on the surface of the water, so as to start the burst of photos and immortalize the impact.
If you can't get the desired result "on the first shot", don't give up and try again and again, perhaps changing the lights, adjusting the shooting parameters better or simply changing the inclination and height of the pipette used for drop the drop on the water.
How to photograph water drops with your mobile phone
You don't have a Reflex at your disposal and would like to try photograph water drops with your mobile phone? Even if the final quality of the photo will not be comparable to that obtainable with a camera (especially the high-end ones), you should still be able to obtain appreciable results, especially as regards the shots that involve "static" drops.
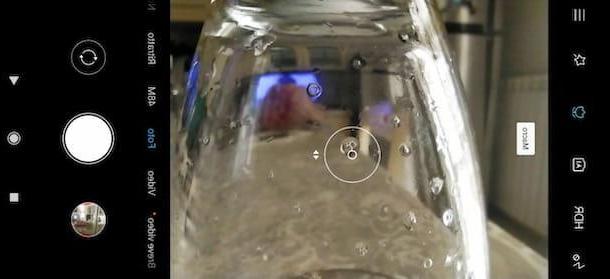
To photograph the drops, therefore, start the app Camera, get as close as possible to the drops, tap on the screen (in correspondence with the latter), so as to focus them correctly, and presses on shutter button placed in the center of the screen (if you are shooting in portrait mode) or on the right (if you are shooting in landscape mode) and that's it.
As for the photos of water droplets in motion, however, things get complicated a bit, as you have to set the correct shooting parameters (perhaps using apps such as Camera FV-5 for Android and Halide for iPhone) and then it is necessary to prepare the set, practically following the same instructions that I gave you in the previous chapters.
For both types of photos, however, it might be useful to "enhance" the camera of your smartphone with some additional macro lenses, which technically do not improve the camera of your device, but can still help facilitate the shooting phase a little (I told you about it in this other guide, remember?).
If you want some further advice on how to take beautiful photos with your mobile phone, however, I refer you to the in-depth study that I have entirely dedicated to the subject. I hope it will be useful to you.
How to photograph water drops


