Noooooo! No, no, that can't be true. There's no point trying to convince yourself that what you did didn't happen in the real world. The situation is very clear. With all your heart, you have been a real fool. Ok, let's think. Calm and courage, don't cry over spilled milk. You accidentally deleted all the photos you took with your digital camera, but that's not a problem. Yes, why do you despair? The shots taken that you have mistakenly removed can all be recovered. How? Well, read this tutorial of mine dedicated, in fact, to how to recover deleted photos and you will find out immediately!
How do you say? The thing interests you - and also a lot, given the situation - but not being very practical in terms of computers and information technology (and it shows, I would add!) Are you afraid of not being able to succeed in the enterprise? Come on, don't be a coward! Apart from the fact that to recover your photos all you have to do is use some special programs (yes, you got it right, there is no need for "macumbe" and magic formulas!) But then I don't really see what you worry if I'm here with you, ready and willing to provide you with all the information you need. Then? Have I convinced you? Yup? Very well. So I would say not to waste any more time chatting and to immediately take action.
Ah, just a small clarification before getting to the heart of this tutorial: miracles cannot be done, unfortunately. In other words, if a file has been deleted and the memory unit on which it was stored has been rewritten several times to store new information, it will be very difficult to do anything. In any case, as they say, trying doesn't hurt. Enjoy the reading!
PhotoRec (Windows / Mac / Linux)

The first tool I want to invite you to use to recover deleted photos from your camera is PhotoRec. It is a software for Windows, Mac and Linux operating systems (but for these useful two it can only be used from the command line). It is free and open source in nature and, as the name implies, allows you to recover images from any storage device connected to your computer: memory card, pendrive, hard disk etc. To illustrate its use, I chose to use the Windows version. So let's see how it works, exactly.
First of all connected to the PhotoRec website and click on the number under the item Latest stable version top right. On the web page that opens, click the link for the version of Windows you are using in the section Stable version and wait for the download of the program to be started and completed.
At the end of the download, extract the archive obtained in any position of the computer and start the executable qphotorec_win.exe that was present inside. In the window that you will later see appear on the desktop, click on the button Yes and use the menu to tendin I will select a supporto dal quale eseguire l'operazione di recupero to select the drive where the photos you accidentally deleted are located.
Now, select the primary partition of the device, check the items FAT / NTFS / HFS + / ReiferFS e Free and select the file holes to be found in the program by clicking on the button Fillet Formats. Then click on the button OK to save the changes made to the program settings.
Finally, click the button KATEGORIEN at the bottom right to choose the folder to save the recovered photos and then click Search in order to start the recovery procedure of the deleted images. Once the process is complete, the images that could be recovered will be automatically saved in the previously chosen folder.
RePicvid Free Photo Recovery (Windows/Mac)
Another great resource you can turn to to recover deleted photos is RePicvid Free Photo Recovery. It is a free program for Windows and macOS operating systems that after a simple scan is able to “resurrect” the shots that had been removed incorrectly. It is also equipped with a very pleasant user interface and its operation is highly intuitive. It is possibly also available in a paid variant with additional functions.
To use it, first connect to the program's website and then click on the button corresponding to the operating system you are using to download the appropriate version. When the download is complete, if you are using Windows, start the executable file you just obtained, click on Yes / Run and accept the terms of use of the program by ticking the appropriate item and then click on Next four times in a row, he presses on install and to conclude click on Finish.
If, on the other hand, you are using a Mac, open the downloaded .pkg file and follow the simple installation wizard that is proposed to you on the screen by always clicking on Continue and typing, when prompted, the password for your user account on macOS.
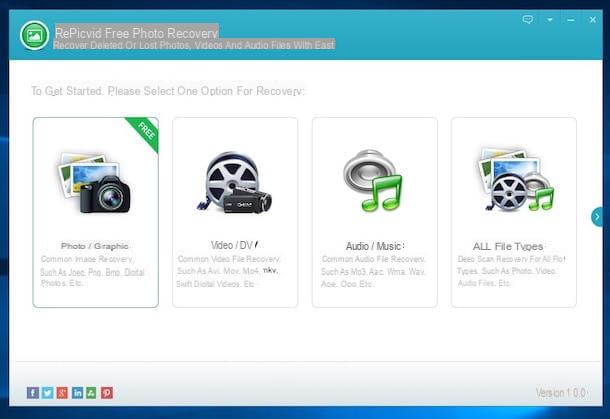
When the installation is complete, start the program (if it has not started by itself) and close the warning you see appearing on the possibility of switching to the paid version of the program, then click on Photo / Graphic, select the unit to be analyzed and then click on the button Scan.
If you want to limit the scan only to specific file formats, before starting the procedure click on the button Advanced Settings which is below and select those of your interest. Then click on OK to confirm the choice made.
At the end of the analysis, select the reference potion from the left alteral bar and in the right part of the program window you will find listed all the identified photos that can be recovered. Pigiandoci above you can also see a preview. If you want to recover them all click on the button Recover which is at the bottom right and indicates the location on your computer where you want to save, otherwise first deselect the ones you don't care about.
DMDE (Windows/Linux)
DMDE is another resource belonging to the category that I strongly suggest you to use to try to recover deleted photos from your camera (but not only). It is for Windows (the version on which I will focus in this paragraph) and Linux (but only from the command line), it is free (but possibly it is also available in a paid variant that allows you to intervene on multiple types of files) and not requires installation. It is also capable of acting on any type of drive, be it an external drive or a specially formatted drive. Perhaps it is a little less practical to use than the resources already seen but it has great potential and is worth trying.
To use it, connect to the program's website and click on the button Download DMDE for Windows that is high up. Once the software has been downloaded, open the ZIP file obtained and extract the contents in any position, then open the executable inside it.
From the window that you will later see appear on the desktop, select cittàn (city) and then click on OK to set the use of the British language for DMDE then accept the conditions of use of the software by checking the appropriate box and click on the button To accept.
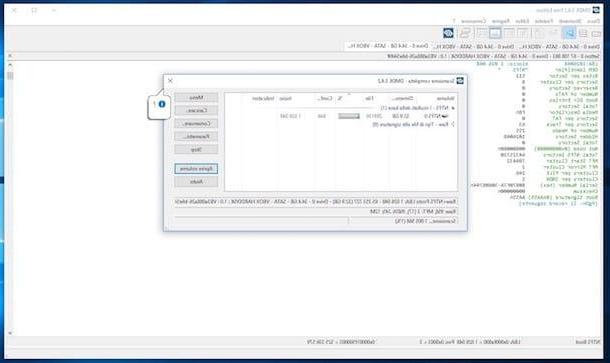
Now, select the unit you want to search on and click on the button OK then presses the button Full scan which is at the bottom and then click on Scan. Once the scanning procedure is finished, select the reference volume from the left, click on the button Menu, Choose Open volume click on the menu that appears and click on OK.
Then explore the various locations of the chosen drive and when you find the photos that you had deleted by mistake and that you want to recover, select them by spitting the relevant box, click on the item Instruments which is in the upper left part of the program window, choose Return… e pigia his OK. The recovered files will be saved in what was their original potion.
If you cannot find the files you are interested in doing as I have just indicated, help yourself by clicking on the menu Instruments, choosing Search in found (to name) and setting specific search filters based on your needs.
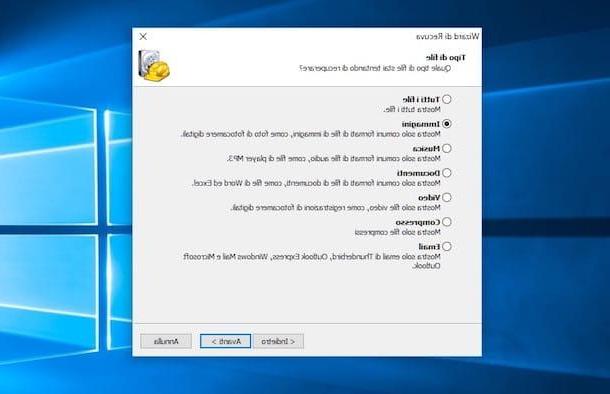
Recuva (Windows)
Recuva is another valid software for data recovery in general (and therefore also photos) usable at no cost on Windows operating systems. It is very simple to use, has a beautiful interface and is also very effective. Well, what are you waiting for to try it?
To download it to your computer, connect to its website and first click on the button Download Free Version, by pressing the button free Download, on the item FileHippo.com. and finally presses the button Scarica latest version present in the new page that has opened.
Next open the obtained executable file, select cittàn (city) from the drop-down menu in the upper right part of the window that appeared on the screen and click on the button install then press on Run Recuva to start the software.
Now, to locate and subsequently recover the deleted photos, press the button NEXT which is in the main window of the program, check the box next to the item Images and click to anchor your NEXT. Then select the device from which to recover the photos and press first on NEXT and then starts.
Once the scan is complete, locate the items to recover, select them and press on Recover to export them to a folder of your choice. Tini note that items marked with the red circle they are those that are practically impossible to recover as they are severely damaged.
Please note: If Recuva cannot find your photos, try to scan again by restarting the program and putting the check next to the item Enable deep scan before clicking starts so as to carry out an analysis of the reference unit even more accurately.
App to recover deleted photos
Were the photos you deleted by mistake not taken with your digital camera but with your smartphone or tablet? No problem, I can help you with that too. If this is the case, I am happy to announce that using some special applications you can be able to recover deleted photos even on your mobile devices. Below you will find those that in my opinion represent some of the best in the category.
Ah, I almost forgot: the apps you find listed below are all for Android. Also for the other operating systems there are useful applications for recovering accidentally removed photos but those that act in a manner almost similar to the above programs are only available for the mobile platform of the "green robot".
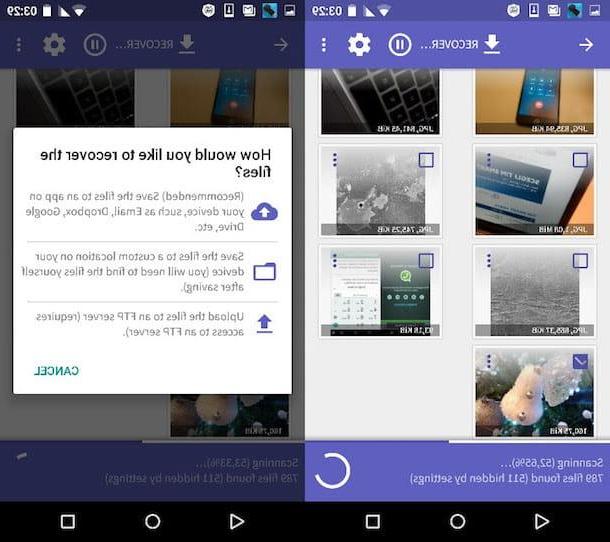
- DiskDigger photo recovery - App that allows you to recover photos that have been deleted on Android by performing a deep scan of the internal and external memory. Files can be saved locally, to the cloud or shared via FTP. Free.
- Undeleter Recover Files & Data - Another app for recovering photos (and more) that can scan deleted items using the cache. It requires root permissions otherwise it won't work. It is free to download.
- Restore Image (Super Easy) - Simple but effective application to recover deleted images on your device on the fly. It analyzes its memory and allows you to recover photos in a couple of taps. In short, the name is a promise. Free.
- Deleted Photo Recovery - Allows you to recover deleted photos from phone memory or external memory and restore them to the gallery. Scan all archives and easily list the files found. Free.
For further learning and to find out which resources can be somehow useful on other platforms for mobile devices, you can read my article dedicated to the topic of medians which I have proceeded to tell you about it in great detail.
How to recover deleted photos