Railjack customization can be accessed from the Configure console in your dry dock.
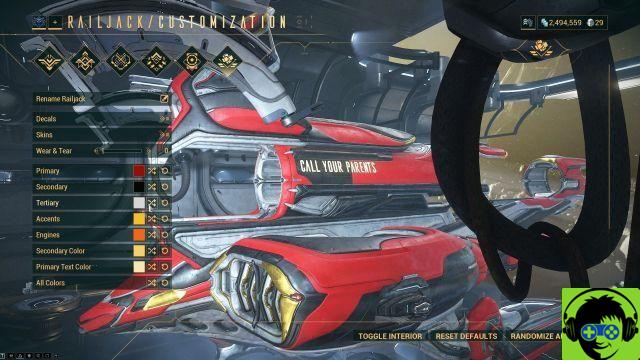
In your dry dock's configuration console, you can access the customize menu, which is the sixth and final tab available. You will have a wide view of your Railjack, and from there you can change a few things.
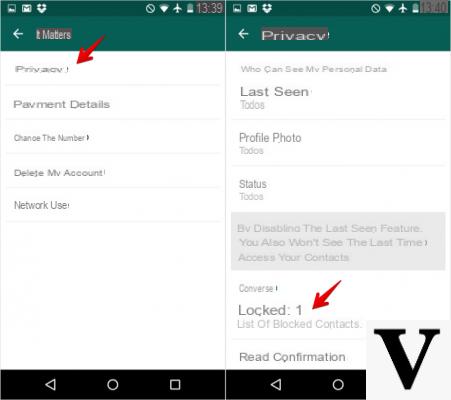
The first thing you can do is rename your ship, which will appear on the outside of the hull for everyone to see. Note that the two skins available for purchase through Plat can block parts of the name, and no foul language is allowed (DE's overzealous filter is in play here). After that, you can place a decal on your Railjack, which is taken from the emblems you've unlocked (however, you can also purchase more from this menu). Next are the skins - there are only two right now and they cost Plat, but expect more to be added in the future.
Wear and tear is what they say on the tin - it changes the look of your Railjack. On the far left you'll find a perfect Railjack, and it will become more haggard by moving the slider to the right.
Below, the colors are pulled from your unlocked color palettes. It works just like coloring your frames and weapons, but you can use the All Colors option to choose a color for all of the options listed. The coloring of your Railjack doesn't stop there, as at the bottom right is an interior Toggle button that will allow you to set which colors your crew will see most often. The interior and exterior colors can be randomized either by the shuffle button next to the slot you want to randomize or through a Randomize All button at the bottom of the screen. Make sure to fire back when you're done: sometimes the game will bug and won't save your selections if you use the escape key or the return button on the controller.
For more Railjack guides, be sure to check out our guides hub!
-