Since Bravely Default 2 is a very narrative game, I'll try to keep any spoilers to a minimum. Cinematic details will be sparse and characters will only be named as needed. Additionally, this walkthrough will follow a checklist format to keep things short and to the point. I'll list the monsters encountered along the critical path (to include their weaknesses), and treasure chests (along with what they contain). Enemies and bosses are natural but necessary spoilers, so I'll mark this article with a slight spoiler warning here, and I will precede each boss with a more obvious spoiler warning.
Bravely Default 2 Chapter 1 Part 1 Walkthrough
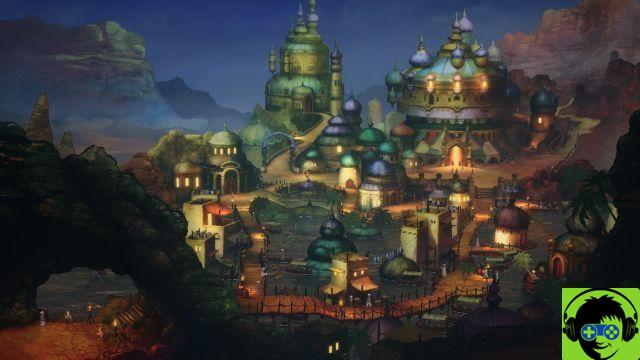
Savalon
- Head south from the Vale of Sighs exit to reach Savalon.
- You are in a canyon, so the only way to go is south. Savalon is at the edge of the canyon on your left if you have turned the camera so you don't face the Vale of Sighs exit.
- There are goblin archers, orc chieftains, and cool leaflets along the way.
- Goblin (humanoid) archers are weak against lightning and spears.
- Orc (humanoid) leaders are weak against water and bows.
- Fresh leaflets (plant) are weak against fire, earth, and sticks.
- A cutscene will play as you approach the town, once it is concluded you will be able to enter unimpeded (the random monster or two aside).
- Once in Savalon, a brief event will take place and you will learn about the fate that has befallen the city.
- There is a wagon at the entrance, which will allow you to travel quickly between cities. For now, it's Savalon and Halcyonia.
- Once the cutscene is complete, go up the path to the left towards the palace to advance the story.
- The hostel is also on this path, left to right before the ramp to the palace. Make sure to stop and rest!
- If you want equipment or items, the store is the first building on the right.
- The Exploration Lady is a little further on in the Item Shop, in the building on its own to the right.
- If you venture right towards the tent, you will trigger a cutscene. You will see Orpheus for the first time - the bard.
- Once the crowd has been dispatched and you have spoken with Orpheus, you will resume your quest to visit the palace.
- There is no side quest associated with Orpheus, so you'll have to wait a bit longer before unlocking Bard.
- You can find one of Savalon's three chests in the first building to the right of the tent (
- The other two aren't accessible until later in the story, so don't worry just yet.
- Once the crowd has been dispatched and you have spoken with Orpheus, you will resume your quest to visit the palace.
- After you've rested, done some shopping, and seen the cutscene of Orpheus (or not - there's no need to move the story forward just yet), head to the palace.
- You will enter a cutscene with Prince Castor of Savalon. When done, he'll join as a temporary party mate, and you'll need to head to the game room (the massive tent) to continue.
- You can loot the only palace chest now, which can be found through the palace gate on the right, then down the hallway (.
- You will enter a cutscene with Prince Castor of Savalon. When done, he'll join as a temporary party mate, and you'll need to head to the game room (the massive tent) to continue.
- Leave the palace and go around the path at the top that leads to the right patch and the playroom (tent).
- Enter to trigger a brief cutscene with Bernard and others.
- Then go back outside and talk to Orpheus.
- Before you leave, go up the stairs and turn right to loot the chest in the game room to
- Return to the entrance of Savalon to start a cutscene with Orpheus and Anihal.
- Listen to it, then follow it to the Sand Swept Ruins once it ends.
- The Sand Swept Ruins are your next dungeon, so stock up and rest at the Inn.
- Also, there's a simple side quest (A Long Lunch) outside the inn, and your target is in the ruins, so you might as well catch it before you leave town. It rewards
- Once outside, head directly south of Savalon towards the coast. You will see an old deserted temple: these are the ruins swept by the sand.
Sand swept ruins
The Sand Swept Ruins is the dungeon for Part 1 of Chapter 1 in Bravely Default 2. There are a bunch of difficult enemies here, so enter it around level 10 and job level 6 or above for the easiest time.
- A cutscene will begin once you enter the Sand Swept Ruins. Once completed, you will be free to explore the dungeon.
- If you don't care about the chest, head to the top left of the open arena you start in, down the hallway, then up the stairs, left and then down to the dungeon portal, to left again, down again, then follow the path to the save point. Enter the arch next to it to start the boss battle.
- The sand-swept ruins are teeming with restless souls, Terra elements, diatryms, sandworms (which randomly attack from patches of yellow sand), and Daidarabocchi clumps.
- Restless souls (living dead) are weak against the wind and the light. Takes half the damage from physical weapons and Earth.
- Terra (Spirit) elements are weak against wind and sticks. Takes half the damage from fire, is immune to lightning, and absorbs Earth.
- Diatryma (Beast) is weak against lightning and bows. Takes half the damage from the wind.
- Sandworms (insects) are weak to water and axes. Takes half the damage from lightning and absorbs Earth.
- Daidarabocci (undead) are weak against lightning and swords. Counters on status ailments. Takes half the damage from light and absorbs darkness.
- There are seven chests in the Sand Swept Ruins. The place is a maze, so you will have to pay attention to the various holes in the walls to reach these chests.
- The first is just above the large area you start in, in an area full of sand. Head up, and when you see the arch, head left down the hallway. Near the far left of the top wall is an opening that will give you access to the sand covered area, and to the far right is the chest (.
- Leave the sand area and continue to the left, then go up the corridor. You will see the second chest behind the wall; head higher until you see a break in the fortification on the left, which will lead you to the chest (.
- Go back to the breach in the wall and go back down to the arch. Head right this time, then turn to the path that goes up. Turn left at the crossroads, then enter the bottom room for the third chest (.
- Head to the room above for the A Long Lunch side quest if you have it. Talk to the man to advance the quest. You will have to go back to Savalon, talk with his wife, come back to him and then to his wife one last time. Do this after clearing the sand swept ruins.
- The fourth chest goes through the broken wall next to the room above the third chest, in the area full of sand under the ramparts (.
- Go back to the broken wall that led you to the second chest, but go up the stairs. Turn left and follow the path to the dungeon portal. Continue through the arch and you will find the fifth chest to your left (.
- Come back to the portal and take the path on the left. Go to the end then go up, then left. There's a giant Daidarabocchi here with a sandworm, so either dodge the fight or make sure your health and MPs are up for grabs before facing them. Kill them and open the sixth chest (.
- Double back and head down to the arch. Follow the path to the save point and venture beyond and go up the stairs to find the seventh chest. Three Terra elements and a restless soul will come out of it. Kill them to receive a
- Return to the save point (if you were collecting the chests) or walk through the arch next to the save point to start a cutscene and then a boss battle. Make sure to rest and save in advance!
Orpheus (Bard)
We have a full guide on how to beat Orpheus in Bravely Default 2 here, but to give you a quick rundown:
- Orpheus: 10640 health and is weak against water, spears and bows.
- Orpheus is an arrogant sonuvabitch, and he's a tough job to overcome. Tu You want a Vanguard in your party to laugh at them and absorb as much damage as possible.
- Orpheus enters battle with four “pets” on the field, and he will buff them with four consecutive turns (meaning he has to wait four until he can act again).
- Toxolotl (aquatic) is weak against water, darkness and spears.
- Will cast Venom, so have Antidotes and Basuna handy.
- Diatryma (Beast) is weak against lightning and bows.
- They will have -35% physical damage taken and -35% magical damage taken.
- It will also improve their attack on subsequent turns.
- Take this opportunity to slowly reduce and kill his monster friends. The battle against Orpheus is a battle of attrition, so don't rush.
- Toxolotl (aquatic) is weak against water, darkness and spears.
- Orpheus will counter magic of all kinds with Sleep, so have Wakeup Bells and Basuna handy.
After taking down Orpheus, you'll unlock Bard Job and enter a cutscene. After the end, return to Savalon leaving the Sand Swept Ruins on foot or with a teleportation stone. Once you leave the ruins, another cutscene will play - head back to town when it concludes to face off against the not-so-trustworthy Bernard.
This will end Part 1 of Chapter 1 in Bravely Default 2. Stay tuned for Part 2, which is currently underway!


