


iPhoto is one of the applications installed "standard" in most Macs. As you can easily understand, it is an excellent software for managing digital photos (as well as videos), thanks to which you can keep all the photos taken on your computer with smartphones, tablets and digital cameras organizing them in an easy but efficient way.
With today's guide, I want to help you discover how to make the most of its potential and keep your photo library always in order. I bet you will be amazed by its ease of use, so let's not waste any more time and see immediately how to archive photos with iPhoto.
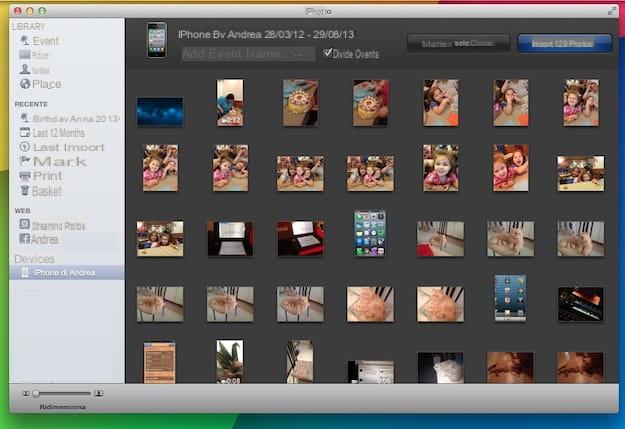
Let's start by seeing how to archive photos with iPhoto after importing them from an external device, such as a smartphone, tablet or digital camera. To import photos into iPhoto, all you have to do is connect the device from which to acquire images to your Mac while the program is running and wait a few seconds.
When the device is recognized by iPhoto, the application will show you all the photos (and videos) present in it, allowing you to copy them to your personal library by clicking on the button Import xxx photo which is located at the top right. If you don't want to import all the images but only some of them, select them by doing cmd + click on their thumbnails and click on the button Import selected by iPhoto.
When importing, iPhoto will automatically split the photos into private eventsBy default, the events are nothing more than the dates on which the shots are taken but, if you want, you can create customized events by selecting the images to import into the application library and typing the name to assign to the event (eg . Birthday 2013) in the text field Add the event name placed at the top of the window.
If you don't want iPhoto to automatically create events to sort photos into, remove the check mark from the item Divide events before starting to copy images. To organize or rename events after importing photos, select the entry Events from the iPhoto sidebar and select the event to edit. In the screen that opens, you can type the new name to assign to the event in the text field located at the top of the window or create a new one with the selected photos by going to the menu Events> Create event.
Another very effective method for archive photos with iPhoto is to create albums in which to divide the images. This is a very simple operation, as all you have to do is select the photos to add to the album from the iPhoto library and select the item New album from the menu Fillet application.
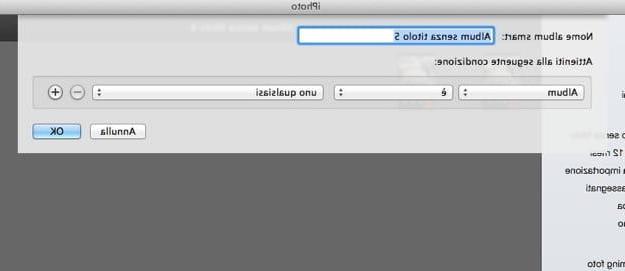
It is also possible to create automatic albums by incorporating within them images that respect certain parameters (eg they were taken on a certain date, in a specific place, etc.). In this case, just select the item New Smart Album from the menu Fillet iPhoto and select the parameters for the images to include in the album using the appropriate drop-down menus.
Finally, I remind you that you can catalog and then search your photos more efficiently by applying classifications (i.e. starlets one to five) and geographic information, if this was not added automatically from the smartphone or camera. To add these and other details to your images (including the faces of the people portrayed in them), simply expand their thumbnails and click the button Info which is located at the bottom.
All photos stored in iPhoto are saved in a file named IPhoto library located in the folder Images OS X. To change the location of this archive, all you have to do is copy it to the location you prefer and open it with a double click, iPhoto will remember the folder in which it is located. As for photo backups, back up your Mac with Time Machine and your images will be automatically saved to disk with backup copies of all your files.
How to archive photos with iPhoto


