


Last weekend, having some free time, I decided to download the photos taken the week before during a walk in the city with some friends to my computer, to then catalog them and jealously keep them in my digital album.
Going to review them one by one, however, I noticed an unpleasant detail: in many photos my friends' eyes were not their real color, but a fiery red. But there is a remedy for everything. In fact, using the right software is possible correct red eyes in the photographs in a few clicks, or in a few taps as it is also possible to act as a smartphone and tablet.
How do you say? Did the same thing happen to you too and are you dying to know how to eliminate this annoying effect from the photos you have taken of your loved ones? So don't waste any more time, make yourself comfortable, read this tutorial and put into practice the instructions you find in it: whether you have a Windows PC, a Mac, an Android device, an iPhone or an iPad, at the end of the reading you will know exactly how to remove red eyes from photos.
Fix red eyes on Windows
A PC equipped with Windows 10, you will be glad to know you can correct red eyes in the photos without installing external applications. In fact, all you need is the app Gallery included "standard" in the Microsoft operating system.
With the Photos app, you can correct all the most common defects in digital photos, primarily the annoying red eye effect, in just a few clicks (or just a few taps, if you use a computer with a touch screen). If you are wondering how to proceed, the answer is very simple: open the image to be corrected using the Photos app (you should just double click on the file icon, otherwise right click on it and select the items Open with> Photos from the menu that appears), presses the button Edit and create che si trova in alto a destra e seleciona la voce Modification give the menu to compare.
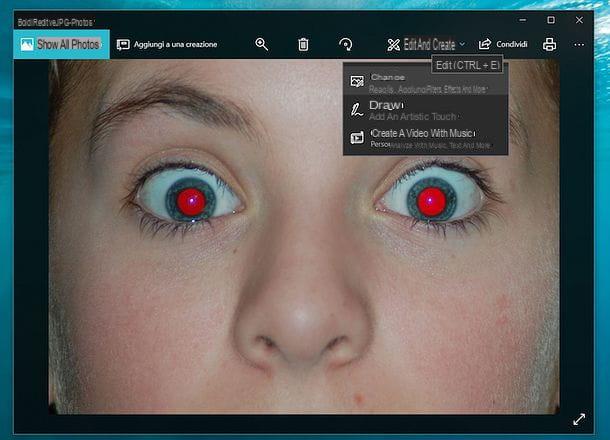
At this point, select the tab Rule From the Photos app sidebar, scroll until you reach the button Fix red eyes and click on the latter.
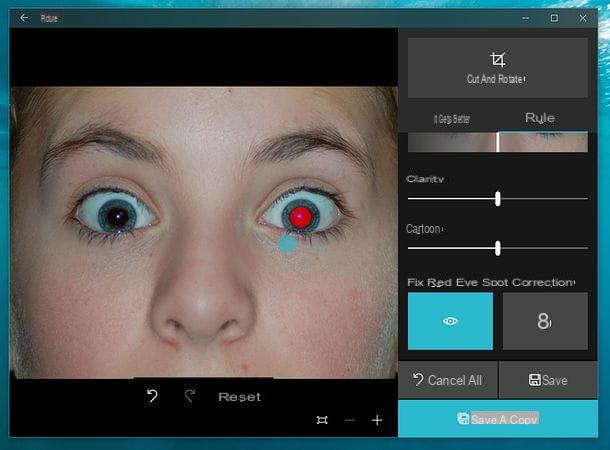
Then use the mouse to "color" the eye area that appears to be red and this should reacquire a natural color (therefore dark).
When you are satisfied with the result, press the button Save to save the changes made to the photo or, if you prefer, save the image as a new file by clicking the button Save a copy (at the bottom of the right sidebar). Easy, right?
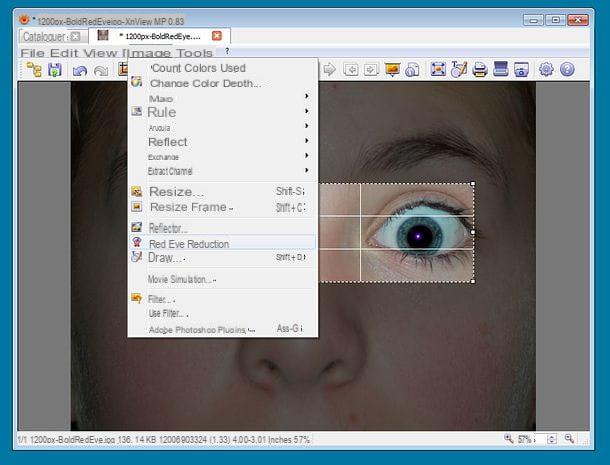
Purposes Windows 7 or another version of the Microsoft operating system without the Photos app? In this case you have to turn to external solutions. I advise you XnViewMP, which is a free image viewer (for non-commercial purposes only) capable of retouching photos in various ways. It is compatible with Windows, macOS and Linux and can also be used without installations.
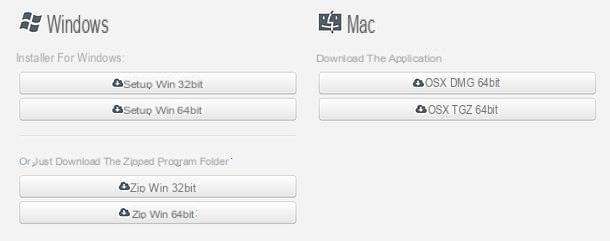
To download the portable version of XnViewMP (the one that does not require installation) on your PC, connect to the official website of the program and click on the button Zip Win 32bit or on the button Zip Win 64bit (under the flag of Windows), depending on whether you are using a 32-bit or 64-bit operating system.
A download complete, apri il zip package which contains XnViewMP, extract the contents to a folder of your choice and run the executable xnviewmp.exe to start the program.
In the window that opens, select theBritish from the drop-down menu to choose the language and click on OK to access the main XnViewMP screen.
At this point, use the list of folders on the left to select the path where the red eye photo to correct is located and open it by double clicking on its miniature.
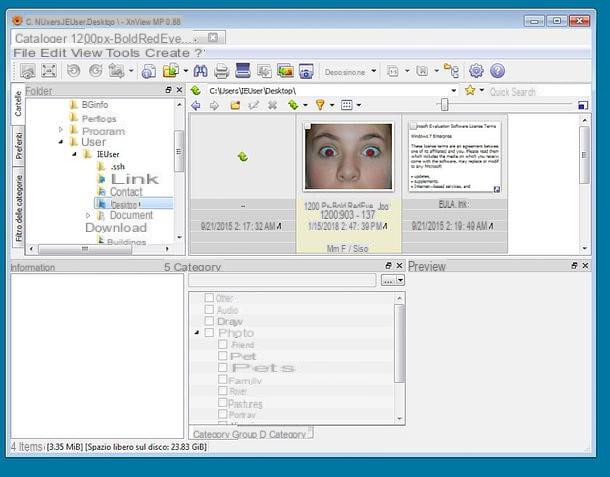
Now all you have to do is highlight the area of the photo that contains the Red eyes drawing a rectangle with the mouse (you have to hold down the left button and create the selection) and call up the filter for the removal of red eyes via the menu Image> Red-eye reduction which is located at the top.
When you are satisfied with the result, go to the menu Fillet of XnViewMP and choose whether to directly save the changes made to the image, by selecting the item Save from the latter, or whether to save the photo as a new file, by selecting the option Save with name.
Fix red eyes on Mac
You have a Mac? So my advice is to not install any external application and to correct red eyes in photos using the app Apple photo, which you find installed "standard" on macOS. How does it work? I'll explain it to you right away.
To remove red eyes from a photo using Apple's Photos app, launch the photo app (the colored flower icon on the Dock bar) and select the image to be corrected. If the photo to be corrected is not in the app library, add it to the app by dragging it with the mouse in the program window.
Once this is done, open the image to retouch by double clicking on its thumbnail, press the button Modification located at the top right and expand the menu Red eyes located in the right sidebar. At this point, click on the icon brush which appeared under the heading Red eyes and "colors" the eyes of the subject in the photo to restore their original color.
When the job is completed, click on the button end (top right) to save the changes and that's it.
If you are not satisfied with Photos, I would like to point out that you can also use XnViewMP on macOS. The instructions to follow to use the program are the same as I explained to you in the paragraph dedicated to Windows.
Correct red eyes online
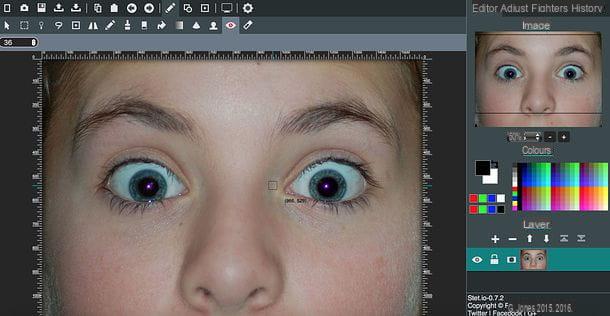
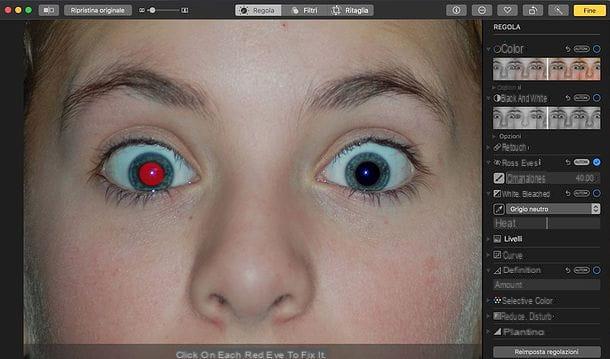
Do you need to get rid of red eyes from a photo but currently you can't (or don't want to) download new programs to your PC? In this case you can rely on an online photo editor, such as Stet.io, which is completely free, requires no registration and works without the help of Flash Player or other additional plugins.
To retouch a photo with Stet.io, connected to the home page of the service, click on the button ↥ located under the heading Import image and select the photo in which to correct the red eyes from your PC. Once the upload is complete, select thered eye located in the upper left, increases the level by zoom image using the drop-down menu located on the right and continuously click on the eyes of the subject portrayed in the photo to restore their original color to them.
When you are satisfied with the result, click on the ↧ icon located at the top left, choose the file format in which to export the image (eg. jpeg o png) and click on your button Export to start downloading the file to your computer.
Fix red eyes on Android
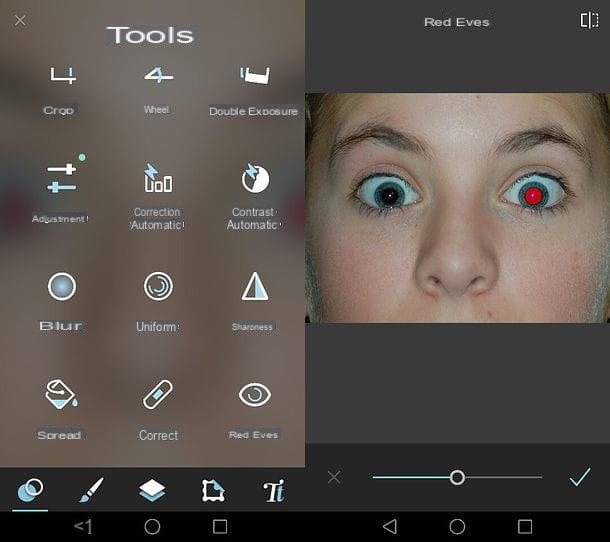
Scrolling through the photos in the gallery of your smartphone Android, did you notice that some of them have the annoying red eye effect? Do not panic, there are many apps that allow you to solve the problem directly from the operating system of the green robot without having to go through the computer. An example above all? Pixlr.
Pixlr is an excellent free app that allows you to retouch photos in a very simple way. It features an extremely intuitive user interface and, more importantly, a red-eye filter that can instantly restore the original color to the eyes of the people portrayed in the photos.
To correct your photos with Pixlr, download the app from the Play Store, start it and press the icon Gallery located in the center of the screen. Then select the image to retouch from the device gallery, tap the icon with i two circles located at the bottom left and select the tools Red eyes from the menu that appears on the screen.
At this point, touch the center of each eye to be corrected and, with the image corrected, save the final result by tapping first on the √ button located at the bottom right and then on the item end, which instead is located at the top right. Easier than that ?!
Fix red eyes on iPhone and iPad
If you use a iPhone or iPad, you can fix red eyes in photos using the default iOS photo gallery manager app - that's right, right Gallery!
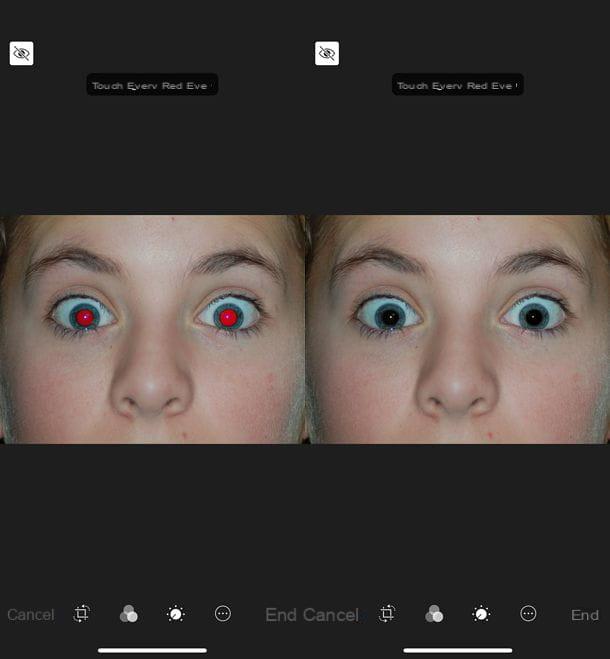
Obviously you have never noticed it, but the Photos app integrates everything you need to correct the red eye effect: all you have to do is select the image to correct, press the button Modification located at the top right and select the icon of theeye located at the top left.
At this point, increase the zoom level of the image to clearly see the point of the photo that contains the eyes, tap the central point of each eye to "color" and that's it. Finally, press the button end (bottom right) to save the changes and the corrected photo should take the place of the red eye photo in the iOS gallery.
Please note: in case of errors in applying the red eye filter, regardless of the device, operating system and app you are using, you can retrace your steps by pressing the button Cancel or circular arrow that goes to the left (the classic "cancel" function present in all applications).
How to correct red eyes


