


How many times do I have to tell you? If you want to experiment with your PC and venture into completely new fields, give it a try. Don't listen to your criticizing friends. If you put some passion into it and use the right solutions, you can do almost anything with your computer, even edit photos for free. Are you wondering how? Using free programs such as GIMP, very famous open source software available for both Windows and macOS and Linux.
If you give me a few minutes of your free time, I'll explain how to edit photos with GIMP and how to silence all your "know-it-all" friends. You will be surprised to discover how simple it is to use this program considered by many to be the best free alternative to Photoshop (which in the professional field is still the undisputed "king" of photo editing software). In the first part of the tutorial I will show you how to download GIMP on your computer, while in the second I will give you some "tips" that will be useful for you to become familiar with its main tools.
So, are you ready to get started? Fantastic! Make yourself comfortable, concentrate on reading the next paragraphs and you will see that you will be able to edit photos with GIMP without any difficulty. Happy reading and, above all, have fun!
Download GIMP
Before getting to the heart of the tutorial by explaining how GIMP works, I must first guide you through the procedure for downloading the program to your computer. Follow the steps below and you will see that you will be able to download the program in no time.
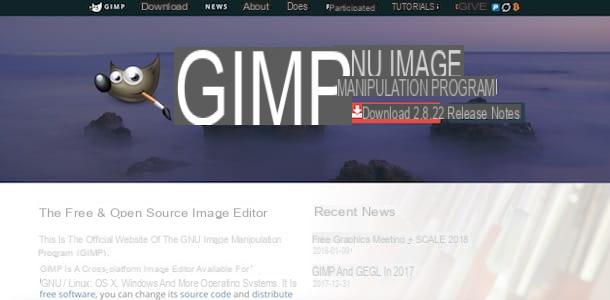
First, go to the GIMP website, click on the red button Download xxxx (instead of the "x" you will find numbers that correspond to the latest version of the program) and then on the orange button Download GIMP xxxx directly, which is located on the right of the page, under the heading GIMP for [name of your operating system].
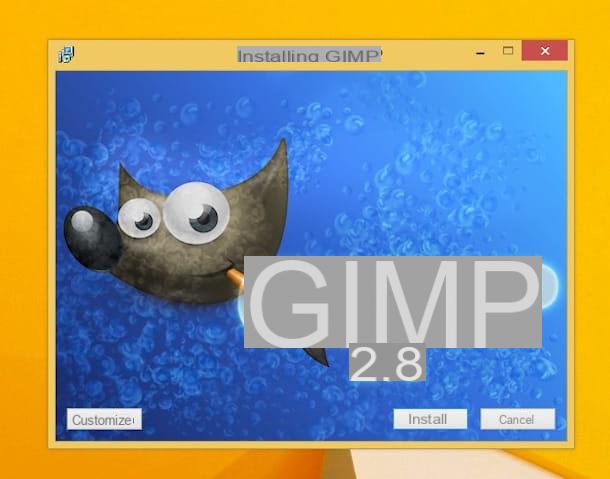
At the end of the download, open the file you just downloaded from the GIMP website and follow the simple wizard that appears on the screen to proceed with the actual installation of the program. If you use a PC Windows, then click on the button Yes and then OK, Install e end.
If you use a Macinstead, drag the GIMP icon into the folder Applications macOS, right-click the program icon and select the item apri from the menu that appears so as to "bypass" the restrictions applied by macOS to software from non-certified developers. Of course, you will only be required to do this the first time you start GIMP.
Edit photos with GIMP
After installing GIMP on your computer, you will have to wait for the initial setup procedure to be completed, which is necessary to optimize its components; but don't be scared, the following starts will be much faster!
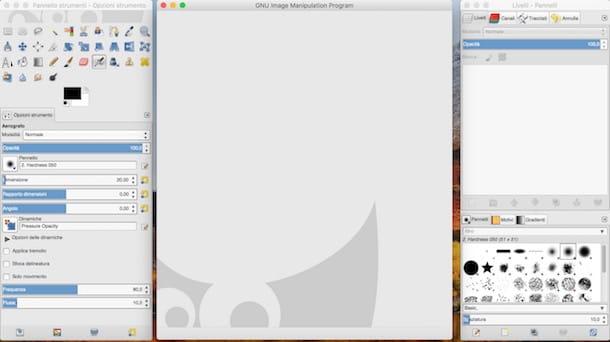
As soon as GIMP is finally started, you will notice that its interface is structured in three main "sections".
- Il instrument panel located on the left, which includes the main GIMP tools, such as the pencil to draw; the tools of selection, to select the areas of the image to be modified; the tools of distortions to resize, perspective and skew photos; the tool of color fill and so on.
- Il square located in the center, in which the photo to be edited will be displayed.
- The window Brushes - Levels located on the right of the screen, where there is the manager of levels (the various “layers” from which an image is composed), the chronology of the operations performed (to cancel and / or restore the changes made to the photos) and more.
To open a photo you want to edit with GIMP, all you have to do is select the item apri from the menu Fillet (top left) and then select the image you want to edit. At this point, based on the changes you need to make to the photo, use the tools included in GIMP to retouch it.
Let's say you want to improve the colors, brightness and other parameters of the uploaded photo. In this specific case, go to the menu Colors and select one of the available tools (eg. Color balance, to adjust the colors; Hue-saturation, to modify its hue or saturation; Brightness-contrast, to adjust brightness and contrast, etc.).
Once you have selected one of these tools, windows will open with the options and adjustment bars of the various filters (which you will have to move to your liking). For best results, help with real-time previews provided by GIMP. If during your work you make mistakes, undo the changes made to the photo by pressing the key combination Ctrl + Z (your Windows) or cmd + z (your macOS).

Do you want to give an artistic touch to your photos? Get creative with the tools on the menu Filters> Artistic (or in Distortion) of the main window of GIMP. Thanks to them, you can turn your photo into a comic, in a cubist painting (cubism), in a oil painting or in one photocopy. By taking advantage of the tools in the menu Filters> Decorative, instead, you can add some very original coffee stains, very nice BORDI and a fascinating effect old photo to your images in no more than a couple of clicks.
You can also enrich your photos with shadows and beautiful lighting effects by going to the menu Filters> Light and Shadow. Then select the item casts shadow to add a shadow to the selected photo layer, Supernova to add colored light to the image or Gradient flare to add a custom flare to the photo.
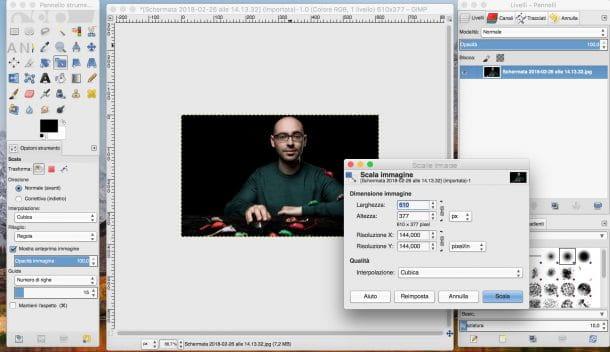
GIMP also allows you to resize your photos using an ad hoc function. To take advantage of it, select the item Image scale from the menu Image, set the new dimensions for the image to assume in the window that opens and click on the button Ladder. For more information on how to resize photos with GIMP, please read the in-depth article I just linked to.
Do you want to crop a portion of the photo? Nothing could be simpler: select the portion to keep using the selection tools located in the panel located on the left and click on the item Crop to selection from the menu Image. Più facile di così ?!
GIMP can also be useful for writing on photos: you can do it using the text tool (you can recall it by clicking on the letter A located in the left toolbar) and drawing on the photo the text box in which to type the text. You can also customize the font and color of the text using the options that appear at the bottom of GIMP's left window (the button Characters and the drop-down menu Sizes).
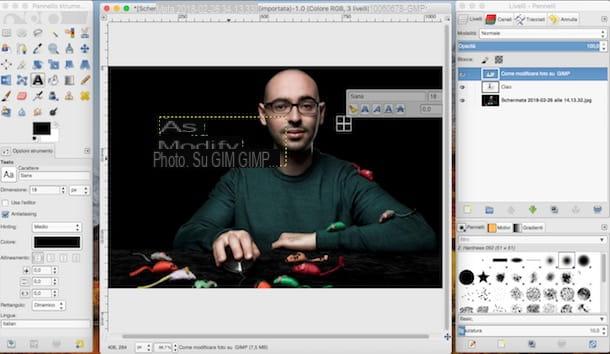
You can move the typed text, as well as any layer of the photo, by clicking on the button first Move tool (the blue cross on the left toolbar) and then on the element to be moved. If you want to learn more about using GIMP's text tool, read the tutorials where I show you how to write on photos and how to sign images with GIMP.
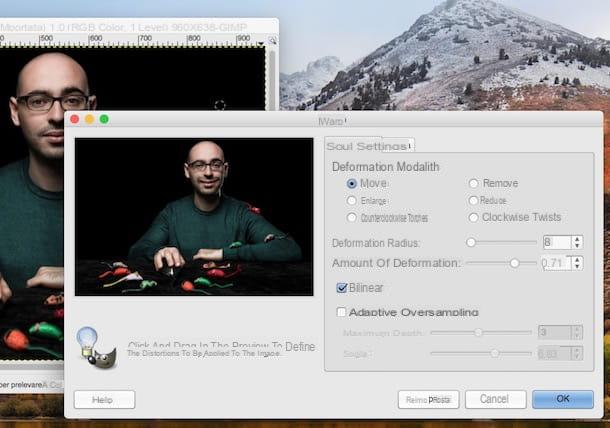
Do you want to use GIMP to create funny caricatures? If so, you can use the distortion tools by clicking on the menu filters, then selecting the tool of Distortion and then clicking on the item IWarping.
In the window that opens, select one of the types of distortion among those proposed in the section Deformation mode (Eg. Move, Enlarge, Twist counterclockwise, Twist clockwise, etc.), move the sliders located on the adjustment bars to adjust the degree of application of the effect on the photo, click on the points of the preview of the photo you want to modify and, when you are satisfied with the result, click on the item OK to salt the job.
If any passage is not clear to you, please read the articles in which I explain in more detail how to distort photos with GIMP or how to change the expression of the face with GIMP: there you will find other useful "tips" to make the most of these specific functions.
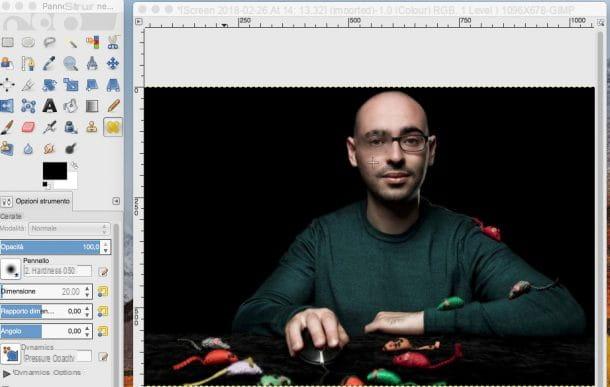
Another very useful tool made available by GIMP is the patch, which allows you to remove skin imperfections from photos (e.g. a mole, a stain, a wrinkle, etc.) and writings. To use it, click on the symbol of two yellow patches forming an "x" located in the GIMP tools panel (on the left), hold down the key Ctrl (your Windows) or cmd (on macOS) and click on the point of the photo surrounding the imperfection or the writing to choose an image sample to use to cover it.
After that, let go of the key Ctrl (your Windows) or cmd (on macOS) and click repeatedly on the point of the photo where the item to remove is present until you reach the desired result. If you are not clear about some steps, you can find useful information on how to remove an element from a photo with GIMP in the deepening that I have just linked to you.
As soon as you have finished editing your photo, save your work by selecting the item Save from the menu Fillet. In the window that opens, type the name you want to assign to the photo in the field Your name, select the folder in which to save it via the menu Save to folder, set the target format (ex. JPG) by clicking on the item Select file type and click sul pulsating Save.
If you want to learn more about other specific features of GIMP, please read the articles in which I show how to blur photos with GIMP, how to clone with GIMP, how to overlay photos with GIMP, how to opacify with GIMP, how to animate images with GIMP, how to create photo puzzles with GIMP, how to zoom photos with GIMP and how to vectorize photos with GIMP. I am sure that these readings will also be of great help to you.
How to edit photos with GIMP


