


Have you taken some photos with your smartphone but once you have transferred them to your computer you have discovered that their resolution leaves a little too much to be desired? If the answer is yes you don't have to despair: it is possible to deal with it by going to increase photo pixels. Yes, that's right, you got it right: despite everything, you can still try to remedy the unpleasant inconvenience by making some small changes to the shots taken. You ask me how? Well, simple: using the programs I'm about to suggest and following the directions I'm going to provide with this guide.
Before explaining in detail what can be done to increase photo pixels, however, it is good to clarify one thing right away. The solutions that I am about to show you and thanks to which you can intervene on your shots can be of great help to improve the resolution of the images but unfortunately they do not allow you to work miracles. In a nutshell, if the shot on which you intend to act is "tanned" particularly badly, even if you follow my instructions to increase photo pixels the final result will not be excellent. In any case, as they say, trying doesn't hurt.
Having clarified this, I would say do not waste any more precious time, to ban the chatter and start immediately to get busy. Position yourself comfortably in front of your trusted computer and take a few minutes of your time to read this guide. Are you ready? Yes? Perfect, then let's get started. Good fun!
Reshade (Windows)
Do you use a PC with Windows installed and do you need to increase photo pixels? Then I suggest you resort to using Reshade. This is a commercial software dedicated to graphics through which it is possible to increase photo pixels and perform various other photo editing operations in a very effective way.
To serve, the first thing you need to do is to click here so that you can immediately connect to the program's web page. Then press the button Download and wait for the Reshade download procedure to be started and completed.
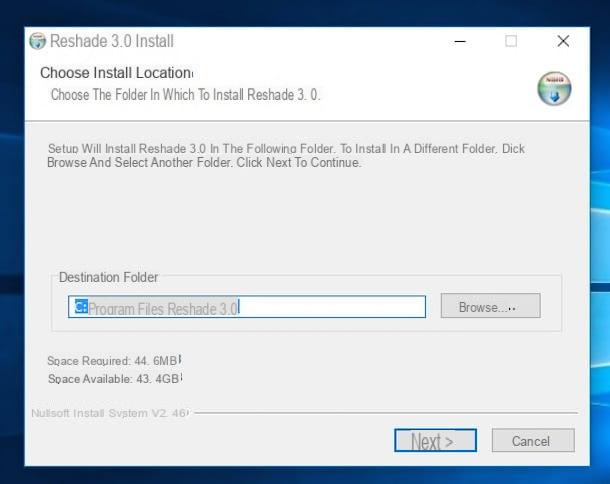
When the download is complete, double-click on the file reshade-install.exe that was downloaded to your computer to start the software installation wizard. Then click on Si and in the window that at this point is shown to you on the desktop first presses the button Next and then install then click Next and to conclude click on Finish.
Now wait for Reshade to start and for the program window to be visible on the desktop and then presses on the item Fillet located at the top left, choose apri from the menu that is shown to you and select the photo on which you intend to go to act. The selected photo will be visible in the right part of the program window while you can watch the modified image directly in real time using the special section attached to the left part of the Reshade window.
Once the photo is displayed in the Reshade window, select from the menu next to the item Screen resolution the resolution you want to give to the photo following the changes. Alternatively, you can manually enter the resolution level by filling in the fields next to the items Width, Height e Resolution.
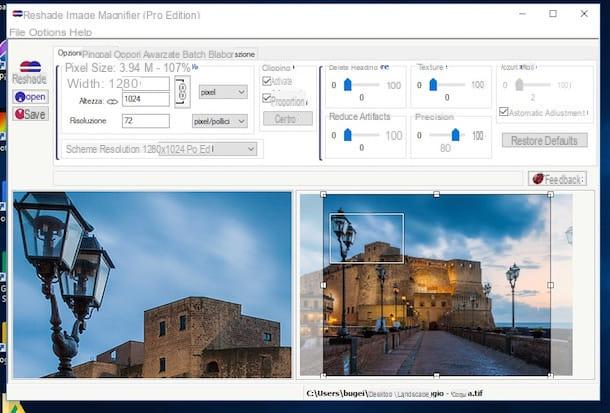
If you wish, you can make further changes to the image using the special sliders present in correspondence with the items Eliminate Noise, Reduce Artifacts, Texture, Precision e Control. If necessary, you can also access the section Advanced options by clicking on the appropriate tab located at the top of the Reshade window and modify the image compression level. You can also adjust the settings related to Loyalty e Gradient fade.
Once you have the desired final result, press the button Save located at the top left of the software window and wait for the processing procedure to be started and completed. The image is saved in the same location as the source file.
SmillaEnlarger (Windows/Mac)
Didn't the program that I suggested in the previous lines convince you in a particular way? Don't use a PC but have a Mac? Then I suggest you resort to using SmillaEnlarger. It is one of the best software currently available on the market thanks to which it is possible to increase the size of digital photos without, however, going to affect the quality of the latter in an excessively negative way. The merit is all of some customizable filters, which act by camouflaging the grain and "noises" that arise naturally when the resolution of an image is increased. It's free and fully compatible with both Windows and macOS / OS X.
So if you want to try to increase pixel photos with SmillaEnlarger, the first thing you need to do is to click here so that you can immediately connect to the program's web page and download it. Once the web page is displayed, presses the button Download green color and wait for the software to download on your computer.
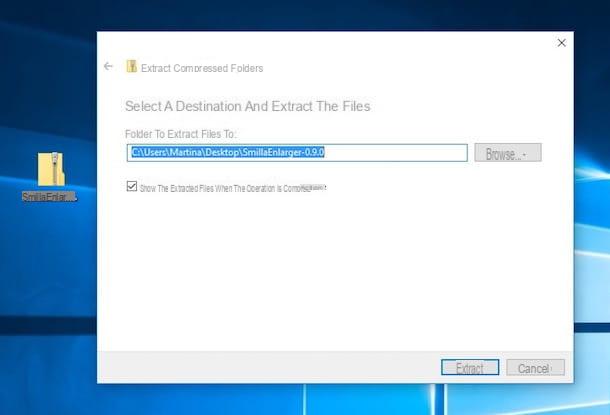
Once the download is complete, if you are using Windows, locate the file SmillaEnlarger-x.x.x.zip, select it and right click, choose the item Extract all ... from the menu that appears and then click the button Extract. Then locate the folder SmillaEnlarger-x.x.x on your computer, open it, April the folder SmillaEnlarger contained within it and then double-click the file SmillaEnlarger.exe to start the program.
If you are using a Mac, once the download is complete click on the file SmillaEnlarger-x.x.x.dmg then drag the SmillaEnlarger icon attached to the window that is shown to you in the folder Applications of macOS / OS X. Then open the Launchpad, look for the SmillaEnlarger icon and click on it to start the program. If a warning appears on the screen indicate the fact that the software comes from an uncertified developer, right click on the SmilaEnlarger icon in the folder Applications, Choose apri from the menu displayed and confirm your willingness to open the application.
Now locate the photo on your computer where you intend to go and drag it into the SmillaEnlarger window. Then type the new height, in pixels, to be assigned to the image in the field Output Height: located at the top left, then select the type of enlargement you want to apply to the photo in the drop-down menu Enlarger Parameter: and click on the button Preview ! on the left to preview the edited photo.
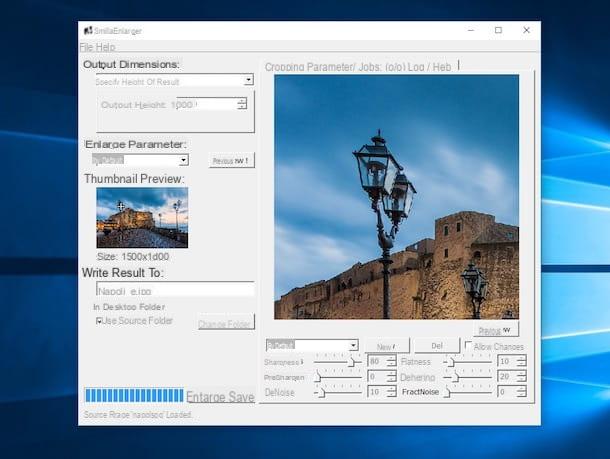
If the result returned by the software is to your liking, click on the button Enlarge & Save to save the photo to your computer. The enlarged image is saved in the same location as the original one.
In case after clicking the button Preview the final result returned is not to your liking, you can still modify the chosen photo by acting on the various parameters made available by SmillaEnlarger before saving a new version on your computer. Then presses on the card Parameter located at the top of the software window and move the sliders placed in the presence of the items Sharpness, PreSharpen, DeNoise, Flatness, Dithering e FractNoise until you reach the result that you think best suits your needs.
GIMP (Windows / Mac / Linux)
Another great tool with which you can try to increase photo pixels is GIMP. Haven't you ever heard of it? Strange, it's very famous! In any case you don't have to worry, let's fix it right away that this is an excellent free program for photo editing, one of the best alternatives to the cost of Photoshop, which allows you to improve the appearance of digital photos, apply special effects to images, distort them, resize them, rotate them and more. The program is available for Windows, Mac and Linux.
To try to increase photo pixels with GIMP first download the program. To do this, click here so that you can connect to the main web page of the software and then click on the entry Download GIMP x.x.xx Directly to download the program to your computer.
When the download is complete, regardless of the operating system in use on your computer, open the file just obtained by clicking on it in order to start the software installation procedure. Therefore, follow the instructions on the screen to complete it.
When installation is complete, wait for GIMP to start and you will see three windows appear: on the left, the toolbar with the tools for editing images, their advanced adjustments and the color palette; in the center an empty window in which the photos to be edited will be displayed once opened and on the right another toolbar with advanced commands for managing the levels, the history of changes and other tools that you will learn to use when you have done more practice with GIMP.
To increase photo pixels with GIMP, proceed by opening the image you want to act on. To do this click on the item Apri ... annessa to the menu Fillet and select the photo on your computer. Once the photo is displayed, click with the cursor on the item Image attached to the menu at the top of the GIMP window and then select the item Image scale ....
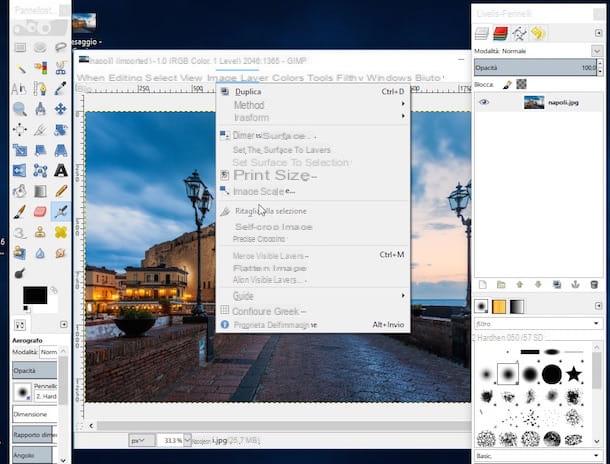
In the new window that appears, change the values in the fields located next to the entries Width e Height. Click on the symbol depicting a chain to save or ignore the proportion between the values entered. Instead, use the menu located next to the item Interpolation attached to the section Quality to determine the level of interpolation (I suggest leaving the default option set). To conclude, press the button Ladder. If the final result returned is not to your liking, just click on the button Reset to restore the correct display of the image.
When the changes are complete, to save the changes made to the photo click on the item Fillet present in the upper left part of the GIMP window, presses on Save from the menu that opened and indicates the location in which to save the edited image. If you want to know more about how GIMP works and the features available to increase photo pixels, I suggest you read my guide on how to use GIMP.
Other useful resources
Do you find the programs to increase photo pixels above interesting but would you like to understand if it is also possible to improve other aspects of your shots such as eliminating unwanted elements or correcting the perspective? Well, I think I can help you with that too.
If you are interested in getting acquainted with useful software and web services to correct the level of sharpness of images, you can in fact read my article on how to sharpen a photo. Instead, in my tutorial on how to remove people from grim photos I hinted in detail how to remove unwanted people or elements from images using the aforementioned GIMP.
If, on the other hand, your problem is too blurred images, take a look at my post dedicated to how to edit blurred photos and you will see that in a flash you will be able to fix everything. Then consulting my guide on how to straighten a photo, you can understand how to correct any orientation imperfections of an image.
To conclude, if instead of acting as a computer you would like to be able to do everything from a smartphone and / or tablet and would therefore like to understand which applications are useful in this sense, then I can not help but advise you to take a look at my dedicated article , in fact, to the best apps to edit photos. I am sure he will be of great help to you.
How to increase photo pixels


