


You always take lots of photos with your smartphone and, every time you want to publish one on your favorite social networks, it always takes a long time to locate it. This is not the first time this has happened and, after having procrastinated for a long time, you have finally decided to put some order.
Now that you have some free time at your disposal, in fact, you would like some advice on the tools to use and so you are wondering if I can give them to you. Yes, of course! You happened upon the right tutorial at the right time! In the following lines, in fact, you will find some advice on how to order photos from computers, smartphones and tablets using solutions that allow you to efficiently organize images, grouping them into albums. What solutions am I talking about? Read on to find out.
Take a few minutes of free time to carefully read the next paragraphs. Sit comfortably in front of your computer and / or grab the device you want to use for organizing your photos and I assure you that you will be able to tidy up your digital shots in the blink of an eye. At this point, all I have to do is wish you a good reading and a good "job".
Sort photos on computer
If you are looking for a solution for order photos present on your computer, you will be pleased to know that there is the possibility to do it through some tools for Windows and macOS which I will talk about in detail in the next paragraphs.
Photo (Windows)
A default solution that can be used for organizing photos into albums is the tool Gallery Windows. To use it, double-click a photo on your computer, or right-click on the image and select the item Open with> Photos give the menu answer.
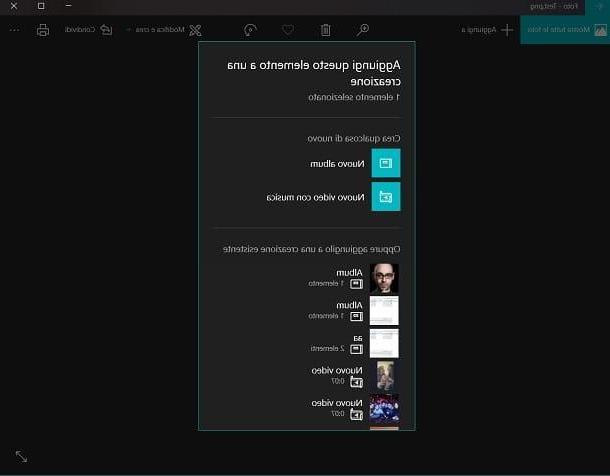
Once the image is displayed with Gallery, award-winning add to that you can see in the upper left corner, then in the context menu you see on the screen, first click on the item New Album, give a name to the album to create (using the text field visible on the screen) and press the button Create album. Alternatively, select an album from the pre-existing ones, in correspondence with the wording Or add it to an existing creation.
You can also organize photos by acting directly through the tool Gallery di Windows. Launch it via Cortana's search bar and then, on its home screen, click the button first Crea, located in the upper right corner, and then on the entry Album, in its context menu. Now, put the check mark on the images present in the tool Gallery you want to add to an album and press the button Crea in the upper right corner.
If the images you want to organize are not present in the tool Gallery Windows, import them by clicking on the button Import located on the home screen. After that, tap on the item From a folder o From a USB device, depending on the path where the photos of your interest are located. For example, if you select the first option, check the folders you want to include and click on Add folders.
Photo (macOS)
If you want to sort photos in album on Mac, you can take advantage of the default image management tool called Gallery. This free software can be used in conjunction with the functionality ICloud Photo Library that uploads the app's media gallery online Gallery macOS and iOS (storage space is free up to 5 GB, expandable for a fee starting from € 0,99 / month) and synchronizes it on all devices on which the user's Apple account is set.
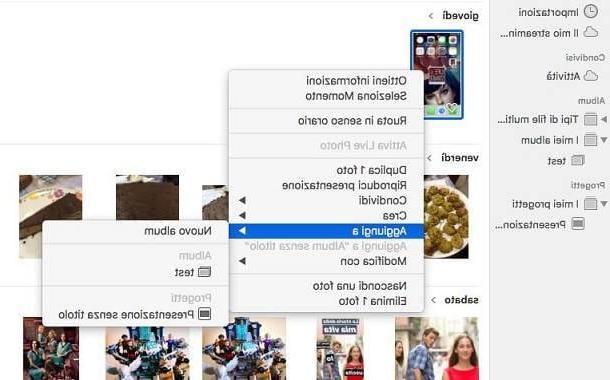
To take advantage of the Photos application, launch it from the Launchpad macOS and, in the menu bar, click on the items File> new album to create a new album on the spot. Once created, add the images in it by reaching the section Gallery on the left sidebar, by right clicking on the thumbnails of the images to be imported and selecting the items add to > [created album name] give the menu to compare.
Also, if you right-click on the album name in the Photos sidebar, you can change the order in which the images are displayed. In the context menu, in fact, by choosing the item Order and then one of the words on the screen (Sort by title, Sort by oldest, Sort by most recent) you can organize the display of images according to various criteria.
If the images you want to order are not yet in the app Gallery, you can easily import them into it. To do this, click on the items File> Import in the top menu and select the folder containing the images you want to import. Alternatively, "grab" the photos with the mouse and drag them into the Photos application window.
NameFix (Windows)
Namexif is a free software for Windows that is useful for organizing photos, as it renames them in sequence, taking into account the data EXIF (i.e. those metadata generated by digital cameras or smartphones that provide information such as the date or place a photo was taken).
To download it on your computer, connected to its home page, click on the button Download Now that you find in the center of the screen, wait for the file to download.exe and start the latter by double clicking, to start the installation. Then press in sequence on Yes, I Agree, Next, install e Close And that's it.
At this point, you can see the main window of the software on the screen; press on Next, Then add Files, to import images, or on Add Dir, to add an entire folder to it and click Next.
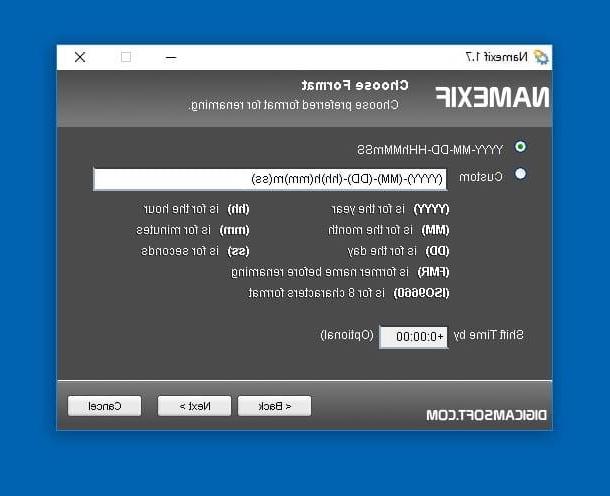
Now, indicate how you intend to rename the images: you can use the default system, which renames them taking into account the EXIF data (YYYY-MM-DD-HHhMMmSS), or you can put a check mark on the item Custom and choose a customized system, in which the parameters relating to the renaming must be entered manually (for example a name you have chosen). Before continuing, by clicking on Next and then Finish, also indicates whether to include information regarding the time a photo was taken (Shift Time by).
Other tools for sorting photos on a computer
If you intend to order photos on your computer, you can also use other programs available for Windows and macOS that allow you to view, manage and organize images.
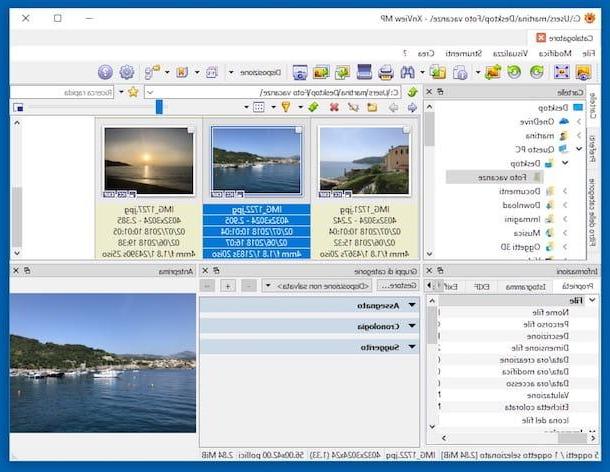
Among those I recommend there is the free program for Windows IrfanView or the free and multiplatform software XnView MP; I told you in more detail about how these solutions work in my guide on programs to organize photos.
There are, then, the File Manager included "standard" in Windows and macOS that allow you to organize "on the fly" the images in the folders, in order to speed up the identification and grouping in other folders.
File Explorer (Windows)
Su Windows you can sort the photos in a folder through the use of File Explorer, the default tool that allows you to view and organize files on your computer.
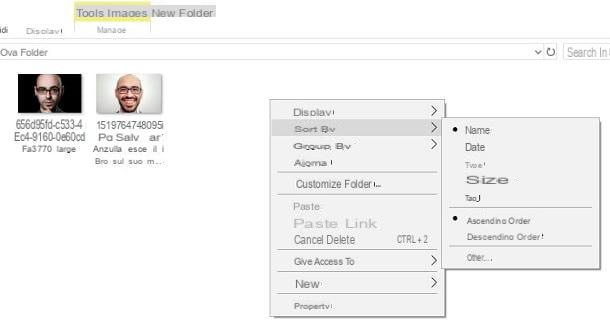
To start, open the album containing the photos you want to sort by double-clicking, in order to view the images contained within it. Then, right-click in a place in the folder where there are no items and, in the drop-down menu that you see on the screen, click on the item Sort by o Organize by.
Finally, click on one of the items relating to the ability to sort photos within the folder: Name, Date, Type, Size o Tag e Ascending order o Descending. To set an order other than those indicated, click on the item Other and, in section Choose details, put the check mark on one of the options you see, such as Sizes; then confirm the operation by pressing on OK.
If you want to organize the display of the images in a folder, right-click in an empty part of the same and, in the relative context menu, press on the item Show. Finally, click on one of the items you see on the screen: very large icons, large icons, which are medium, small icons, list, details panes o content.
Finder (macOS)
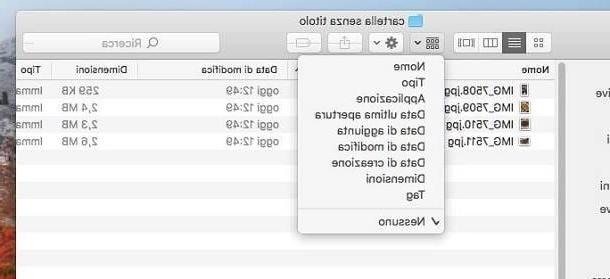
order pictures su Mac, you can use the default file management tool, the Finder.
To proceed, open the folder containing the photos to be organized and press the key with the squares symbol, to open the relevant context menu. Then choose one of the options on the screen (Name, Type, Application, Last opened date, Added date, Modified date, Created date, Size, Tag), to sort the images according to the selected parameter.
App to sort photos
Photos taken by a smartphone or tablet are automatically organized in order of shooting in the application that acts as the default media gallery (Gallery on iOS and Gallery o Gallery on Android). By acting through these or through third-party apps, however, it is possible to organize the images in albums. In the following lines I'll explain how to do it.
Media Gallery (Android)
Su Android, in most cases, the default application for managing multimedia elements, Gallery o Gallery, allows you to organize photos in albums.
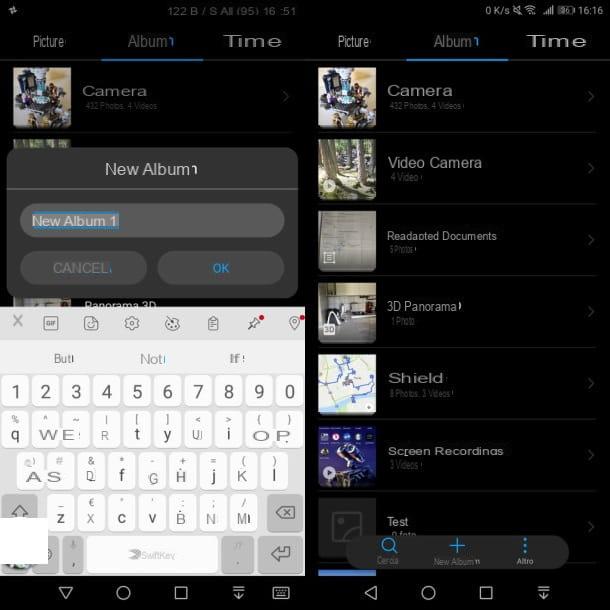
To do this, open the application that refers to the default media gallery of your device, by tapping its icon on the home screen. In my case, having a smartphone available Huawei Mate 10 Pro it is a question of tapping on the app called Gallery.
Once this is done, locate the section Album and press pulsating (+) New Album, indicate the title to give to the album and press on OK. Then import the photos you want to upload from the other automatically created albums by tapping on it to select them, press the symbol () and then tap on the item Copy o Move, depending on the operation you wish to perform.
Google Photo (Android / iOS)
If you intend to organize photos in albums via the app Google Gallery, which offers online backup of photos and videos with free and unlimited storage (for images and videos uploaded, respectively, at 16MP and 1080p). To upload images and videos at a higher resolution, however, the free storage space is 15 GB, expandable for a fee starting from € 1,99 / month.
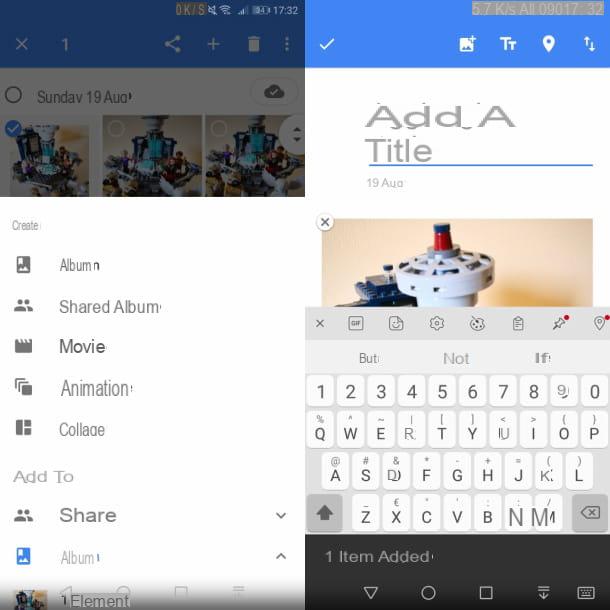
That said, to sort the photos in the album into the Google Photos (which is available for Android and iOS), start the app using its icon on the home screen. Now, if a photo is already present in this multimedia library, make a long tap on it in the section Gallery that you find located in the menu below.
Select any other photos by pressing on their thumbnails and press the button capacitor positive (+) lead located in the upper right corner. Then, in the relative context menu, click on Album, to create an album on the spot to give a name or to select one of the previously created albums, which are shown on the screen. I told you more about Google Photos in this guide of mine.
Photo (iOS)
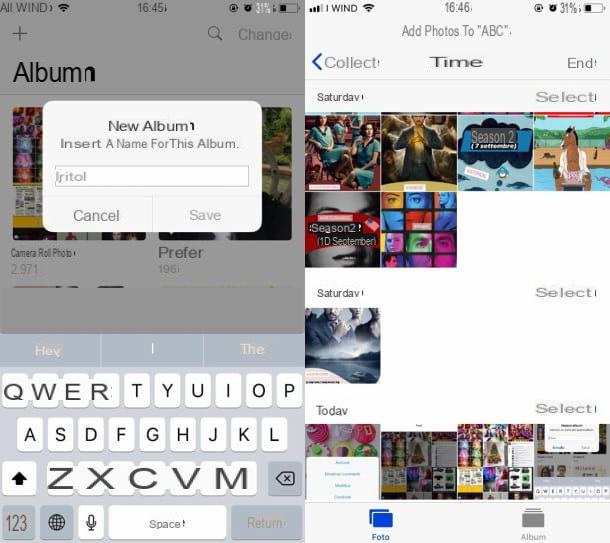
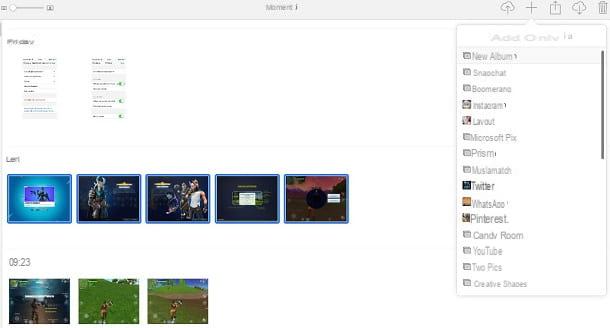
If you are using an iPhone or iPad, launch the app Gallery by tapping on its icon on the home screen. Then press on the menu item Album located at the bottom and then press the button capacitor positive (+) lead located at the top left. Now give a name to the album to create by typing it in the text field Title, and press on Save.
Subsequently, select the images to organize in the album, placing the check mark on them, and presses on the item end top right. The album you created will be in the section Album and the photos will also be visible directly in the section Gallery.
Online services on which to order photos
The most frequent questions I am asked about sorting photos have to do with the use of the most famous online tools, such as Facebook e Instagram. However, you can also organize your photos through the service Gallery iCloud and the website Google Photos. In the following lines I will talk about it in detail.
Unless set otherwise, photos uploaded to Facebook they are automatically sorted in the social network's multimedia gallery, in the section Gallery and in the album Uploads or in the one named Photos in which you are.
From computer
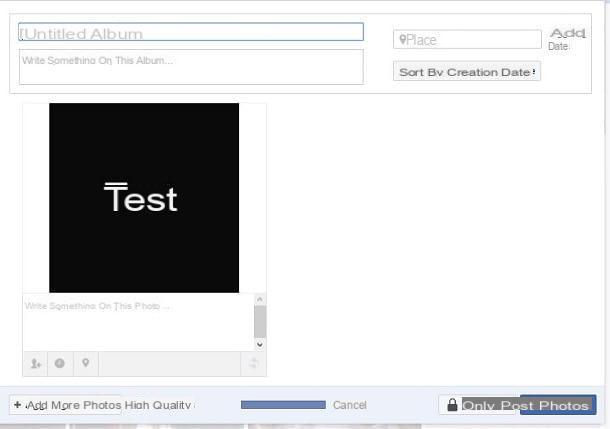
If you mean sort photos on Facebook, you can intervene to organize images not yet uploaded to Facebook into albums. To do it from computer connect to the official website of the social network to log in with your credentials. Then press on your name, to view your profile, click on the tab Gallery and press pulsating Create album, if you want to upload photos by creating an album on the spot in which to organize them.
Once the image has been imported and given a title to the album, press the button Post photos to share the album created with the privacy settings you have chosen (for example Friends).
If, on the other hand, you want to move previously uploaded photos, locate the pre-existing image in the Your photos section, click the icon with the pencil symbol located in the upper right corner and press on the item Move to another album. Then, in the next drop-down menu, indicate the album to move it to and confirm the operation using the button Move photos.
Give smartphone and tablet
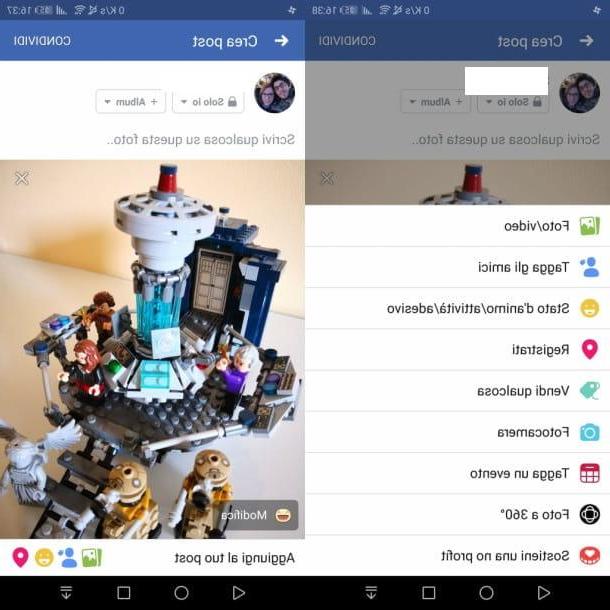
Using the application of Facebook for Android or iOS, you can first sort in albums of photos that have not yet been uploaded. To do this, click on the item What are you thinking about? located in the main menu of the social network, set the privacy of the photo you want to upload and sort in an album (for example Friends), tap on the item Photo / Video and, after selecting the image to import, press the button Album you see on the screen.
Alternatively, you can add the photos to a new album, using the wording Create album. In this case, it subsequently indicates the title of the album and set the privacy, then click on the button Save to create it.
Optionally, you can also add a photo to an album, directly via the section Gallery: in this case, choose the existing album on which you want to import a photo and press on the wording Add Photo / Video. Then select the thumbnail of the photos to import and press the button end.
If you intend to order the photos on Instagram you must first keep in mind that it is possible to do this only through the application of the photographic social network for Android and iOS.
To do this, start the app by tapping its icon on the home screen of the device you are using, in order to log in with your initials, then press the icon with the symbol of a little man located below, to view your profile. Now choose whether to view the images of the feed in the traditional way, or whether to activate the scrolling view, by tapping on the button with the symbol of a grid (usually the default view) or on the symbol of a square located alongside.
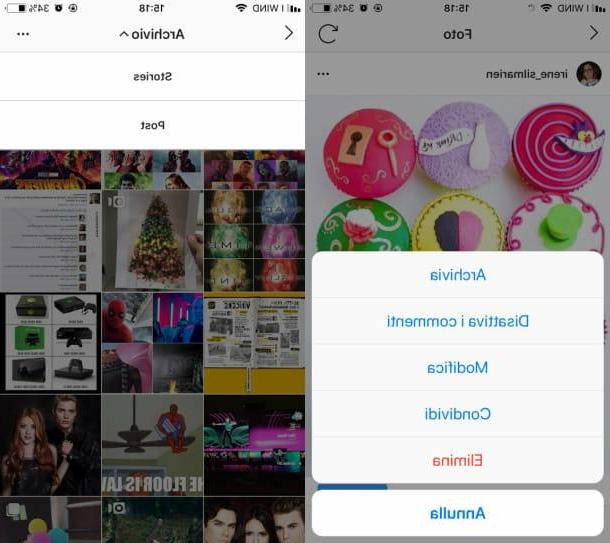
The only possibility that Instagram offers for organizing photos is archiving: to do this, tap on a photo to archive, press the icon with the symbol (...) located at the top right and, finally, press on the menu item Archive. To access archived images, press the icon with the dell'orology symbol located at the top left, tap on the item archive and then Post to view them. For more information on this Instagram feature, read my tutorial dedicated to the topic.
Google Photos
If you intend to organize photos in albums in Google Photos, you can also act through its official website. To sort the photos in the album in the Google Photos, log in to the service through your Google account and then follow the instructions set out in the previous paragraph, dedicated to the app for smartphones and tablets, whose operation is similar to the web panel.
However, if the images to be organized are not present inside Google Photos, before carrying out the operations I have indicated, you must upload them online by clicking on the button Charge, which you can see on the home screen of the service.
ICloud Photos
If you have enabled iCloud Photo Library Sync on your iOS device, I recommend that you log into the iCloud website with your Apple ID, so you can then click on the app Gallery and view the images synchronized with your device.
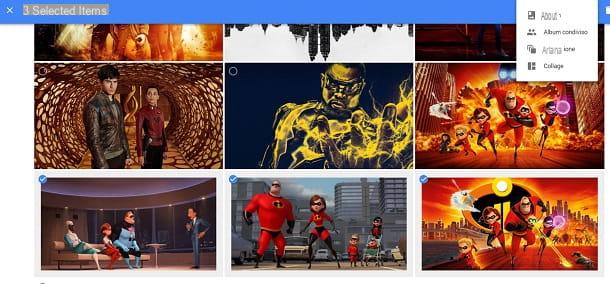
By acting in this way, you can easily sort the photos contained in its library into albums; to do this, put the check mark on the image to be organized (if you want to select more than one at the same time, press the button capacitor positive (+) lead which you can see appear in the right corner by moving the mouse over one of these multimedia elements); then in the drop-down menu that you see on the screen by tapping the button capacitor positive (+) lead, click on the item New Album to create an album on the spot or press on a caption that refers to a previously created album.
If the images you want to organize are not in the app Gallery iCloud, press the button with the speech bubble symbol located in the top bar, to import them from your computer.
How to order photos


