


Sooner or later all budding photographers try to photograph the Moon. When you have a good camera and the right lenses at your disposal, it's not that hard to do it. The speech, however, changes, and a lot, if you only have a smartphone at your disposal. Even in this case, however, it is possible to come up with interesting shots - not even minimally comparable to those that can be obtained with professional cameras, for obvious technical reasons - as long as you follow some precautions.
Are you wondering what these tricks are? Among other things, you have to carefully choose the right moment to capture the Moon, manually adjust the shooting parameters, follow some composition rules and possibly "enhance" the camera of your mobile phone with some lens suitable for the purpose. Even if the final quality of the shot will not be excellent, it will certainly be interesting at least to share it online on social networks (and not only).
What do you say? Would you like to deepen the subject and see in detail how to photograph the Moon with your cell phone? Yup? Optimal! So make yourself comfortable, take all the time you need to concentrate on reading the next paragraphs and, more importantly, try to follow the directions I am about to give you. I am convinced that, thanks to my "tips", you will be able to take home some interesting shots. I wish you good reading and, above all, have fun!
Choose the right moment to photograph the Moon with your mobile
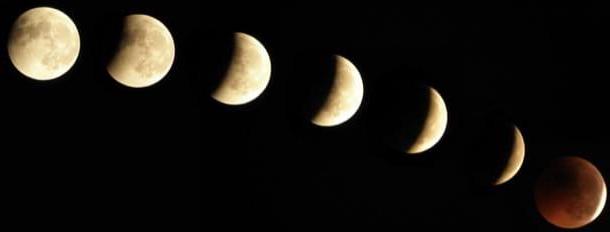
Before actually seeing how to photograph the Moon with your cell phone, it seems only right to say a few words on how choose the right time to take the shot. As I told you in the introduction of the article, the smartphone camera does not have the technical characteristics necessary to take quality shots of subjects that emit a lot of light (like in this case the Moon). This means that, if you want to try to capture some details, it is advisable to choose times when it is not very high in the sky and, at the same time, when sunlight is still present.
To follow the astronomical movements of the Moon and, therefore, have access to useful information regarding the moment in which it rises and sets and the phase in which it is located (e.g. waning, waxing, etc.), you can make use of applications such as Star Map (for Android and iOS) e Night Sky (for iOS), which I have already told you extensively in this other guide.
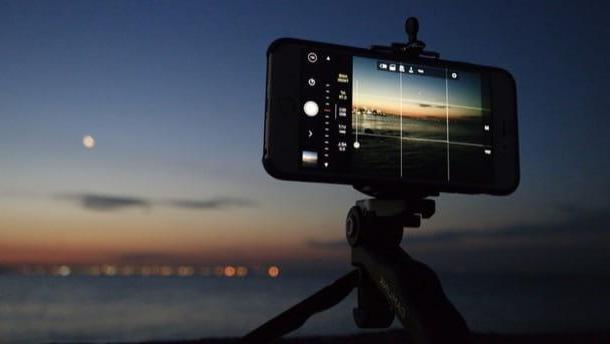
After choosing the moment of the day that seems most suitable for you to photograph the Moon with your smartphone, all you have to do is go to the location that seems most appropriate to the type of photography you want to make (for example a forest or the historic center. of your city) and start taking your photos by following the advice you find in the next chapters.
Of course, it seems obvious to me to tell you not to choose days when the sky is covered by clouds or when there is fog, as you would not be able to capture the main subject of your composition: the Moon, in fact!
Manually adjust the shooting parameters
Manually adjust the shooting parameters it can help you to better manage your mobile phone camera and, consequently, get more interesting photographs. Since the default applications for taking photos with smartphones hardly allow you to manually manage theISO,aperture opening and all other shooting parameters, you will have to resort to third-party solutions to succeed: if you have a device Android, I recommend the excellent Camera FV-5 which is free. If you have a iPhoneinstead, I suggest you try ProCam or Halide (which cost 6,99 euros each).
Regardless of the apps you decide to use for your purpose, I suggest that you take into account the factors listed below regarding the parameters you will need to manually adjust.
- ISO sensitivity - this value indicates the degree of amplification of the electrical signal sent to the sensor cells. The more this value is raised, the brighter the photos will be. Since increasing the ISO the sensor must take an extra "effort" to capture the light, I advise you not to increase it too much, otherwise the photos will have an unsightly "grain" effect (the so-called noise).
- Shutter speed - by increasing the shutter speed, you can reduce the shutter speed and, consequently, freeze the scene avoiding blur or micro-blur (but be careful not to overdo it, because by increasing the shutter speed too much you risk getting one underexposed shot). By decreasing the shutter speed, however, you will increase the shutter speed and, consequently, more light will enter the lens, making the shot brighter (even in this case, however, do not overdo it because you risk getting an overexposed photo and / or move).
- Maximum aperture of the diaphragm - this value indicates the amount of light passing through the lens, which is measured in F-stop (Eg. f / 2.8, f / 4.5, etc.). The lower this value is, the more light will enter the lens. It must be said, however, that many apps on the stores do not give the possibility to manually adjust the aperture.
In summary, then, to get quality photos of the Moon, you have to increase the ISO a little to get a brighter photo (if you're shooting in the dark), open the aperture or increase the shutter speed. Obviously, try to balance these three parameters by adjusting to the light conditions of the environment in which you are, in order to have a photo correctly exposed.
Compose the photo
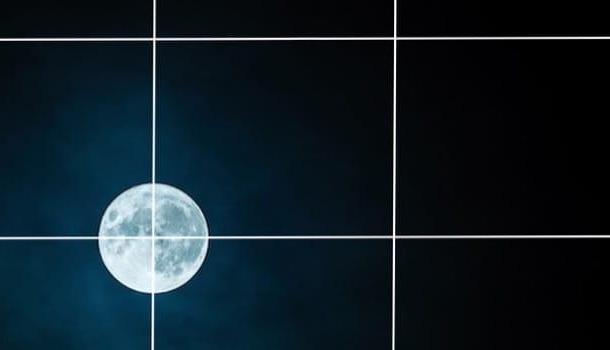
Compose the photo it is one of the most important and delicate shooting phases. Since you will hardly be able to photograph the Moon in detail, I recommend that you "position" it in the composition trying to make it stand out at its best. How can you do it? Following the very famous rule of thirds.
If you have not heard of it (which seems somewhat strange to me), know that this "basic" rule of photography helps to position the main subject of the photo (in your case the Moon) in the point where it is best highlighted. To do this, you need to split the image into one imaginary grid consisting of 9 rectangles: instead of taking the picture by placing the subject in the central rectangle, it is advisable to place it in one of the points of intersection of the grill.
Perhaps it will seem like an insignificant detail, but I guarantee you that by trying to use this very simple composition technique, you will give a more interesting touch to your shots and you will develop a more attentive eye to detail, learning to compose the photo following a very specific criterion, without leaving nothing to chance.
Do not use digital zoom
When you are about to photograph the Moon, it is almost natural to use the zoom to photograph the most significant details of the satellite. Do you want a tip? Do not use digital zoom for no reason in the world! If you do not know, the digital zoom, unlike the optical one (which has only been implemented on a few latest generation smartphones through a "game" of the lenses of the rear cameras of the latter), is simply a digital enlargement of the photo.
What does this mean? That with digital zoom the frame is digitally zoomed and, therefore, graininess due to the loss of image quality becomes visible. Hope this is enough to discourage you from using it to photograph the Moon.
Shoot in HDR mode

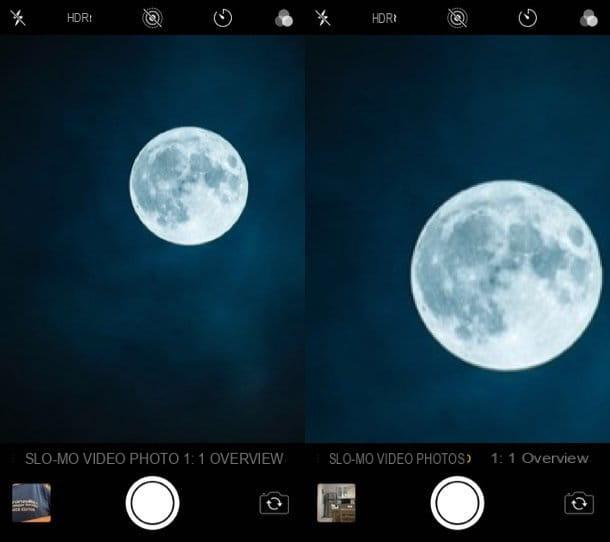
Shoot with the mode HDR active can help you get a better shot. HDR or High Dynamic Range, in fact, is a technique that allows you to increase the level of details displayed in a photo by combining versions of the same image that have various degrees of brightness and exposure (in the photo at the beginning of the chapter you will find a striking example of an image without and with HDR effect). Let me tell you how to use it on Android and iPhone.
To take HDR photos on Android, after starting the app Camera of your smartphone, press the icon ofgear present on its main screen and, in the menu that opens, locate the item HDR o High Dynamic Range and move up ON the corresponding switch lever (on other devices the procedure may be slightly different, depending on the brand, model and version of Android installed). Up iPhoneinstead, after starting the app Camera, tap on the item HDR located at the top and, in the menu that opens, presses on the item Yes.
If you want more information on the application of the HDR effect, I suggest you read the guide I dedicated to the subject.
Purchase additional smartphone lenses
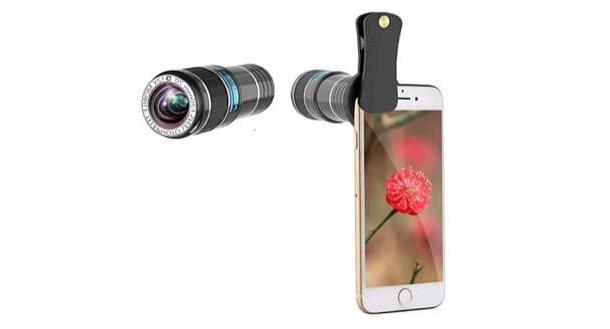
To make up for the technical shortcomings of your mobile phone camera, you can buy additional smartphone lenses, so that you have more shooting possibilities. Some of these lenses, in fact, allow you to have a wide angle and a telephoto lens which, respectively, can be useful for capturing a larger portion of the landscape in which to "embed" the Moon (if you don't want to shoot it up close) or to try to photograph it. in detail (which is not easy to do with a smartphone).
Clearly, do not expect who knows what quality from these accessories: they are "toys" that are not even remotely comparable to the interchangeable lenses of DSLRs and mirrorless cameras, but if you want to try to experience some of them, go ahead. You can buy them with a few tens of euros both in the most well-stocked electronics stores and in online stores, such as Amazon.
How to photograph the Moon with your cellphone


