


Have you accidentally deleted some photos that were present on your digital camera's SD card? Trying to "clean" the microSD of your smartphone, have you accidentally deleted some photos that you shouldn't have deleted? Don't despair, not yet at least!
If the memory area where your images were stored has not yet been overwritten by other data, you have a good chance of being able to recover your photos. All you have to do is download one of the software I am about to recommend, follow the instructions below and… cross your fingers so that the photos you are interested in are still recoverable!
Do you wonder how much it costs to carry out an operation like this? Don't worry, you won't have to spend a penny. Most of the solutions I'm about to tell you are totally free and very simple to use. So, can we know that you are still standing there? Find out now how to recover deleted photos from SD and put this guide into practice, every second lost takes you further and further away from the possibility of restoring the images you care so much about.
PhotoRec (Windows / Mac / Linux)
PhotoRec is the best software for recover deleted photos from SD free of charge. It is compatible with Windows, macOS and Linux and, in terms of effectiveness, it has absolutely nothing to envy to the most noble paid solutions. To download it to your PC, connect to the TestDisk website (another free application for recovering data and partitions with which it comes) and click on the item Windows.
When the download is complete, open the zip package that contains the program, extract the contents in any folder and start the executable qphotorec_win.exe. In the window that opens, select the unit relating to the SD card from the appropriate drop-down menu (the one located at the top); then click on the partition from which you intend to recover the photos (eg. 1. FAT32) and put the check mark next to the entry corresponding to the file system with which the drive is formatted (eg. FAT / NTFS / HFS + / ReiferFS). Make sure the item is selected at the bottom right Free and go ahead with the procedure.
Now you need to click on the button File formats and select all the types of files that you intend to recover with PhotoRec: since these are photos, I recommend that you leave the check mark only on JPG, PNG e RAW but you can freely choose the types of files that interest you. To remove the check from all the items selected by default in the program, click on the button Reset; to save your preferences, click on OK.
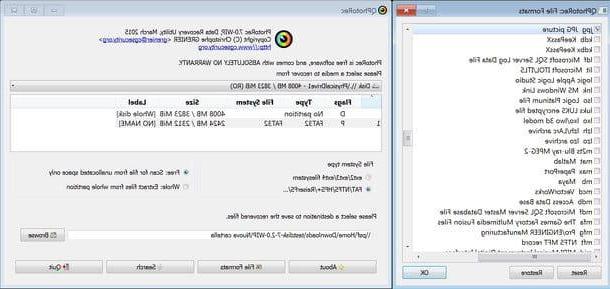
Per conclusdere, pigia sul pulsating KATEGORIEN, choose the folder in which to save the restored photos and click on Search to start searching and retrieving all available images. The duration of the operation will vary depending on the amount of data to be processed. In case you are unable to recover the photos that interest you, try to repeat the operation by placing the check mark next to the item Whole instead of on Free (bottom right).
PhotoRec can also be run from the command line: just run the executable photorec_win.exe, select the SD card drive, choose which partition to scan, confirm the file system used, the scan mode (Free o Whole) and indicate the folder in which to save the restored photos (by pressing C). On Mac you can only use this version. To learn more about how it works, follow the instructions on this web page.
Recuva (Windows)
If PhotoRec doesn't meet your expectations, try Recuva. It is a great data recovery software available exclusively for Windows. It is produced by the same company as CCleaner (famous application for system maintenance) and can also be used in a portable version, which does not require tedious installations to be used.
To download the portable version of Recuva (which is the one I recommend you try), connect to the program's website and click on the button Download placed under the heading Recuva – Portable. Then open the zip archive you just downloaded (rcsetupxx.zip), extract the contents to a folder of your choice and run the executable recava64.exe (recava.exe if you are using a 32-bit operating system).
Now, if the Recuva interface appears to be in English, click on the "X" at the top right, press the button Options and select the item cittàno (cityn) from the drop-down menu for choosing the language in order to translate it into British. Next, restart the program and click on the button NEXT to start the data recovery procedure.
In the window that opens, choose the type of file you intend to recover from the SD card (in your case images, but you can also choose videos, documents, etc.), click on the button NEXT and metti il segno di spunta accanto alla voce Your multimedia card or iPod to direct the scan to removable devices only.
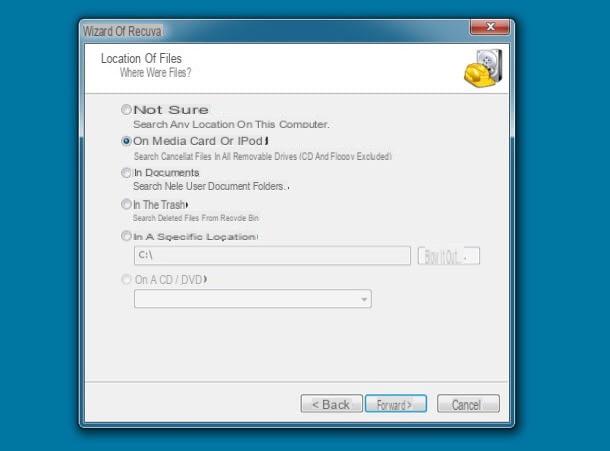
Finally, put the check mark next to the item Enable deep scan, presses the button starts and wait for the list of all the files that can be recovered from the memory card to be shown.
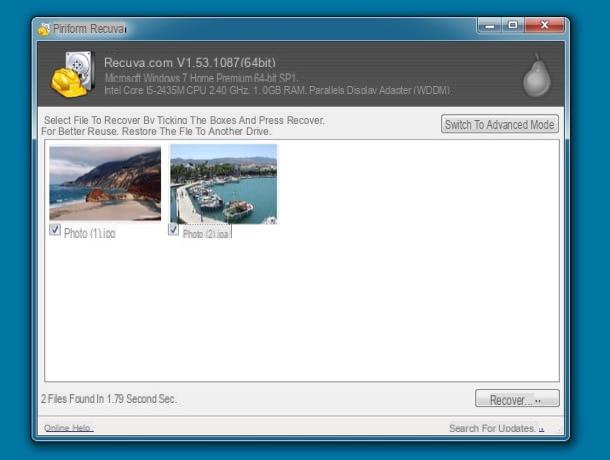
The files detected by Recuva are shown in the form of thumbnails: those with full thumbnails can be recovered without problems, those with damaged thumbnails can be recovered but are probably damaged, while those with completely white thumbnails cannot be recovered.
Then put the check mark next to the names of the images you want to recover, press the button Recover located at the bottom right and select the folder to export the files.
Disk Drill (Mac)
If you use a Mac, I highly recommend you try Disk Drill, one of the most complete data recovery software in the Mac field. In reality there is also a version for Windows, but since it is not a free program, in the PC field you I recommend trying PhotoRec or Recuva first.
Yes, unfortunately you read that right! Disk Drill is not free, it costs 79 euros, but it is available in a free trial version that allows you to find out which files can be recovered and allows you to preview them. To download it to your computer, connect to the Disk Drill website and click on the button Scarica free. Next, open the package dmg which contains Disk Drill, copy the program icon to the folder Applications macOS and launch it.
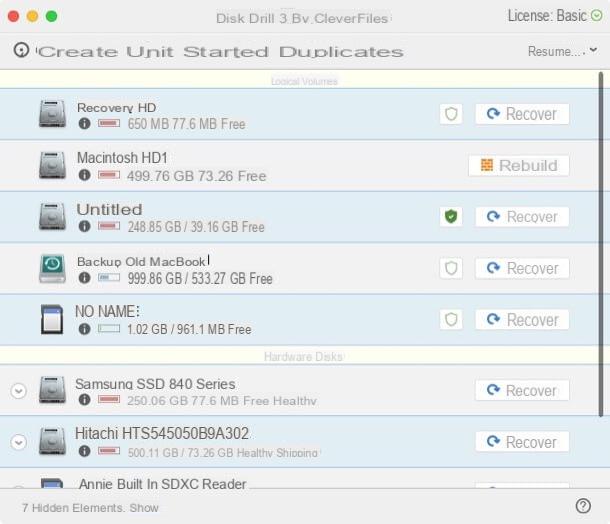
In the window that opens, click on the button Recover located next to the icon of the SD card, select the voice Images from the drop-down menu that appears at the top and wait patiently for the scan to be completed.
After the scan is complete, expand the folder Files found e clicca sull'icona dell 'eye which is next to the name of the image you intend to recover: if you can see its preview, it means that the file is still intact and therefore can be recovered.
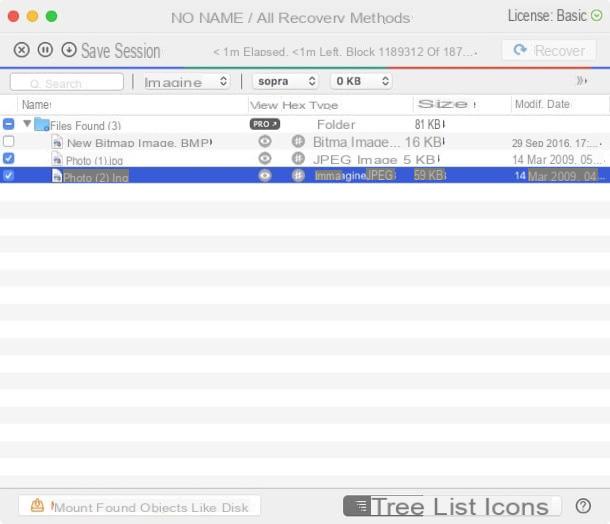
To recover deleted files from the SD (using the full version of Disk Drill), you have to put the check mark next to their names and you have to press the button Recover which is located at the top right.
DiskDigger (Android)
If you have an Android smartphone or tablet that reads microSD cards, you have accidentally deleted photos from them and now you want to recover them, you can rely on DiskDigger. It is one of the best free apps to restore photos from Android devices and it is very easy to use, the only drawback - if we want to call it that - is that it can only operate on terminals unlocked via the root procedure.
After downloading it from the Google Play Store, start it, press the button Conceded to authorize it to run with root permissions and reply No, thanks to the proposal to switch to the Pro version of the application, which is paid and allows you to recover other types of files in addition to photos.
Next, select the microSD from which to recover photos, put the check mark next to the option JPG (select option PNG only if you want to recover the screenshots and photos downloaded from the Internet) and presses the button OK to start scanning the card.
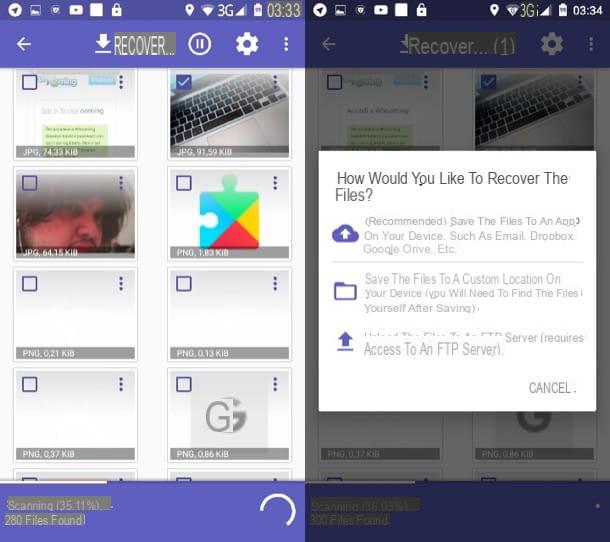
At the end of the process, put the check next to the thumbnails of the images to be recovered, press the button Recover located at the top right and choose whether to export the photos to a cloud storage service (or via email) by selecting the nuvola or whether to save them locally in a folder on the phone by selecting, precisely, the icon of folder.
To get more details on how DiskDigger works and discover other apps that allow you to recover deleted photos from your mobile, consult my guide on the subject.
How to recover deleted photos from SD


