Although you still don't have a very good relationship with the computer, you have been entrusted with the task of digitizing some photographs. This means that for one of the very first times in your life you have to use a scanner and you have to do it without making mistakes. An impossible mission? But no, far from it!
Scanning a photograph is very easy, much simpler than what you imagine. All you have to do is check the status of the scanner (or printer, if you have a multifunction printer with integrated scanner), insert the photo to be scanned into the device and press a button. Generally you do not need to install any programs, just use the tools included "standard" in Windows and macOS.
Just think: if you want, you can even avoid using the PC. If you have a smartphone equipped with a good quality camera, you can use apps that transform the smartphone into a scanner and intelligently optimize the photos framed with the phone by correcting their perspective, colors and other properties. If you want to know more and want to learn how to scan a photo with your PC or your mobile phone, keep reading: you will find everything explained below.
Scan photos from your computer
Let's start with the more “traditional” procedure, the one that involves connecting a scanner - or a multifunction printer - to the computer and using the tools included “as standard” in Windows and macOS.
Preliminary operation
If you want to learn how to scan a photo, you must first make sure that your scanner is properly connected and installed on your PC. Then check that the device is connected to the computer via USB cable or via Wi-Fi network (in this case there should be a light on the front of the scanner or multifunction printer with the Wi-Fi icon next to it) and check that the device is installed correctly.
To verify the correct installation of the scanner or multifunction printer on your computer, click on the button Home Windows (the flag icon located in the lower left corner of the screen), search for the term "Printers" and select the item Devices and printers from the search results. If in the screen that opens there is the name of your scanner and / or your printer, there should not be the problem: the device is already configured and the PC should recognize it without problems.

To perform the same check on a Mac, you open System preference (the gear icon located in the Dock bar) and select the item Printers and scanners from the window that opens. If the next screen shows the name of the scanner or multifunction printer you intend to use, no problem, you can move on to the next step of the guide. Otherwise you need to install the device drivers.
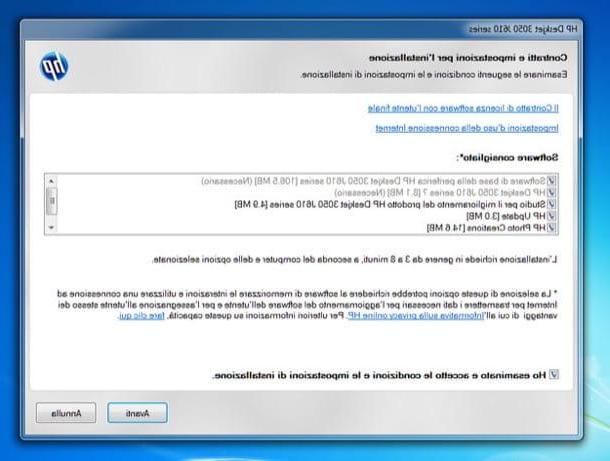
If the scanner and / or printer is not installed, download the appropriate ones driver, install them on your computer and, when prompted, connect the device to your PC via USB cable. The procedure to follow should be quite simple, in any case you can help you with the instructions contained in my tutorial on how to connect a printer to your computer. If you are using a Mac, you should be able to install the printer or scanner simply by connecting it to the computer via USB cable and waiting for macOS to download the software necessary for its recognition.
Scan photos on Windows
Now you are really ready to scan a photo with your PC. Then click on the button Home Windows (the flag icon located in the lower left corner of the screen), search for the term "scanner" in the menu that opens and select the item Windows Fax and Scan from the search results.
Nella finestra che si apre, click on your button New digitization (top left), select the scanner you want to use (this step is only necessary if multiple scanners are installed on the system) and adjust all settings for your scan.
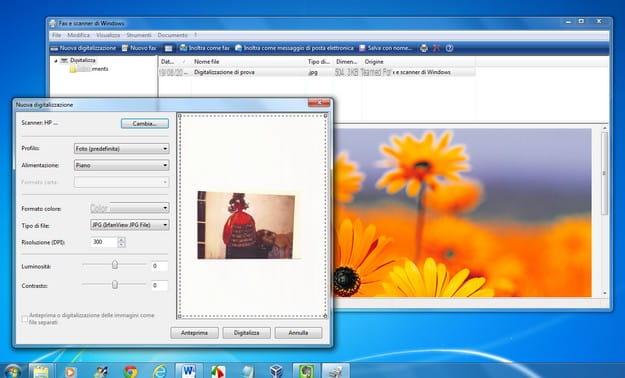
So make sure that in the drop-down menu Profile sia selezionata l'opzione Photo (default), set the type of photo you want to scan from the drop-down menu Color format (Color for color photos or Greyscale for an artistic or antique black and white photo) and adjust the format and quality of the image you want to obtain using, respectively, the fields File type (eg. JPG, BMP, PNG, etc.) e DPI (300 is the optimal average value, the higher the DPI the bigger and heavier the image obtained will be).
Once you have adjusted all the scan settings, click on the button Preview to get a preview of the scanned photo and, if you are satisfied with the result, click on Digitize to complete the scan. The image is automatically saved in the folder Documents> Scanned documents.
Scan photos on Mac
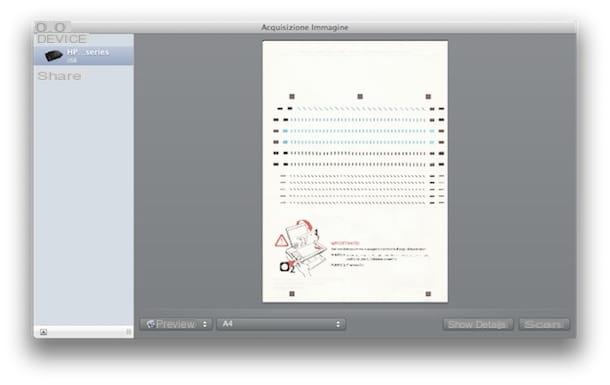
I use a Mac? No problem. You can scan photos and documents using Acquisition Image: a free application included “standard” in all versions of macOS. You can find it easily by opening the Lacunhpad and clicking on the folder Other.
Once the Image Capture utility has started, to start a scan with the Mac, all you have to do is select the name of the scanner or printer from the left sidebar, adjust the settings of the output files by pressing the button More details and start digitizing the photos by clicking the button Scan which is located at the bottom right.
By default, photos scanned with the macOS Image Capture utility are saved in the folder Images Mac as JPG format files.
If any of the steps are not clear to you, you can find out more details on how to scan with Mac in my tutorial dedicated to the topic.
Scan photos from your smartphone
Do you have a mid-range smartphone equipped with a good quality camera? Then I'll give you a tip: don't waste time configuring scanners and multifunction printers and digitize your photos directly with your mobile phone.
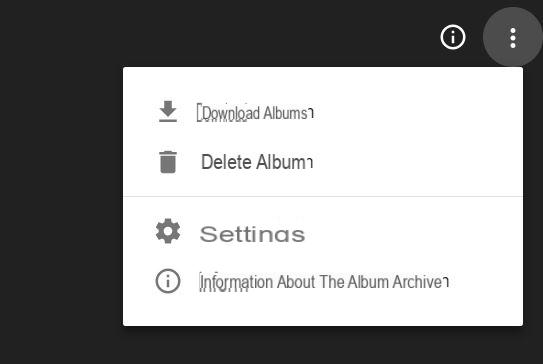
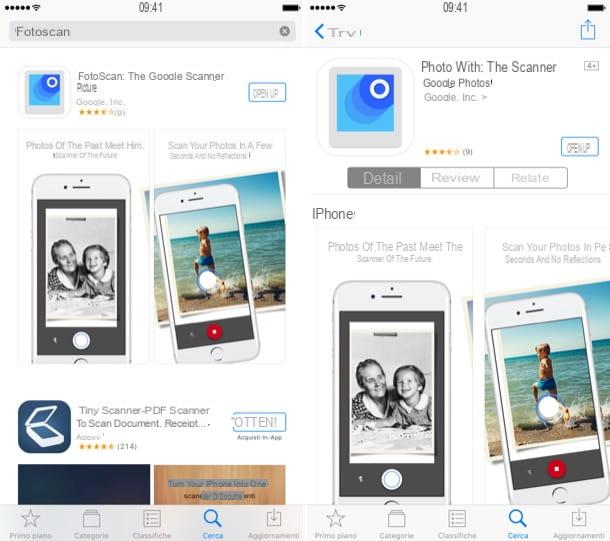
There are lots of apps to scan photos with your smartphone, the one I recommend you use is FotoScan from Google, which is completely free and is compatible with both Android and iPhone smartphones. It integrates perfectly with Google Photos, the famous Google cloud storage service that allows you to store photos online, but is not strictly related to the latter (you can also use it without going through Google Photos, saving the scanned images directly in the Android or iOS roll).
To download Google's FotoScan, open your smartphone's store (Google Play Store your android or App Store your iPhone), close PhotoScan in the latter, select the application icon from the search results and press the button to start the installation of the latter on your device.
When installation is complete, open FotoScan, follow the brief initial tutorial of the application and press the button Start Scan to start digitizing your photos. The process of digitizing the photos is really simple: all you have to do is frame the photo, press on white button located at the bottom center and move the hoops that appears in the center of the screen on four circles that appear in the corners of the image.
So wait a few moments for the image to be processed, press on his miniature that appears at the bottom right and choose if adjust its angles pressing the appropriate button or whether to save it as it is in the Android or iOS roll by pressing first on up left arrow and then on the button Save everything.
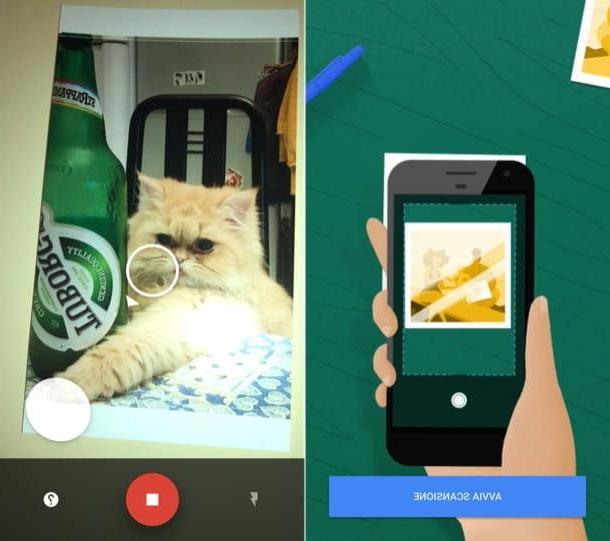
For good results, take the photo in a well-lit environment and avoid using the flash on the photo to be scanned. On iPhone, to allow FotoScan to work correctly, you must authorize the application to access the iOS camera roll.
Portable scanners
In conclusion, I would like to point out that there are also gods portable scanners, generally very inexpensive, which allow you to scan documents and photos without using a PC. They run on battery and save scanned images directly to a memory card to be inserted into them. In my buying guide dedicated to portable scanners you will find all the information you need. Below you can also find some of the best portable scanners that you can currently buy online.
See offer on Amazon See offer on Amazon How to scan a photo