


When you upload your photos to Facebook, you are always in a hurry. This doesn't allow you to organize them properly and now you find yourself with more chaotic photo albums than ever. Well, don't you think it would be nice to put them in place and rearrange them following a logical sense, so as not to force your friends to extricate themselves from the usual tide of randomly displayed shots?
Yes, I know, you have not yet had the time to "study" all the Facebook settings well and you do not know how to order the photos uploaded to your profile, but rest assured because it takes very little to learn how to do such a thing. Come on, don't wait any longer! Take a few minutes of free time and follow my directions on how to order photos on facebook: your friends will be grateful to you for life!
So, may I know what are you still doing standing there? Courage: make yourself comfortable, take all the time you need to concentrate on reading the next lines and, above all, put into practice the "tips" I am about to give you. There is nothing left for me to do, except wish you good reading and, above all, have fun!
How to sort photos on Facebook on smartphones and tablets
Let's see, first of all, how to order photos on Facebook on smartphones and tablets since, in all probability, you too will be among the users who usually access the most famous social network in the world from mobile.
Android
If you use Facebook on a device Android, to order the photos, you must log in to your account through the official social network app, go to the section dedicated to photos and order them using the function that allows you to create and manage your own albums. Let me explain how to proceed in more detail.
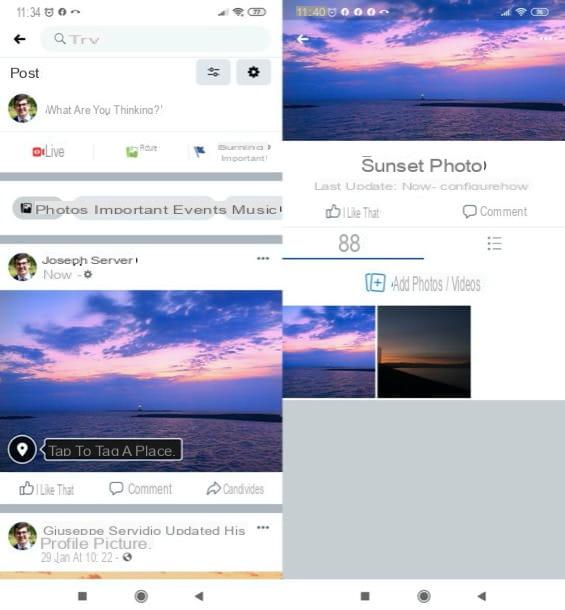
To begin with, start the official Facebook app for Android and, if you haven't already done so, log in to your account. Next, tap the button (≡) located in the upper right corner of the screen and select the you don't know, so you can go directly to your profile. Now, scroll the displayed screen a bit and then press the button Gallery, in order to access the section where the photos you have published on Facebook are grouped.
In the opened screen, presses on the card Album, award-winning capacitor positive (+) lead located at the entry Create album, indicates the name of the album, its eventual Description and the settings of the privacy of the same and, finally, press on the item Crea, to complete its creation. To add photos to the newly created album, all you have to do is press the button Add photos / videos and upload the shots of your interest.
To remove photos from an album, instead, go to the screen Album following the directions I gave you just now, tap on album name of your interest, press onpreview of the photo to be removed and, after pressing the button depicting i three vertical dots at the top right, select the item Delete photos And that's it.
If, on the other hand, you intend to delete an entire photo album (as long as it is not one of the default Facebook albums, such as those containing profile and cover photos), after pressing the album name from the screen Album and having tapped on the symbol of three horizontal dots, presses on the wording Delete per due turn consecutive.
You wonder if it's possible change the order of photos within albums? The answer, unfortunately, is negative: the Facebook app does not allow you to do this; however you can succeed in this intent from computer or by visiting Facebook from the browser of your device and activating the desktop mode on it (in Chromefor example, just press the button (⋮) and touch the item Desktop site in the menu that opens). Find more details in the dedicated chapter of this guide.
iOS / iPadOS
If you use the Facebook app for iOS e iPadOS, you have to follow more or less the same steps that I showed you in the chapter on Android: log into your account, move to the section dedicated to photos and order them using the feature that allows you to create and manage photo albums.
After logging in to Facebook from its official app for iOS / iPadOS, tap the button (≡) located at the bottom right of the screen and presses on you don't know, in order to go to your profile. At this point, lightly scroll the displayed screen and then press the button Gallery (your iOS) or See all photos (your iPadOS).
In the screen that opened, tap on the tab Album located at the top right, presses the button capacitor positive (+) lead placed in correspondence with the wording Create album, specify in the appropriate text fields the name of the album, his Description (optional) and the settings of the privacy to assign to the same and, when you are ready to do so, press on the item Save, located at the top right, to complete its creation. To insert photos in the newly created album, then press the button Add photos / videos and upload the photos of your interest.
To remove a shot from an album, however, after going to the screen Album, do tap sul album name of your interest, presses onpreview of the photo to be deleted and, after pressing the button depicting i three horizontal dots located at the top right (if you don't see it, tap on the photo), select the item Delete photos and confirm the operation by tapping on the item Delete.
If, on the other hand, you want to delete an entire photo album, after going to the section Album and have selected the album name of your interest, presses on the symbol of three horizontal dots, select the voice Delete album and confirm your choice by tapping the button Delete present in the box that appeared on the screen. Please note that some albums, such as profile and cover pictures, cannot be deleted.
The Facebook app for iOS / iPadOS does not have the for function either change the order of photos within albums. To do this you can act from computer or visit Facebook from the browser of your device by activating the desktop mode in the latter (in Safari just press the button AA located at the top left of the address bar and touch the item Request desktop site in the menu that opens). Find more details in the dedicated chapter of this guide.
How to sort photos on Facebook on PC
Now is the time to see how to order photos on facebook acting as a PC. Also in this case, I will show you how to proceed using the social network function that allows you to create and manage your own photo albums.
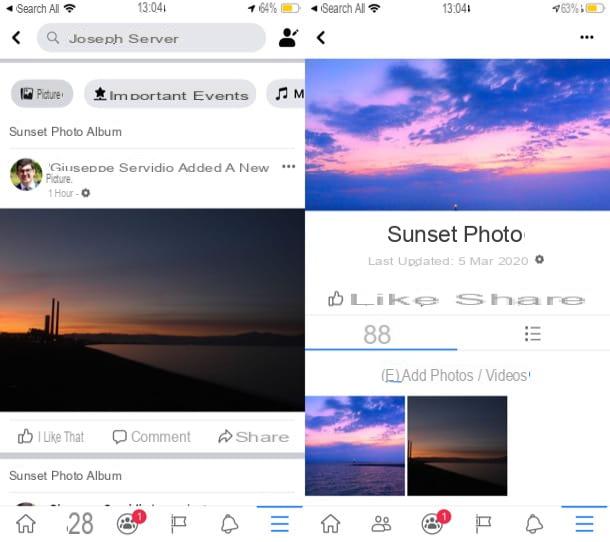
After logging into Facebook from its home page, click on the you don't know located at the top of the page, in order to go directly to your profile. Once this is done, click on the tab Gallery, which is placed immediately below the cover image.
Next, click on the tab Album present in the box Gallery and proceed as you like.
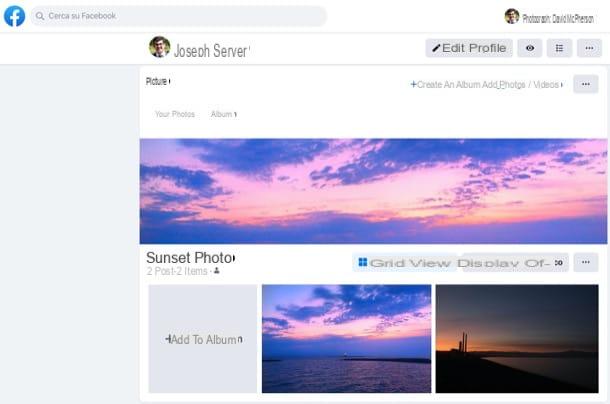
If, for example, you want change the display order of the photos in the album, award-winning Modification located at the top right, drag the boxes of the various photos in the order you prefer and press on Save (top right), to save the changes.
Please note that this procedure is not feasible for all albums (e.g. it is not possible to change the order of Profile pictures). Furthermore, it seems that new versions of the Facebook design that, at the time of writing, are being tested on some selected accounts, no longer provide the possibility to change the order of the photos in the albums: I will update the tutorial as soon as they are there. clearer information about it.
Now let's move on to the other album organization functions. If you want to create an album, click on the button (+) Create an album and, on the page that opens, fill in the fields Album name e Description (optional), in order to assign a name and description to the album. After selecting the level of privacy of the same, using the appropriate button located at the bottom (on the left), click on the blue button Public, so as to complete the creation of the same.
To insert photos in the album, however, you have to click on the button Add photos / videos and select the photos you want to import into the album. If you need to delete a photo from an album, instead, after going to the section Album of your profile following the instructions I have just given you, click on the album name of your interest, click on the button depicting i three horizontal dots which is located on the right and select the item Edit album.
On the page that opens, click on (X) placed in the upper right corner of the photo you wish to remove from the album and confirm the operation by replying Delete to the question Are you sure you want to delete this photo?, present in the box Delete photos that appeared on the screen.
To delete an entire album, however, after clicking on album name of your interest (in the section Album profile), click the i symbol three horizontal dots, select the voice Delete album and confirm the operation by clicking on the button Delete album present in the opened box. I want to remind you that some albums, such as those related to profile and cover pictures, for obvious reasons cannot be deleted.
How to sort photos on Facebook


