


When you're not an expert photographer, it's easy to make mistakes and take photos that are far from perfect. In short, to err human ... but I must say that sometimes you surpass yourself! Take for example the photos you took on your last trip abroad… they are almost all wrong!
Fortunately for you, it exists Photoshop which, within a few clicks, allows you to fix even the less successful photos. By the way, how about we catch the ball and see right away how to straighten a photo with Photoshop? I have a feeling that such a guide can come in handy! In the next paragraphs I will explain how to proceed both from the "classic" version of the program, the one for Windows and macOS, and from its online variant and through some of its official apps for smartphones and tablets.
Since you're ready to get started, I'd say don't waste any more valuable time chatting and get right into this tutorial right away. Strength and courage: make yourself comfortable, take all the time you need to concentrate on reading the next lines and, above all, try to put into practice the instructions I will give you. I wish you happy reading and I wish you a big good luck for everything!
How to straighten a photo with Photoshop on PC
If you want to learn how to straighten a photo with Photoshop on PC or on Mac, you must first start the program, import the photo you intend to straighten into it and use some useful functions for this purpose. Find everything explained in detail below.
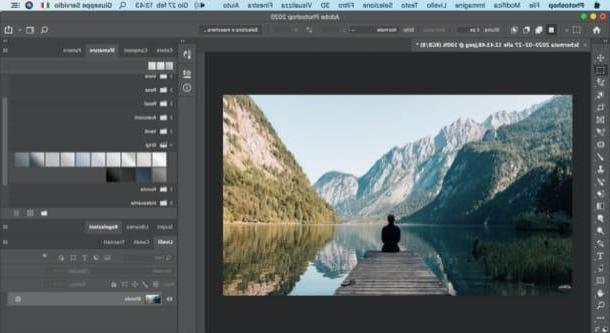
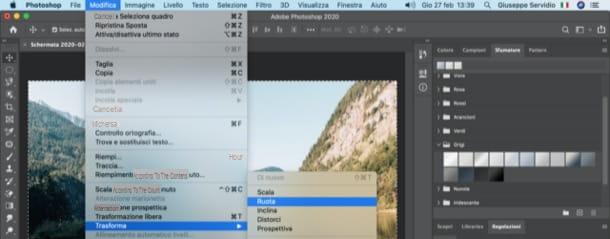
First, go to the menu File> Open, top left, to import the photo of your interest into Photoshop (or drag it directly into the main program window). Once the image to be edited is open, press the key combination Ctrl + A (your Windows) or cmd + a (on macOS), to select it entirely, and go to the menu Edit> Transform Photoshop to operate the function Wheel.
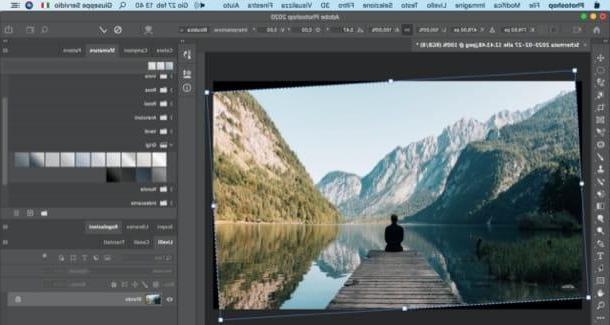
Position yourself, now, with the mouse pointer on one of the corners of the photo and, when you see one appear black dart instead of the pointer, hold down the left mouse button and move the photo up or down to rotate it clockwise or counterclockwise.
When you believe that you have achieved the right sense of direction and have obtained a straight photo, click on the black check mark top right. This way, the changes made to the image will be applied instantly.
Now you have managed to straighten the imported shot in Photoshop, but you have almost certainly obtained an image with very annoying black or white corners. To eliminate them, you have to give up a few pieces of your photo, cropping it, so that the “empty” corners are excluded.
To do this, select it rectangular marquee tool from the software toolbar (the one located on the left) and “draw” with the mouse a selection that includes the center of the image without the white or black corners.
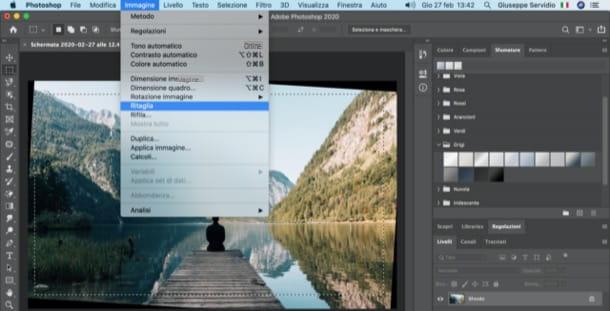
When the operation is complete, select with the mouse and move the selection you just created, to better center it. When you are satisfied with the result, go to the menu Image> Crop Photoshop, to crop your photo and thus eliminate the "empty" corners.
Mission accomplished! Now you just have to save your straightened image by selecting the item Save with name from the menu Fillet Photoshop, and that's it. Happy?
How to straighten a photo with Photoshop online
You haven't downloaded Adobe's world-famous photo editing software to your computer yet and would like to know if it's possible straighten a photo with Photoshop online, or with Photoshop Express Editor? Yes, of course! Before explaining how to proceed, however, let me tell you that Photoshop Express Editor requires the use of Adobe Flash Player and only allows you to edit images in JPEG format.
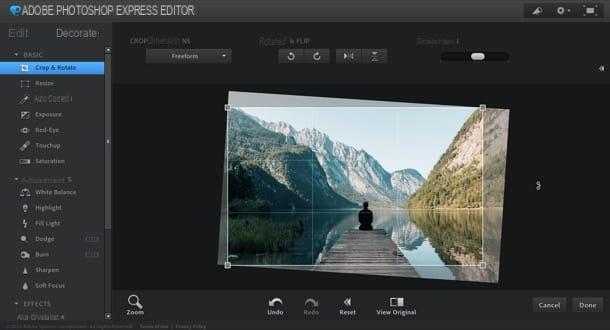
To take advantage of Adobe's online service, the first thing you need to do is go to the main page of Photoshop Express Editor and click on the buttons UPLOAD PHOTO e Upload, in order to select the image you want to import into the Adobe web application. Once this is done, select (if necessary) the tab Edit at the top left and, after opening the menu if necessary Basic located on the left, click on the item Crop & Rotate.
Now, place the mouse cursor on one of the four corners or on one of the four sides of the image. As you can see, an icon depicting two darts: holding down the left mouse button, slide the cursor up or down, so as to straighten and crop the "dead corners" of the photo. You can achieve the same result by moving the cursor placed in correspondence with the wording Straighten (in alto to destra).
If you are satisfied with the result and you do not need to make further changes to the photo, save it: to do so, just click on the buttons Done e Save. Easier than that?
If you find Photoshop Express Editor too limited, you can consider Photopea, a free online service that perfectly matches the Photoshop interface and supports all popular graphic file formats. More info here.
How to straighten a photo with Photoshop on smartphones and tablets
If you wish straighten a photo with Photoshop on smartphones and tablets, you can take advantage of Adobe Photoshop Express, one of the many Photoshop apps available for Android and iOS / iPadOS, which is free and simple to use.
After installing and starting the app in question on your smartphone or tablet, take a look at the information sheets that illustrate its main features and then log in with your Adobe ID, your account Google or your account Facebookby pressing the relative buttons.
Once this is done, give the app all the permissions it needs to work correctly and then select the photo to straighten by tapping on thepreview of a locally saved photo on the Photoshop Express home screen. Alternatively, you can expand the menu All the pictures at the top left and select one of the other options available to import photos (eg. Camera, Creative Cloud, Etc.).
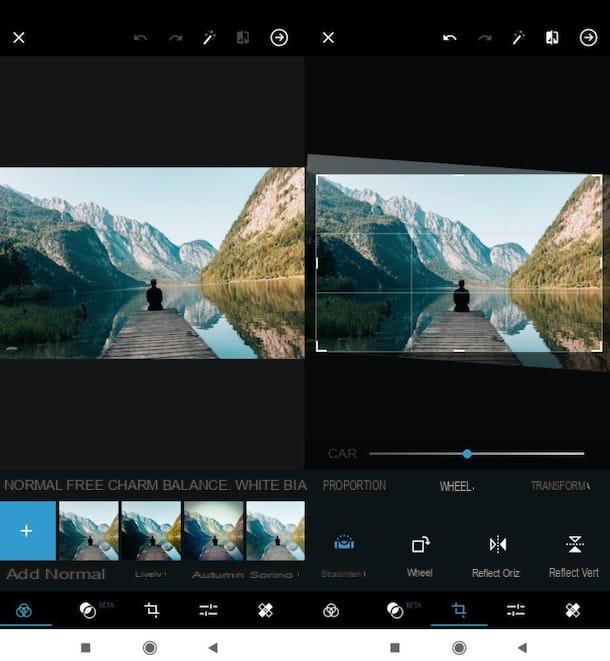
Next, tap the button Cut out located at the bottom, select the tab Wheel in the opened screen and move the cursor present on adjustment bar appear on the screen, until you reach the desired result. If you deem it necessary, you can customize the cropping made to the image, using the appropriate indicators placed on the sides and corners of the same.
If you have no other changes to make to the image, save the photo you straightened: press the icon depicting the freccia rivolta verse destra, in the upper right corner of the screen, and select one of the saving or sharing options among those provided by Photoshop Express.
It was arranged di iPad, I remind you that you can use the iPadOS version of Photoshop which integrates most of the features of Photoshop CC and also some features designed for its touch screen and some official accessories, Apple Pencil in primis. The version of Photoshop for iPad is free for the first month of use, then it costs 10,99 euro / month.
How to straighten a photo with Photoshop


