


Since you travel a lot and have an unbridled passion for photography, you would like to take advantage of the camera of your Android or iOS mobile device to take photos that stand out for being particularly noteworthy. In particular, since you are fascinated by the new technological trends concerning the world of photography, you would like to understand how it is possible to take 360 ° photos in a simple and fast way, using your trusty smartphone.
Well, if that's actually the case, know that taking 360 ° photos is actually a lot easier than you can imagine. If you have a latest generation smartphone, you will be happy to know that you can take 360 ° photos directly using your device's default application. Usually this integrates itself a special shooting mode and this will allow you to take a panoramic photo in the blink of an eye.
Alternatively, if you do not have this functionality within the default application of your device, you can take 360-degree photos even using some popular applications. The latter, downloadable for free on devices equipped with the Android or iOS operating system, they are excellent alternatives for creating panoramic photos. During this tutorial I will explain in detail which applications to use and how to use them for the creation of 360 ° photos. Are you then ready to start? Keep your smartphone in hand and follow the instructions I am about to give you. As usual, before we begin, I wish you a good read.
Default camera on iOS
To take 360 photos from iOS smartphones there is theoretically no need to install an external application, as the application Camera of Apple devices already have the photo shooting mode suitable for this particular purpose.
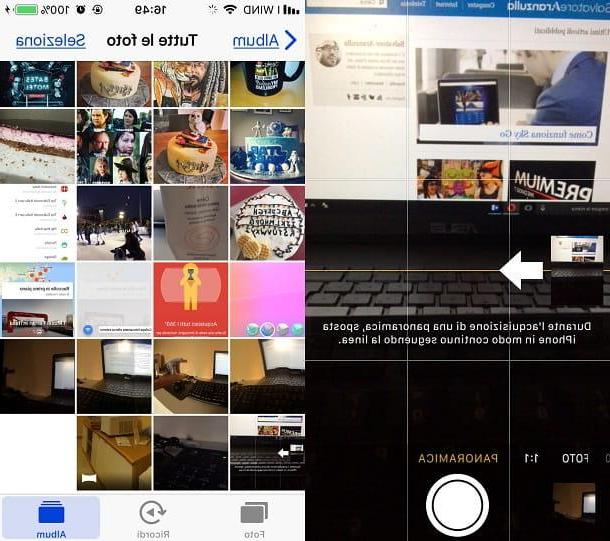
From your device, then open the application Camera (has the symbol of a camera) and, using the menu located at the bottom, scroll with your finger the items you see on the screen, until you find the wording View (I remind you that to select it, you can also tap on the writing, which will change from white to yellow).
Going to select this shooting mode, you will have the possibility to take a photo in panoramic mode, going to manually frame the environment around you. Following the indication that you can read on the screen, you will have to move the iPhone continuously in a straight line, until you have finished the shot.
Then press the pulsing tondo and then move your mobile sideways trying to keep your hand as steady as possible. The arrow symbol that you will see on the screen should stay in the center as much as possible. By moving the arrow indicator all the way from one side of the screen to the other, the 360 ° panoramic photo will be automatically captured and saved in the default memory of your device.
You will then be able to see the photo you just took by tapping on its thumbnail at the bottom left, or find it at any other time by tapping on the app Gallery of iOS. In the device's media gallery, the panoramic photo will be marked with a special rectangular icon.
Default camera on Android
In the best of cases, even the latest Android devices integrate a shooting mode that allows the creation of 360 ° photos. Clearly it must be taken into account that, in this specific case, the implementation procedure may vary slightly depending on the Android device you intend to use.
However, to take 360 ° photos, using the default camera of an Android device, you must first open the application Camera (symbol of a camera). Now, you will need to find the appropriate shooting mode to perform this type of task, so that the user interface of your device is predisposed to the panoramic shooting mode.
As I anticipated, in this specific case the procedure I indicated may vary; in fact, in the following lines I specifically refer to the procedure to be carried out using the Android smartphone in my possession.
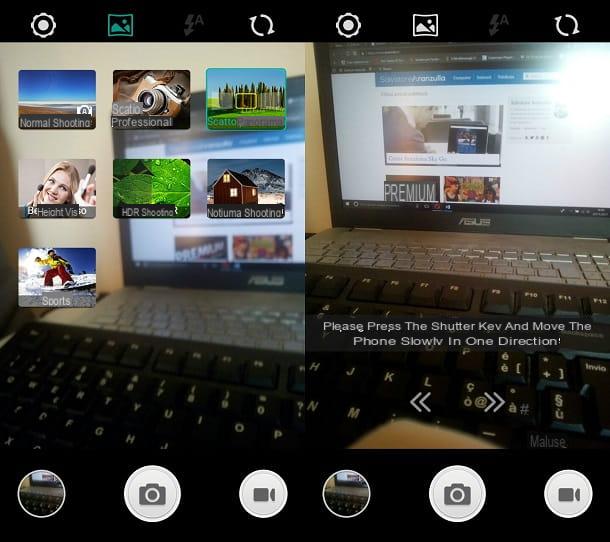
To find the panorama mode, you need to tap on picture symbol located at the top (it is therefore necessary to locate the button relating to the options or shooting modes), and then go and tap on the mode Panorama shot. Once the appropriate mode for panoramic shooting has been identified, in the vast majority of devices an indication should appear on the screen which refers to the instructions to follow for making a 360-degree shot.
Usually, the shooting mode requires that you tap the button to take the photo (symbol of a circle or symbol of a camera), and then slowly move the device, moving it left or right, towards the area to be included in the shot.
Once you have finished taking the photo, it will be saved in the device memory. The photo taken will be visible at any time: just go to the default photo gallery application of your smartphone (usually it is the app Gallery).
Google Street View (Android/iOS)
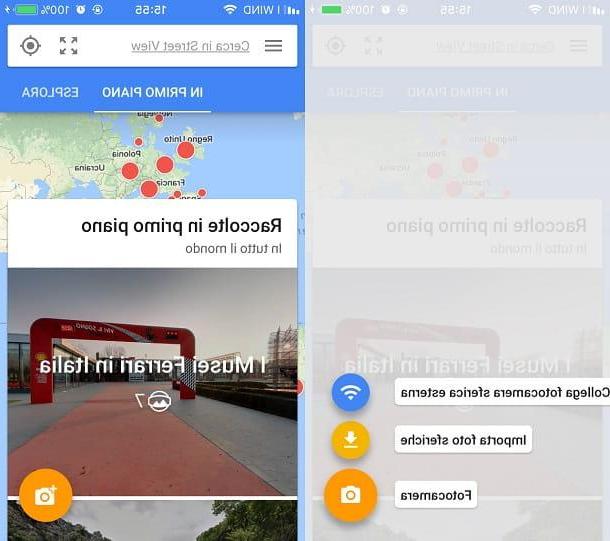
A valid application that allows you to take 360-degree photos is Google Stree View, a very interesting application both for making photos and for viewing panoramic photos. The app in question was developed by Google and allows you to view 360-degree photos taken from places around the world.
In order to use this app for the purpose of creating 360 ° photos, which can also be uploaded to Google Street View and thus contribute to the improvement of the Google photo database, you must first download the app on Android or iOS . To do this, go to the Google PlayStore or the iOS App Store and, through the search engine, locate the application in question.
Once you have found it and tapped its card, install it on your smartphone. Via the Android PlayStore press the button Install / Accetto, from iOS, on the other hand, install the application by pressing the button Ottieni / Installa. In both cases, once the app installation is complete, start the Google Street View application by tapping the button apri.
As soon as you are in front of the main application screen (after skipping the introductory tutorial) you can start taking a panoramic photo. To do this, tap the button with the camera symbol that you find at the bottom right. From the menu of choices that will be presented to you, then tap on the item Camera, to take a photo on the spot.
To take a 360 ° photo (in this case it is a spherical photo), you will then have to follow the instructions on the screen: you will be asked to frame all the points of the place you want to photograph as you go. Keep in mind that you will have to move the phone so that the right points are framed that will be indicated to you. Once you have finished shooting, press the button with the V tick symbol you see below.
The 360 ° photo you took will be available immediately after the application has processed it. The photo taken can then be shared in Google Street View; in this way you can provide your contribution to Google.
Cardboard Camera (Android/iOS)
Google applications prove to be the best for making 360-degree photos. An example is also the Cardboard Camera application which, designed for viewing content designed for Virtual Reality, can also be used to take panoramic photos.
Then proceed by installing the application in question on your Android or iOS device. Once you have identified the application I mentioned in the multimedia store of your device, install it by pressing the button Install / Accetto (on Android) or the button Ottieni / Installa (from iOS). In both cases, to start the application, once installed, you will have to press the Open button.
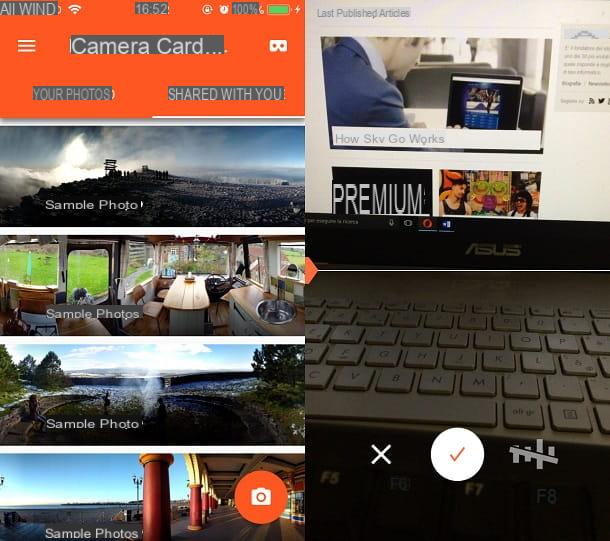
To take a 360-degree photo, then press the button with the camera symbol. All you have to do is press on red round button in the center to start activating the panoramic shot guideline. Then follow the line in the center and move your device to frame the place to be photographed. At the end of the photo, press the button with the V symbol check mark.
The panoramic photo taken by you will now be processed by the application and, as soon as it is ready to be viewed, it will appear in the section Your Photos of this application. If you have a virtual reality viewer, you will also be able to see it through the viewer; just click on the symbol below that represents the Google Cardboard.
Other applications to take 360-degree photos
Generally speaking, to take 360-degree photos I would recommend the use of a native tool of your device, so that it is possible to take pictures in high resolution. However, the applications mentioned above and the other applications that I am about to point out in the following lines represent a valid alternative.
- Panorama 360 (Android / iOS) - Available on both Android and iOS, this application comes with an English-language user interface and offers the ability to take 360-degree photos. The most interesting feature of this application is its multimedia gallery that allows you to view 360-degree videos. It also allows you to take panoramic photos at HD resolution, but by paying, you can also activate the shooting mode at 4K resolution.
- Photo 360 by Sfera (Android) - Although the user interface is a bit old-fashioned, Photo 360 by Sfera can be a useful application for taking panoramic photos on older Android smartphone models.


