One of your greatest passions is photography. This is demonstrated by the fact that, as soon as you have a free moment, you like to experiment with new techniques and new shooting modes, to create original shots. Now, for example, you would like to learn how to take pictures with the so-called "artistic blur", but unfortunately you have no idea what parameters to set on your camera and you fear that this time you will not be able to reach your goal. But do not worry! If you want, I'm here to give you a hand!
In the course of this guide, in fact, I will have the opportunity to explain you in detail how to take blurred photos using your Reflex or your smartphone. I guarantee you that it is not at all complicated to succeed, as long as you have a clear understanding of the parameters on which to "work". Also, if you're interested, I'll show you how to use the blurry photos you can get to make Tumblr-style images (which are very popular on the Internet).
So, can we know that you are still standing there? Courage: make yourself comfortable, take all the time you need to concentrate on reading the next paragraphs and, more importantly, try to implement the "tips" that I will give you. I am convinced that, at the end of this reading, you will be perfectly able to take original shots, with the right degree of blur. I wish you good reading and, above all, have fun!
How to take blurred photos with the Reflex
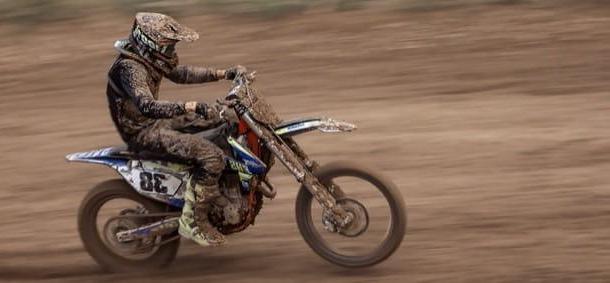
You wish to know how to take blurred photos using a reflex? If so, chances are you plan to take shots using the so-called del technique panning, or that particular photographic technique that allows you to "freeze" the subject in the foreground, keeping it "still", but giving the background and other elements of the image a blurred effect, capable of giving great dynamism to the entire scene.
Using this technique is not that complicated, as long as you have a good command of the parameters to be used to make a good quality shot. To do this, in fact, you must first set a shutter speed that is relatively short (eg. 1/60 o 1/30) and then make sure that theautofocus (or, if not, activate it).
Another important thing to make a photo with the panning technique concerns the choice of aerial selection mode autofocus, which must be set to single point and dynamic. In the case of the camera I used to write this tutorial (in this case, a Canon EOS 1300D), to set this parameter, press the button AF and then select the item AI Servo. Since I cannot know which Reflex you have, I invite you to refer to the user manual of the same, so as to know which buttons to press to select the mode in question.
Once you have set the parameters just mentioned, you will be able to position the focus point where you prefer and, in this way, you will be able to "follow" the subject while it is moving while correcting the focus at the same time. Trying to take a picture of the subject you have aimed and are following with the lens, you should be able to "freeze" it in the scene, focusing on the latter and making the background blurry.
Ah… I was about to forget to tell you something important: if you have a lens equipped with an image stabilizer, remember to disable stabilization using the special lever that should be positioned on the lens that you have secured to the camera body of your Reflex, otherwise the blur could be somehow corrected by the stabilizer itself, thus frustrating your efforts to take a shot with the "blur artistic". Understood?
If you have difficulty in mastering the camera in your possession, perhaps because you have just purchased it and have not yet become familiar with its various settings, reading the guide in which I explain in detail how to use a DSLR may be useful.
App to take blurred photos
You would like to know if there are any app to take blurry photos, that is, images with a moving background or Animated GIF? The answer is yes. There are many apps that allow you to create content of this type in just a few steps. Let me explain in detail how some of the best on the square work.
AfterFocus (Android/iOS)

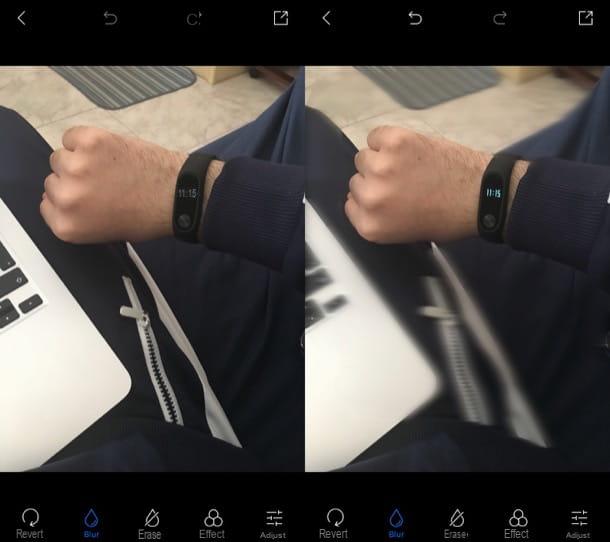
If your intention is to apply blur to the background of your photos, I recommend using AfterFocus, an app that is quite simple to use also to blur the background of your shots (as well as to apply blur). On Android it can be downloaded for free, while on iOS it costs € 1,09.
After installing and launching AfterFocus on your Android or iOS device, tap the button Album, select the photo you want to edit, select the method in which you want to cut out the main subject (Smart to use the automatic tool e Manual to use the manual one) and then tap the button Continue.
After cutting out the main subject of the photo, tap the button Next located at the top right, select the item Blur located at the bottom right and then tap on the tab Motion blur. At this point you just have to adjust the effect to be applied using the adjustment bars located in correspondence with the items Blur e Feather and, when you are satisfied with the result, tap on the item Save located at the top right and then up Yes.
GIPHY CAM (Android / iOS)
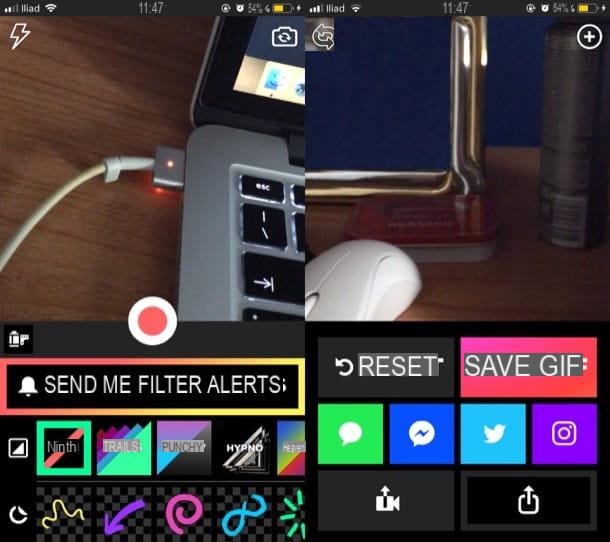
If, on the other hand, you want to make nice GIFs using some, I suggest you contact GIPHY Cam, a free solution that is developed by GIPHY, a very famous search engine for images to download in GIF format.
After downloading and starting GIPHY Cam on your Android or iOS device, tap the button OK and then presses on x located at the top right to close the app welcome message. At this point, to make the GIF, press on red button, in order to start recording a new video to use for the realization of your animation.
When you have finished capturing the frames with which to make the GIF, remove your finger from the red button and, in the screen that opens, tap the button Save GIF to save the animation on your device or, if you prefer, select one of the available sharing options.
Other apps to take blurry photos
If the solutions I told you about in the previous lines did not satisfy you, take a look at these other apps to take blurry photos. I am sure you will find someone who is right for you.
- Photo Focus Effect (Android) - it is a free app that allows you to change the background of your photos in a rather simple and fast way, applying a pleasant blur effect to them and possibly even blur.
- Photo Focus Effects: Blur Image Background (iOS) - as its name suggests, this semi-free application allows you to retouch the background of your shots, adding the blur effect that allows you to give a touch of dynamism to your photos.
- GIF Camera (Android) - this is a free application that allows you to make GIFs quickly and easily. It does not offer many possibilities to customize your work, but it is this feature that makes it perfect for those looking for an app without "frills".
- GIF Maker – GIF Editor (Android) - this free app allows you to both download GIFs from the Internet and create new ones using various tools that are quite simple to use and that allow you to insert stickers, texts and many other decorative elements.
- Gif Maker (iOS) - as you can easily guess from its name, this is an app that allows you to produce GIFs starting from videos made at the moment or, if necessary, videos already saved in the Gallery and even static photos. To eliminate the advertising present in the free version and eliminate some limits, such as the inability to create GIFs longer than 10 seconds, you need to buy the full version of the app, which costs 4,49 euros.
For more information on how these and other apps to blur the background of photos and apps to make GIFs work, I suggest you take a look at the guides I have dedicated to these topics.
How To Make Tumblr Blurred Photos
want make tumblr-style blurry photos? There are various apps, online services and programs to use for this purpose, but before I list them below, I want to make a brief clarification on what the Tumblr style is.
As you may already know, the Tumblr style belongs to the social network of the same name (which I have already told you about in another guide) and is characterized by various elements: in some cases from vintage photos mixed with fresh and innovative elements with typefaces sought after, in other cases (for example in fashion tumblelogs) by professional shots with subject in focus and background with blur effect. That said, let's see together some apps that can be for you.
Photo Blur Effects (Android)
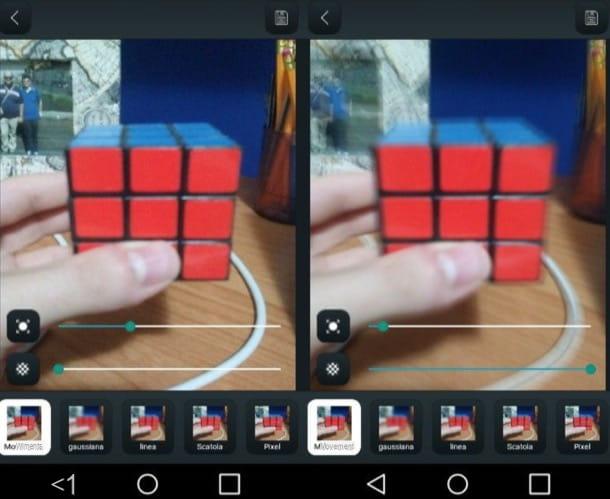
In addition to the apps mentioned earlier in the guide, I recommend making Tumblr-style blurry photos using Photo Blur Effects to Android, which allows you to apply various types of effects to the background of the photos, including the blurred one. While being able to download the app for free, I point out that many effects are available by making in-app purchases starting at € 1,09 each.
After installing and starting Photo Blur Effects, tap on the symbol of Gallery present on its main screen and select the photo you want to edit. At this point, you just have to press the button Movement located at the bottom right and adjust the application of the effect using the adjustment bars at the bottom of the screen.
When the work is finished, presses on the symbol of floppy disk at the top right and wait for the image to be saved on your device. Easier than that?
Blur effect (iOS)
A device is possible iOS, you can use for that purpose Blur effect which works in a similar way to the Android app I told you about earlier. Even Blur Effect, in fact, offers the possibility to retouch your shots and change the background to make it blurred (at least apparently).
After installing and starting the Blur Effect, tap on the symbol of Gallery and select the photo you want to edit. Then select the item Blur at the bottom and start blurring the background of the photo by swiping your finger over it.
Once this is done, tap on the Effect item located at the bottom right, select the item Motion from the menu that opens and that's it. If you are satisfied with the result, remember to press the symbol of arrow located at the top right to save the output file on your device.
GIF Me! (Android / iOS)
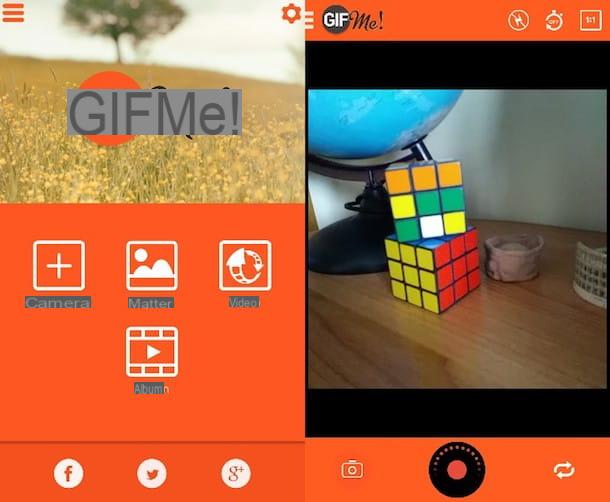
Also GIF Me! can be a solution for you, if you want to make Tumblr-style GIFs. This is a semi-free app that transforms videos (made on the spot or taken from the Gallery) into fun animated GIFs. I define this solution as semi-free because it has advertising banners that can be removed by purchasing its Pro version, which costs € 1,59 on the Google Play Store and € 2,29 on the App Store.
After downloading GIF Me! on your Android or iOS device, start it and, on the home screen, tap the button Camera (on Android) or the button Record Animation (on iOS) to capture the frames to be used for the creation of the GIF with the camera of your device. At this point, tap on the icon hoops to start recording the video and, when you are ready to do so, press on the symbol of square to stop recording.
At the end of the work, modify the GIF you have made if necessary using the buttons and menus that appear at the bottom (eg. T to add text, the glasses symbol to add adhesives, the icon oflittle man running to change the playback speed, etc.) and, finally, tap on the symbol of arrow pointing down which is located at the top right, so as to save the GIF locally or share it through one of the sharing options available.
Other useful solutions to make Tumblr blurry photos
There are also other useful solutions to make Tumblr blurry photos that deserve to be taken into consideration: below you will find a few.
- Photopea (Online) - this is a well-known online photo editing service, whose interface resembles that of “classic” photo editing programs. It integrates numerous tools for editing photos, including some for retouching the background and applying blur.
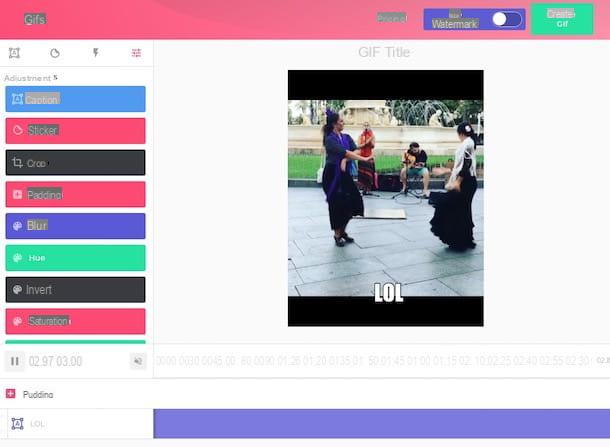
- GIFS.com (Online) - is a famous online service that allows you to create customized animated images starting from online videos (eg YouTube, Vimeo, etc.) or from movies saved on your computer. Although basic free, I want to tell you that there is a paid version, which allows you to remove the watermark that is applied to your works.
- GIF Maker by GIPHY (Online) - this is GIPHY's online editor, which allows you to create animated GIFs by uploading photos or videos saved on your computer. It also offers a function that allows you to create GIFs by pasting the link of a video taken from the Internet.
- GIPHY Capture (macOS) - it is a software developed by GIPHY, which is free and simple to use. It allows you to create GIFs starting from portions of the screen recorded to be edited later using the included tools.
For more information on how to create Tumblr-style photos, feel free to consult the guide I linked to you, because it can certainly provide you with other interesting ideas on the content to be created. If, on the other hand, you want more information on how to make GIFs and how to change the background of photos, take a look at these other insights that I linked to you.
How to take blurred photos