The difference between a nice photo taken at night and a bad one is often not the fault of your iPhone but of some precautions that you do not follow. Or some useful techniques that we list in this article.
If you want to capture a beautiful landscape at the dark using your iPhone but unfortunately you notice that the shots are grainy, blurry, dark or full of digital noise then you are in the right place. Within this article we will explain how to take great night photos with iPhone following a few simple tricks that will allow you to greatly improve your night shots.
Shooting in low light conditions can be challenging but with a few simple tricks you can dramatically improve your night photos.
Now no more chatter and ... let's get started!
Keep the iPhone steady while shooting
often night photos they are blurry and it is a common problem since you are not alone. However, it is possible take clear, blur-free photos even in the dark without too much difficulty. When there isn't much light in the scene, the smartphone camera uses a slower shutter speed. The latter represents the amount of time the camera shutter remains open when taking a photo.
The longer the shutter is open, the more light is captured by the sensor and fed into the photo. Therefore, in low light conditions, the shutter stays open longer to capture enough light and detail to fit into the image. But there is a problem: any movement made during the long exposure time will make the shot blurry.
If you move yours iPhone (even slightly) during the shooting phase, you will get a blurry photo as a result due to the movement of the camera. Therefore, to avoid this effect, you will have to keep the phone as stable as possible during the shooting phase.
If you have a tripod, use it to keep the camera perfectly still when take photos at night. In this case, we advise you to take as a reference our dedicated buying guide that you find below.
Alternatively, use a solid surface or object (eg wall or tree) to keep the iPhone's body stable. Another piece of advice we give you is to keep your elbows together with your body to stabilize your arms.
Below I show you a photo with also the handle that you have to hold.

Reduce the exposure
He night photos taken from yours iPhone they often seem too bright, the dark areas have a grainy gray and / or the bright ones have an excessive brightness and without any detail, then you have to adjust a setting inside the camera.
When taking a photo of a dark scene, the camera tries to capture as much detail as possible. To bring out the details in the shadows, the camera of yours iPhone makes the image brighter.
Usually, however, this is not what you would like to see. You would like blacks to appear black and see as much detail as possible in the brighter areas. The good news is that you don't need to use any special camera settings in night mode or install third-party apps: all you need to do is simply reduce the exposure in the app before taking the shot.
Exposure allows you to adjust the brightness of a photo, so reducing it makes the image darker. It is this modification that makes a night photo fantastic. Another advantage that brings with it the decrease in exposure to night photos is that the camera doesn't need to capture as much light. This means that a faster shutter speed will be used to avoid letting in too much light. A faster shutter speed eliminates the possibility of having blurry photos.
That said, to reduce exposure in theCamera app, you must first focus on the specific point of the scene that you want to have sharper and then scroll down to reduce the exposure, always keeping your finger pressed. Once the correct exposure level is set, press the shutter button to capture the photo.
Take night photos in well-lit areas
How to take great night photos with iPhone? If you take night photos in the dark without any light, you will definitely not get the desired result. There must be at least one light source to illuminate the subject to be captured. For example, you can look for street lamps or illuminated buildings or even shop windows or billboards. Alternatively, you can create an artificial light using lanterns, candles or spotlights. Anything that creates light in the scene is great for night photography.
If yours is to make a night portrait, position the subject so that the light shines on their face. You can illuminate the entire face from the front or position the subject sideways to the light. Remember, though, that the side lighting will only illuminate half of the face while the other will remain in the dark. The dark space around the subject can be considered as a sort of frame, attracting the eye of the beholder.
If you want to create a photography silhouette, the subject must position himself in front of the light source. After setting the focus point, swipe down to reduce the exposure and then press the shutter button to capture the photo.
How to avoid blurry photos
Blurry images are one of the most common problems in low-light photography. Graininess (also called digital noise) reduces the quality of the shot. To escape this effect, we recommend using a photo editing app (eg Adobe Photoshop Express) which has tools that allow you to reduce background noise.
Excessive noise reduction, however, could make the photo more flattened and lacking in detail, so it's always best to avoid capturing blurry photos while shooting. To avoid this, you can follow two practical tips: reduce exposure and ISO.
As mentioned earlier, reducing the exposure allows you to decrease the brightness of the image. This also allows you to reduce or completely eliminate graininess. For the uninitiated, the ISO takes care of controlling the sensitivity of the camera sensor to light. The higher the ISO, the more sensitive the sensor is to light. Basically, the camera captures more light by setting a high ISO value.
Using a high ISO when shooting at night, however, has a downside: makes the shot more grainy. So, for night photography, we suggest you avoid setting high ISO values, of course if possible.
Unfortunately, the built-in camera app in iOS it does not allow you to control this setting. If reducing the exposure doesn't eliminate the graininess, you can use a third-party camera app to lower the ISO. For example, you can take advantage of Camera + 2 (€ 4,49) which allows you to adjust both shutter speed and ISO settings. Alternatively, refer to the two tutorials listed below.
Take night photos when there is sunrise or sunset
Instead of taking pictures completely in the dark, try to take advantage the light emitted by the sun during sunrise or sunset in order to get a night shot but with a touch of color and details in the sky.
You can use the sunlight on the horizon to create particular portraits. For example, when the sun is on the horizon, you will get an orange background. When it is below the horizon, the light will be bluish. If that's not enough, this type of shot can be further enhanced by using editing apps.
Take pictures in the rain
Even if capturing night photos under the rain it might not be that interesting, it's a fun experience as you can have truly unique and creative results. For example, you can capture portrait photos water drops that fall on the windows or the street lamps that create particular reflections.
While shooting, focus on the drops of water so that they appear sharp and blur the background. Once this is done, reduce the exposure if necessary so that the lights are not overexposed. When taking pictures in the rain, don't forget to take a look at the ground as well as it often creates very special colored reflections.
Use lights as guidelines
In daytime shots, you can often find several elements that can be used as guidelines to create particular compositions that bring out the subject in a scene. However, these elements blend into the dark background when you are in the dark. But what stands out at night are the lights, so you can use them to create shots.
Use lights to frame the subject
If you are still wondering how to take great night photos with iPhone, we recommend that you use an object in the scene to frame the subject. In the daytime, for example, you can use an arch, a door frame or even the branches of a tree. At night, however, it is possible to use the lights as a framing element.
For example, you can use the round light from a street lamp to bring out the details of the subject's face. Place the latter within the illuminated part of the scene to achieve the desired result. Alternatively, you can partially expose your subject in the shade to add a touch of mystery to the shot.
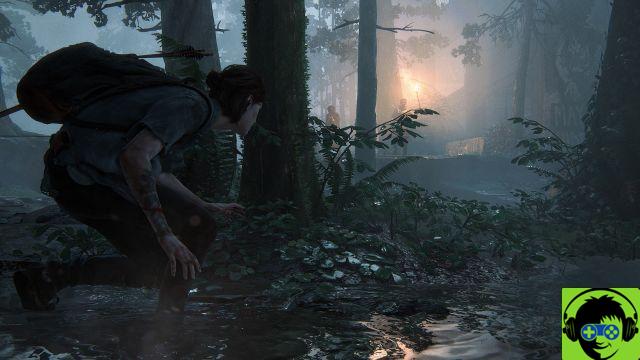
Try long exposure photography
Night is the best time to create stunning long exposure photos. Such a shot allows you to capture any moment of the scene with blur effect and is a great way to convey a sense of movement to photos. For example, you can capture the light trails created by the headlights of moving cars, motorbikes and trains.
Unfortunately, the stock camera of theiPhone it does not allow you to adjust the shutter speed, so you will have to take advantage of a third-party app such as Slow Shutter Cam which is practically perfect for creating long exposure photos.
Once installed on your iPhone, open it and choose the type of long exposure photo you want to capture using the 3 options proposed. With that done, adjust the blur and shutter speed to create the desired effect.
The moment you press the shutter button, the app will take a series of images in rapid succession and will blend them together creating a long exposure photo that captures the movement of the subject.
Given the long exposure times, it is essential to keep the iPhone perfectly still. This is because if there is movement, the objects will appear blurry. Therefore, we recommend that you use a tripod, place the smartphone on an object that does not move or join the elbows to the body to lock the arms. Remember that long exposure photography takes some practice, so you'll have to experiment with various settings to get the desired result.
Turn night photos into black and white shots
We close this article, entitled "How to take great night photos with iPhone“, Offering you another piece of advice. You can improve night shots even after having immortalized them. Since photos taken in low light do not have many colors, you can try convert them to black and white using a photo editing app.
Night photos are particularly suitable for black and white as these require high contrast, hence dark highlights and shadows in the image. Often night shots get an even more satisfying effect when transformed into B&W.
Other than that, converting a night shot to black and white is perfect for highlighting the most important features of it. For example, if there is a lot of dark space around the subject, the black and white effect will further enhance the sense of mystery and also solve the problems with the warm colors you get from street lights. Finally, the black and white effect adds a classic and timeless touch to photos.
The night mode of the iPhone
From the iPhone 11 onwards, Apple introduced the night mode in his iPhones. In reality, many Android smartphones also have one, so if you have a smartphone with this mode you can try to exploit it. If you are a user instead iPhone then this paragraph is dedicated to you because I will explain you in detail how to use night mode.
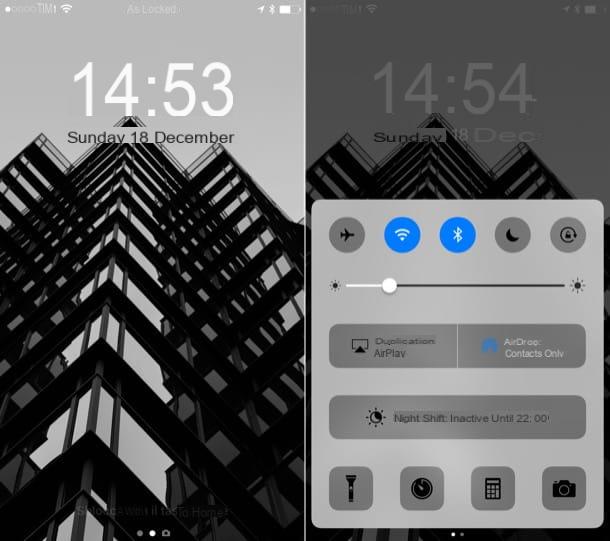
How to activate night mode
The steps are actually very simple: it is activated AUTOMATICALLY alone when there is low light. Just frame the subject to be photographed and touch the "Night Mode" button, located next to the "Flash" icon (represented by a lightning bolt) at the top left.

By tapping the button, you can manually set the timer for shooting or make the mode automatic.
If you were to manually set the timer you need to remember that the more seconds the photo will be brighter, because more light will enter the camera lens. In this case, however, you have to keep your iPhone as still and stable as possible or you risk getting blurred photos (read the tricks related to the first paragraph of this guide to keep the iPhone still).
Hold your iPhone steady until the shot is complete. Remember that the camera takes multiple photos during the exposure time. The more stable you hold the camera, the sharper the photo will be. As soon as the exposure is done, your iPhone merges the images to create your Night mode photo.
Bonus content: A video on how to take better photos
The video you see attached here allows you to take better photos with iPhone: it is full of useful tips that you will surely find of interest to you and that will help you in your daily shots.
Doubts or problems? We help you
Remember to subscribe to our Youtube channel for videos and other reviews. If you want to stay up to date, subscribe to our Telegram channel and follow us on Instagram. If you want to receive support for any questions or problems, join our Facebook community or contact us on Instagram. Don't forget that we have also created a search engine full of exclusive coupons and the best promotions from the web!