


You are a person who travels often and your unbridled passion for photography made you think about the possibility of revolutionizing the way you take your shots. Given the recent popularity of panoramic photos, you have therefore wondered if it is possible to take advantage of the default camera of your Android or iOS device to succeed in this intent or if, to do so, you need to use a professional camera.
If things are exactly the way I described them and then you want to know more about how to take panoramic photos, know that you have come across the right tutorial at the right time! Making panoramic photographs is really simple and I'll help you find out how to do it: you don't need to use dedicated devices, you can carry out this operation via your smartphone, regardless of its model or the operating system it uses, quickly and immediately, taking advantage of the 'special function integrated in the camera of the same.
How do you say? Not sure if your mobile is so modern and has this shooting mode? Don't worry, I have other solutions in mind and I want to tell you about them in this tutorial of mine. In fact, there are some free applications for Android and iOS that are able to replace the default camera app for creating panoramic photos. In this guide I will therefore talk to you in detail about the different options available to you, explaining step by step how to use them. Are you ready to get started? Well, then sit comfortably, pick up your device and carefully read the instructions I am about to give you. I wish you a good reading and a lot of fun!
Take panoramic photos on Android
Modern Android devices generally do not need a third-party application to take panoramic photos, as they integrate this functionality directly into their default camera. I can therefore explain to you in detail how to succeed, but you must take into account that the steps indicated may vary depending on the model of the device you own: some of the most famous manufacturers of Android smartphones and tablets are in fact used to customize the user interface of the operating system developed by Google.
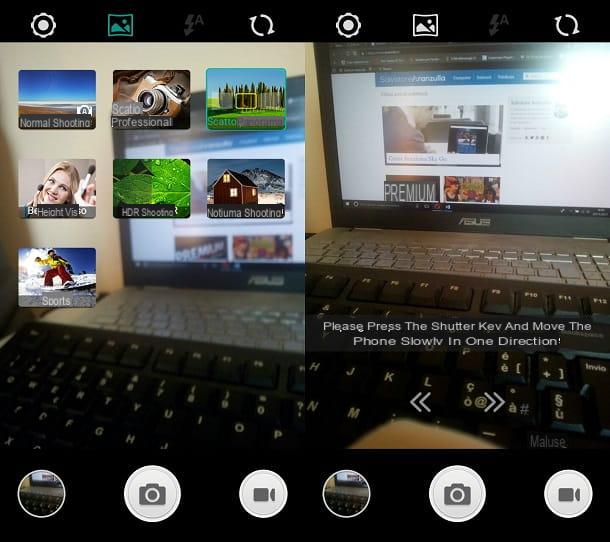
take panoramic photos it is therefore necessary to act through the default camera; then presses the icon Camera that you can see on the main screen of your device (it's the one with the symbol of a camera). Now, locate the panoramic shooting mode in the app settings. As I mentioned in the previous lines, this procedure may vary depending on the device in use; in the following lines I therefore indicate the procedures that refer to the Android device in my possession (Wiko Lenny 3).
To find the mode View, presses the button with the picture symbol (located at the top) to access the options section, the one in which all the available shooting modes are visible. Now tap the button Panorama shot to activate the mode View and, to take a photo with this mode active, follow the instructions you see on the screen.
Usually, the procedure to follow involves pressing the shutter release button (The symbol of a circle or the camera symbol) and then slowly moving the smartphone or tablet on a straight horizontal line, thus moving the device to the right or left. In summary, you have to move your device to frame the area to be included in the panoramic shot.
The panoramic shooting mode stops automatically once the maximum extension area is reached but, if you wish, you can manually stop the operation: to do so, press the pulsating dell'otturatore, what it presents the symbol of a circle or a camera.
At the end of the shooting, the image will be processed and will be automatically saved in the device memory, to be visible also at a later time. To see it, press the button with the multimedia gallery symbol, located in the lower left corner. Alternatively, go directly to the application Gallery o Gallery, that is the one related to the default photo gallery of your device.
Take panoramic photos on iOS

For iPhone e iPad, the panoramic shooting mode is already built into the default application Camera. Having said that, the first thing you need to do is to press the icon of the app in question (presents the symbol of a camera) located on the main screen of your device, then use the menu below to locate the item View. If you do not see this wording, move the items you see on the screen with your finger in order to find it and tap on it.
Now, using the camera of your device, frame the surrounding environment and when you are ready, press on pulsing tondo in the center. Then move your device sideways on a straight line, letting yourself be guided by the lines you see on the screen and by the indicator with the arrow symbol. Then move the indicator from one side of the screen to the other, keeping the arrow always on the center line, until the photo is automatically saved to the Camera Roll. If you wish, you can stop shooting at any time by pressing on pulsating dell'otturatore (is the one with the circle symbol you see in the center).
At the end of the shot, the photo is automatically processed and saved in the memory of your device; you can see it by pressing on its miniature at the bottom left. Alternatively, tap on the app Gallery, on the main screen of your device, to view the album Panoramic and find the photo you took just as easily.
App for taking panoramic photos
If the Camera app included in your smartphone does not fully satisfy you, you can take panoramic photos even with a 'third party application. In this regard, in the following lines, I want to talk to you about how to take advantage of this opportunity, pointing out some free applications for both Android and iOS.
Facebook (Android / iOS)
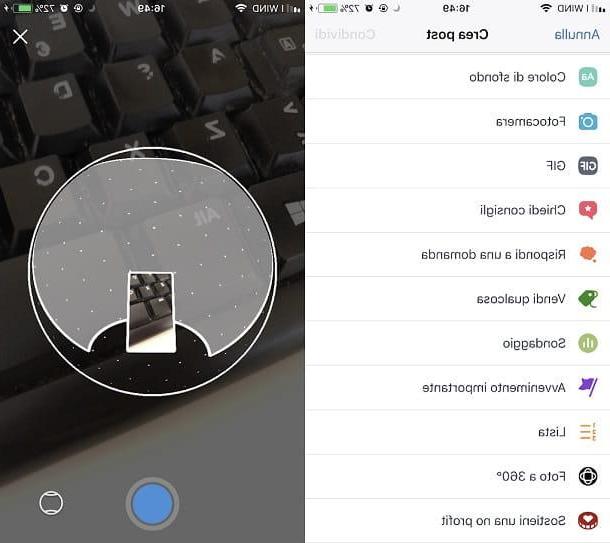
You're probably not aware of it, but the official application of Facebook integrates a feature that allows you to take 360 ° photos and publish them quickly within the social network itself.
If you have already installed the Facebook on your Android or iOS device (if not, read this tutorial of mine in which I'll explain how to do it), tap on its icon, then press on the text field corresponding to the item What are you thinking about?. From the menu you see on the screen, press on the wording Photo to 360 °, then presses the button OK and get ready to take the panoramic photo.
To take a panoramic photo via the app Facebook there are two modes, visible by pressing the button with the round symbol located at the bottom right: the first takes a panoramic photo, while the second is used to make a spherical photo.
Are you ready to take a photo? Yup? Very well; frame the surrounding environment, keep the cursor you see on the screen in the center and rotate the device in the frame (you have to follow the lines you see on the screen), until the end of the shot. Once this is done, the photo will be processed and visible on the screen, integrated into a post by Facebook. If you want to publish it on the social network, press the button Share. Otherwise, press the button with the symbol (X); the photo will be saved in the memory of your device, in the media gallery of your device, in the folder Facebook.
Google Street View (Android/iOS)
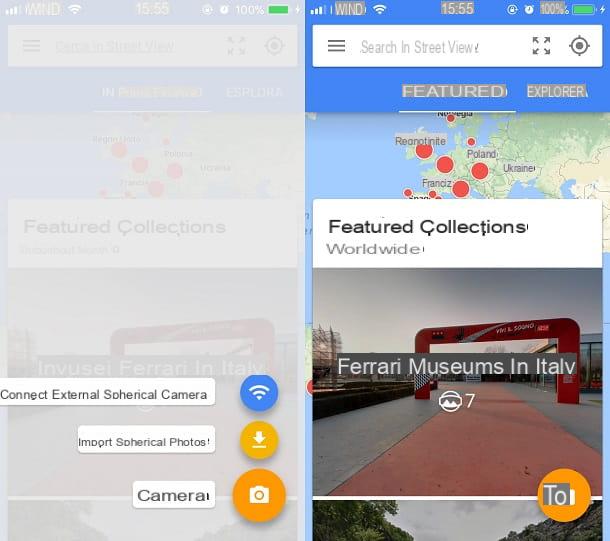
A valid alternative application, which can be used for the creation of panoramic photos, is Google Street View, application known for viewing and taking 360 ° photos of places and landscapes around the world.
If you want to use it then, download it on your Android or iOS device. Then click on the icon respectively Play Store or the 'App Store and then, using the internal search engine, type Google Street View. Once you have identified the application, install it by pressing the buttons Install e Accept, from Android, while on iOS press the buttons Get e Install, then confirming the installation via the touch ID, Face ID or by typing your iCloud account password. In both cases, at the end of the installation, tap the button apri or start the app by tapping on its icon that will have been added on the main screen of your device.
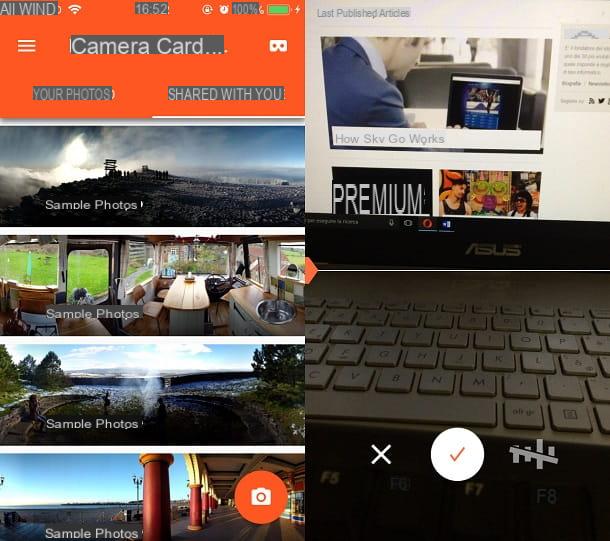
When the application is running, skip the introductory tutorial by pressing on Salta, tap the button with the camera symbol located at the bottom, then on the item Camera and follow the instructions on the screen, which will ask you to move your device to frame the circular cursor, keeping it still for a few seconds in the points indicated. At the end of the shot, press the button with the √ symbol to activate the processing of the photo that will then be shown to you on the screen. The panoramic photo made with this application will be saved in the multimedia gallery of your device, inside the folder panorama.
Other apps for taking panoramic photos
The solutions for taking panoramic photos that I have reported to you in this tutorial of mine have not been able to meet your needs? Would you like other similar advice on the applications to use for the realization of this type of photo? Don't worry, I can still help you and point you to other useful tools. Read the following lines carefully - I'm sure you will find the app that's right for you.
- Panorama 360 (Android / iOS) - this is a free application that can be used on devices Android e iOS for making panoramic photos. This, similar to the application Google Street View, also integrates the viewing of photos and 360 ° videos shared by other users. The main difference is that you need to purchase the paid version (which costs € 3,49) if you want to take high-resolution panoramic photos.
- Cardboard Camera (Android/iOS) – quest’app per Android e iOS it is developed by Google and, although it is designed for the visualization of multimedia contents dedicated to virtual reality, it can be easily used for the creation of panoramic photos. Its user interface is certainly one of its main strengths, as it is very simple and immediate. It is also worth noting the presence of a native feature that is used for audio recording when taking panoramic photos.


