


You would like to create a collage by placing two photos that you made with yours side by side iPhone but the mere thought of exporting images to your PC and "fiddling" with complex photo editing programs, such as Photoshop, discourages you? Well, who told you you have to use the computer?
There are applications that allow you to create beautiful photo collages directly on the iPhone: just start them, select the images to be placed side by side and choose the “collage” model you prefer. Everything is done in a very simple way and in a few seconds. The result can then be saved directly to the phone or shared online on social networks. Do not you believe it? So now I recommend some of the ones I liked the most and I'll explain how they work.
Courage! Is it possible to know that you are still standing there? Take five minutes of free time and find out how to tile two photos with iPhone thanks to the information you find below. The steps to take apply to all iPhone models and to all the latest versions of iOS or iPadOS, if you are using an iPad. I just have to wish you a good read and, above all, a good time!
Google Photos
A great app that you can use to manage your iPhone gallery photos and create collages with them is Google Photos. Haven't you ever heard of it? This is a service that allows you to manage photos in the same way as the iOS / iPadOS Photos app, adding the ability to create backups of these in the cloud completely free of charge (as long as you accept a resolution limit of 16MP for photos and 1080p for videos).
To have a backup without resolution limits, you have to erode Google's cloud storage and then inevitably subscribe to one of its paid plans, as I explained to you in my tutorial on how Google Photos works.
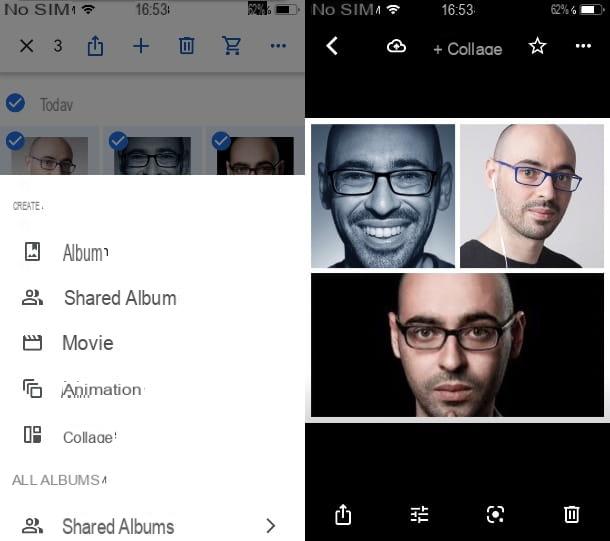
As for the ability to make collages with Google Photos, after downloading the app from the App Store, launch it and log in with your Google account. At this point, in the list of photos in the gallery, which you find on the main Google Photos screen, keep your finger pressed on the thumbnail of the first one you want to use in the collage.
Now, select all the other photos you want to add to your project and press the icon capacitor positive (+) lead up. In the menu that is shown to you, choose the option Collage, so as to automatically generate a collage of the photos you have chosen.
You don't have as many customization options, but using theadjustment icon, below, you can rotate the image or add coloring filters to the collage. You do not need to do anything else: your creation has been automatically saved in the iPhone gallery and you can view it in the list of photos, returning to the main screen.
canva
If you are looking for an app with more features to create your collages, perhaps with the possibility of inserting decorative elements, I recommend using canva. It's free but with a subscription plan that costs 11,99 euro / month o 107,99 euro / year, to access the many templates to create your projects.
After downloading the app from the App Store, launch canva from its icon on the home screen and, on the main screen, log in with your account Google o Facebook. You can also decide to register for an account simply by using yours email address.
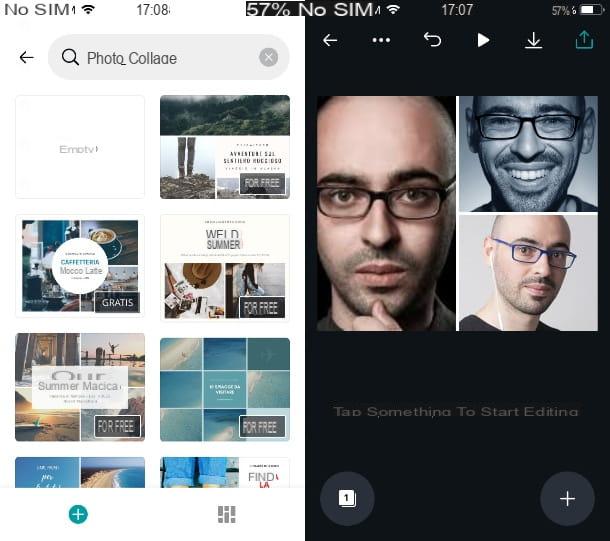
At this point, on the main screen of the app, presses on the item Photo collage and choose one of the many projects available for free (or among the Premium ones, if you have an active subscription).
By choosing a project, you will be directed to its editing section, through which you can choose the different panes and replace the default images with those that you can import from the iPhone gallery (they are shown in the area below). If you want to add more elements to the collage, like images, texts o decorationspigia sull'icona capacitor positive (+) lead placed at the bottom.
When you feel you have completed your project, click onshare icon located at the top right and, in the box that is shown to you, choose whether to save the image on the device (Save as image) or whether to share the collage on other external services that you find in the list.
Layout from Instagram
You intend to create photo collages to maybe post them on Instagram? Then I invite you to try Layout from Instagram, an app officially published by Instagram that allows you to create beautiful collages and also share them on your account of the famous social network. You can download it for free from the App Store.
The operation of the app is very intuitive: after starting it and browsing its short initial presentation, all you have to do is press the button Start and allow access to the device memory.
Then, in the screen that is shown to you, tap on the miniature of the photos you want to import into the collage, using the area in the center. If you don't find them, use the tabs below to filter the photo albums on your iPhone.
In the area above, choose a layout (i.e. a disposition) among those that are presented to you, by tapping on it. By doing so, you will access the editing section, to customize the collage.
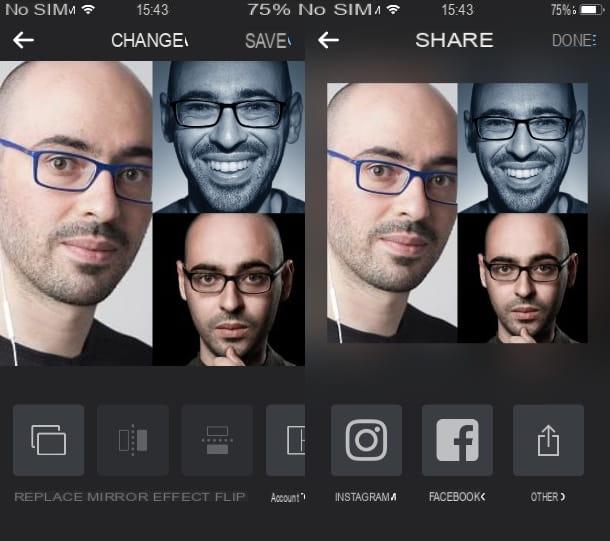
Using the buttons at the bottom, you can decide to replace an image of the collage (Replace), activate mirror mode (Mirror effect) or flip selected images (Flip). You can also activate an outline to space images from each other (Side dishes).
If you want to change the arrangement of the images, keep your finger pressed on one of them and then drag it to the new frame. If you want to highlight a different detail of the image in the collage box, by pressing your fingers you can move them or perform an enlargement or reduction.
When you are satisfied with the result, tap the button Save located at the top right and choose whether to share your collage on Instagram, Facebook or whether to export it to other apps, by pressing the button Other.
I warn you that the collage functionality of the app Layout from Instagram it is also available in Stories of Instagram, through the appropriate filter. I told you about it in detail in my guide on how to make collages on Instagram.
Picsew
If you want to create vertical or horizontal collages with your photos, perhaps to make banners or to merge screenshots of some app, I recommend using the app Picsew: one of the best of its kind.
As with all the apps I've told you about so far, you can download it for free from the App Store but a Premium version is available, with a cost starting from 1,09 €, which allows for more features, such as high-quality export, the ability to intelligently merge screenshots, or access to templates or annotations.
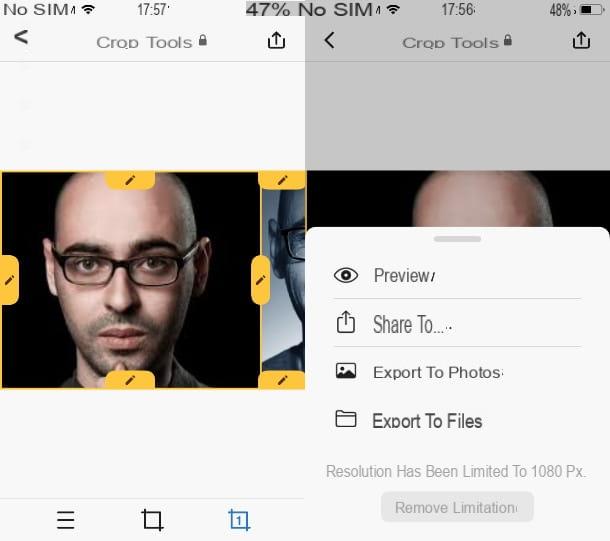
After downloading the app in question and launching it on your iPhone, on its main screen, tap on miniature of the photos you want to import. Once this is done, choose the template to apply to the collage, choosing between vertical (Vertical) or horizontal (Horizontal), by selecting the appropriate items below.
Now, use the icons with pencil next to the boxes where the photos are housed, in case you want to make some cuts. Unfortunately, if you use the free version, you will not be able to access all the additional tools to decorate the image, which you can find in the tab above Tools.
After you have finished the collage, tap on theshare icon at the top right and choose whether to save it on the device (Export to Photos or Export to Files) or if you want to share it on other apps installed on your iPhone (Share to).
Photo Collage Free
If you are looking for a solution for tile photos with iPhone, I recommend you try too Photo Collage Free. As you can guess from its name, this is a free app that allows you to easily create photo collages using your Apple phone.
It includes many predefined templates and allows you to enrich the selected images with various graphic effects. Its only flaw is that it contains advertising banners that sometimes slow down the work, but nothing particularly serious.
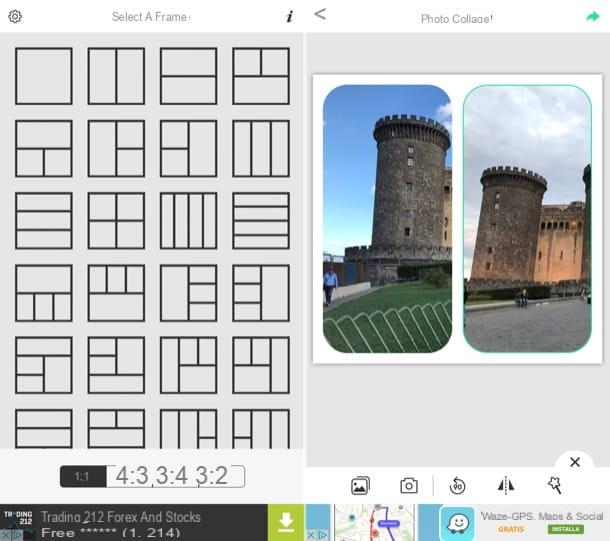
You can install Photo Collage Free directly from the App Store. After performing this operation, start the app in question and select the format of the collage to create, using the buttons with the aspect ratios located at the bottom (eg. PM4:3, PM1:1, etc.) and the diagrams in the center of the screen.
At this point, press the buttons + placed in the center of the screen and then on the miniature of the photo you want to import into that collage pane. If you are asked for consent to access the media gallery of the device, you consent.
Now, press the button >at the bottom and use the buttons that appear in the area below to make your changes. By selecting a photo in the box, you can rotate it, flip it horizontally and apply special effects. By deselecting the photos, you can instead use the buttons you see to change the outline or even change the previously selected layout.
When you are satisfied with the result, press onarrow icon located at the top right and choose whether to save the collage in standard format (Normal) or high resolution (High) and whether to save it on your device or share it on other apps.
Pic Collage

Another great app that allows you to create photo collages on iPhone is Pic Collage which, as for the app I told you about in the previous chapter, has a few advertising banners too many but is still very convenient to use.
Its main flaw - if we want to consider it this way - is that it adds a small watermark to the collages created and does not allow you to use some effects if you do not buy the full version of the app. 4,99 euro / month o 36,99 euro / year.
Is everything clear so far? Well, then let's take action. To tile two or more photos with Pic Collage, after downloading it from the App Store, start it, allow it to access the iOS roll and press the button Grids. Then select the layout you want to use and press on one of the collage squares. Now, press the button Gallery and import the photo from the gallery. Repeat this procedure for all other tiles in the collage.
Well, now you just have to use the features in the area below to apply stickers, set the background, add texts and any decorative element you want to insert in the collage. If you want to make a change to the photo of a box, instead, just tap on it and use the buttons that are shown to you.
When there is fatto, premi sul tasto Done, at the top, and choose whether to save the collage just created in the iPhone media gallery (Save to album) or share it externally through one of the services listed below.
How to tile two photos with iPhone


