You need to zip some photos, then email them with yours Mac, but having recently switched to Apple computers, you don't know how to do it? Would you like to lighten the weight of some images before uploading them to your website but you don't know which applications to turn to? Don't worry, I'm here to give you a hand.
With today's guide, we'll see how to zip photos with Mac for any eventuality: sending via email in zip format, compression for publication on the Web and more. All you have to do is read the directions I am about to give you and put them into practice. It will be a real breeze, you'll see.
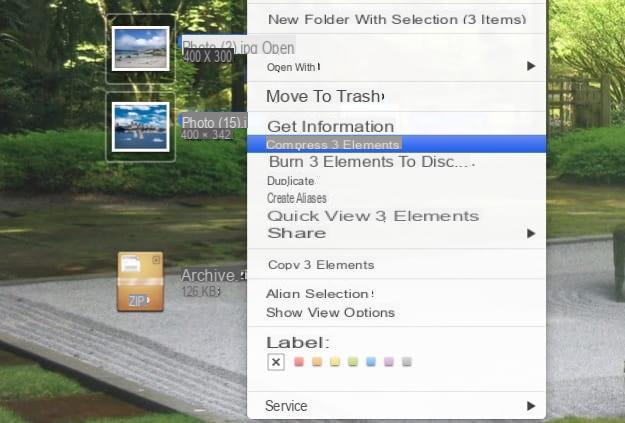
Let's start by seeing how to zip photos with Mac in the true sense of the word, that is, creating a zip package containing all the photos to be sent via email (or even to be archived on your computer, why not?). In this case, the first step you need to take is to select all the images to include in the zip archive by holding down the key cmd on the Mac keyboard and clicking on them.
Then carry out click destro on any of the selected files and, from the menu that opens, select the item Collapse x elements. The photo processing will start automatically, after which a zip file containing all the images will be created. Easier than that?

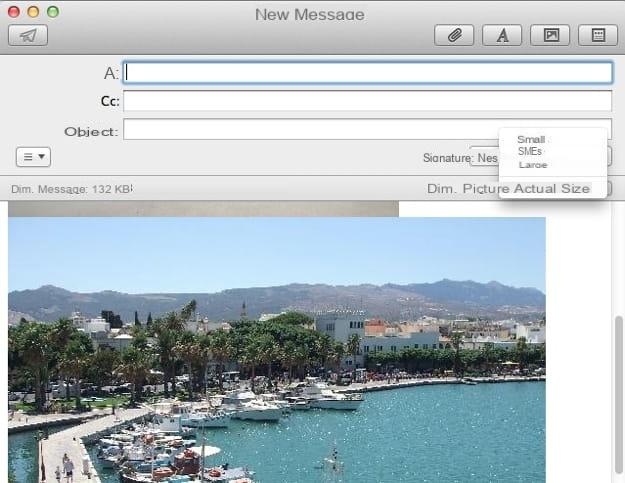
if devi zip photos with Mac to send them via email, you can also bypass the creation of a zip archive and take advantage of the automatic compression feature included in Mail, the default OS X email client. Again, the first step you need to take is to select all the images to send by holding down the cmd on the Mac keyboard and clicking on them.
Then carry out click destro on any of the selected files and, from the menu that opens, select the item Share> Email. A new Mail message will automatically open with the photos you selected attached. To collapse them, expand the drop-down menu located next to the item Image size (top right) and select one of the available options (eg. Small o Averages). In this way, before sending the email, the Mac will reduce the resolution and weight of the images.

Finally, let's see how to “manually” reduce the weight of images on a Mac by adjusting their quality and resolution. The only tool you need to use is Preview, another application included “standard” in OS X that allows you to edit photos in a very simple and effective way.
To reduce the resolution and more carefully adjust the quality of a photo with Preview, all you have to do is open the file to “lighten” and take advantage of the functions included in the program. Then select the item Tools> Adjust Size from the menu bar to retouch the image resolution, while to adjust the quality of the output file you have to go to the menu File> Export. In the window that opens, use the bar Quality to adjust the visual quality level of the photo to be saved and that's it.
Of course, the lower the quality set for the photo, the lighter the output file will be. But be careful not to sacrifice too much the look of the image on the altar of lightness because it wouldn't be worth it.
How to zip photos on Mac


