


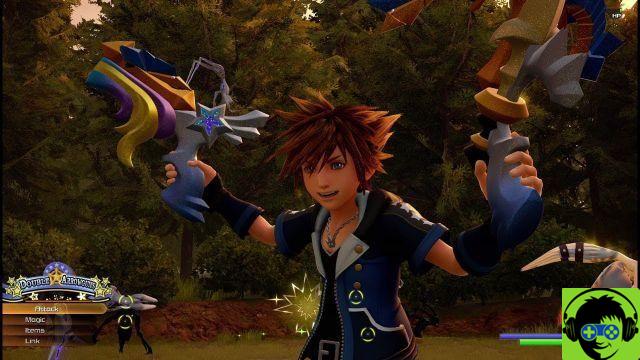
During the course of the adventure you will face a wide variety of mandatory and secret bosses. In this guide we describe the best strategy to take down all the bosses of Kingdom Hearts 3 .
How to take down all the bosses of Kingdom Hearts 3
Here is the strategy to kill the bosses of Kingdom Hearts 3 , including secret bosses.
Kingdom Hearts 3 GUIDE | ROCK TITAN
Where: Colosseum Olympus
Strategy: Your goal to defeat Rock Titan is to knock his head off. However, to get to the head you'll have to destroy the legs. Once the legs are removed, you can climb up the body and start damaging the head. So hit his mighty legs and when the Titan finds himself without them, go for the head attack. When Rock Titan tramples on the ground, it will launch fragments of the ground that can inflict damage. Avoid them and keep hitting him. The rest of the battle is relatively easy.
Kingdom Hearts 3 GUIDE | FIRE & ICE TITANS
Where: Colosseum Olympus
Strategy: Just like Rock Titan, both Fire and Ice Titan have the head as their main weakness. One way to get to their heads is to use Shotlock, otherwise you can easily get to the heads of the two bosses by climbing the center pillar. No matter what order you decide to take them down, the advice is to focus on one first and then switch to the other once you take them down. You must avoid fireballs and move away when the ice titan begins to breathe icy air.
Kingdom Hearts 3 GUIDE | WIND TITAN
Where: Olympus Coliseum
Strategy: At the start of the battle you just have to dodge some debris that the Wind Titan will throw at you as you attack his legs. At some point in the battle, you'll be sucked into the tornado and thrown into the air and then fall into free fall. During this section you must avoid debris, fireballs and ice.
When the free fall allows you to stay at eye level with the titan, you can inflict the most damage. To quickly defeat the titan, use a combination of attacks such as Blaster Blaze. If you need to get close to the titan again, if he is thrown back, use Shotlock to reach the floating debris platforms.
Kingdom Hearts 3 GUIDE | HEARTLESS DOLL
Where: Toy Box
Strategy: The Heartless doll can be difficult as it has attacks that make it hard to get close. We suggest you use multiple attacks from a distance. Using Blaster Blaze will allow you to stay away from the doll and unleash powerful attacks. Of course, that said, the enemy will also move frequently, so you have to move around a lot to not be an easy target.
Kingdom Hearts 3 GUIDE | KING OF TOYS
Where: Toy Box
Strategy: The weak point to focus your attacks on is the head, but getting to the enemy can be difficult, so use Shotlock if it's too far to reach. This enemy also has a wide range of attacks. You'll be dealing with debris, rockets, electric currents, and an electric pulse. It's worth noting that the electrical impulse will appear when you stick to your head for too long smearing attacks.
One method to attack the enemy without being physically on him is to use Counter Shield. However, the best method is to attack with the keyblade avoiding long attack sessions. Touch and run and repeat until he is gone.
Kingdom Hearts 3 GUIDE | MOTHER GOTHEL'S HEARTLESS
Where: Tangled
Strategy: Mother Gothel gives clear signs of when she is attacking, in particular the warhead gives you enough time to get out of the way. As a result, between attacks, you should stop and watch the boss' moves, act accordingly and return to hitting him. After a while, you'll be trapped in a root maze with a flurry of debris from above. All you have to do is look for the door to go through.
Once you get out of the maze, you can keep attacking. We suggest you use a variety of attacks as this battle can last quite a while, but the only really annoying enemy attack is the maze.
Kingdom Hearts 3 GUIDE | ICE WOLF
Where: Arendelle
Strategy: Ice Wolf has some pesky attacks to deal with, but it will be important to focus on his special move. During the battle, he will cast a dark shadow as he disappears and send small Ice Wolves to fight. You need to eliminate as many of those little Ice Wolves as possible to start a cutscene in which Ice Wolf will reveal itself again. Once he reappears, Sora can launch her most powerful attacks, but it's worth using Marshmallow when it's available to greatly increase the amount of damage you can inflict on the Ice Wolf.
Kingdom Hearts 3 DRIVE | DAVY JONES
Where: Pirates of the Caribbean World
Strategy: Weakness: Long-range attacks. Davy Jones follows an extremely cowardly pattern. He's quick to fight and quick to run. He will use a variety of skills like: Dive & Surprise Attack, Counterattack, and then occasionally ride the Kraken. The moment you fight Davy Jones, don't confront him face to face, but try to get behind him.
The Dive & Surprise Attack is basically a cowardly tactic of Davy Jones, during which he'll dive into the water and attack you from a random direction. Don't let Davy Jones get in front of you while you're attacking him. His counterattack ability is strong and he can empty your HPs in a matter of seconds. Stay behind him at all times.
After inflicting enough damage to Davy Jones, he will summon his trusty monster: the Kraken. Ignore his tentacles and try to focus your attacks on Davy Jones, who is now on his ship.
Kingdom Hearts 3 | ANTI-WATER GUIDE
Where: Realm of Darkness
Strategy: Weakness: susceptible to all types of damage. Anti-Aqua is basically an evil version of Aqua. It will use most of the abilities Aqua uses, including: Teleportation, Evoke Illusions, Ice Vortex, Magic Storm. Anti-Aqua is one of the toughest bosses in Kingdom Hearts III. It's fast, inflicts a lot of damage and evokes a lot of illusions.
She'll use her teleportation capability to be behind you or to get away from you while you're damaging her. Eventually, it will evoke many illusions that can harm you. Hitting Aquanort will break these illusions.
Tribulation Charge is one of her strongest abilities and basically involves her evoking two illusions of herself that can throw energy balls. Both balls can inflict a lot of damage. However, Anti-Aqua is vulnerable to attack when it's casting this ability. So, avoid the energy balls and hit Anti-Aqua mercilessly when it uses this power.
Ice vortexes are very dangerous: don't get trapped in a vortex, otherwise you will lose a lot of HP. With Magic Storm, on the other hand, Anti-Aqua evokes more than three illusions to shoot at icy objects.
In short, most of Anti-Aqua's abilities are based on illusion. Use AoE attacks - attacks that do damage within an extended area - and you'll easily be able to inflict massive damage.
Kingdom Hearts 3 GUIDE | VANITAS
Where: Land of Departure
Strategy: Vanitas mainly uses Firewheel and Throwing Fireballs. Vanitas can be beaten relatively easily as Aqua's moves are fast, so it's mainly about spamming attacks to prevent Vanitas from making lethal moves. The Weaver spell is especially useful in this battle to quickly increase the damage.
Kingdom Hearts 3 GUIDE | LARXENE, MARLUXIA, LUXORD
Where: Keyblade Cemetery
Strategy: These three bosses can be chaotic, but you'll be fighting alongside Mickey Mouse. It's best to keep moving and attack with your favorite keyblade until the first movie is activated. You will be surrounded by playing cards. Sora is in charge of finding out which card Luxord is hiding behind.
The card she's hiding in will then move towards that card and attack her, taking Luxord out. From there you will once again have to find his card to attack it. Keep going until you take him out. After his fight, you will have to face the remaining two members of organization XII.
Just as this fight with the boss began, the ending will be difficult and chaotic. We suggest you use spells and special attacks to get the job done quickly, but you'll need to avoid attacks frequently when you control Sora. Once you defeat one of the two bosses, a movie will be activated, then you'll have to take out the last one.
Kingdom Hearts 3 GUIDE | XIGBAR AND RIKU
Where: Keyblade Cemetery
Strategy: This is another battle with two bosses. Unlike Luxord, Larxene and Marluxia, this battle is a bit easier to handle. You just have to worry about the barrage of arrows that seems to do the most damage. Using the Rage Form is a good idea to decrease the health of your opponents while using Shotlock to quickly turn around the map. Likewise, you'll find that a movie will be activated every time you defeat a boss.
Kingdom Hearts 3 DRIVING | SAIX
Where: Keyblade Cemetery
Strategy: In this battle you will fight alongside Kairi and Axel, but it won't be easy, especially when the enemy uses Berserk. Therefore, you should use the Rage Form to empty your opponent's health. After a while, a movie will be activated. The fight will resume but the strategy will remain the same. Use the Rage Form along with your allies' powers, such as King's Flare, to do a lot of damage quickly. At some point, Saix gets faster, stay behind as much as possible until Saix's attacks end. Come closer and attack him again until he is defeated.
Kingdom Hearts 3 DRIVE | EARTH
Where: Keyblade Cemetery
Strategy: This battle is based on keeping Earth away when it unleashes its special attack. This will make it very strong and bring a lot of damage against ours. The time to hit him is when he is no longer in Dark Terra's form, in fact he will be vulnerable for a few seconds: hit him with the most powerful attacks you have. Most of this battle is fought by dodging Earth's attacks and simply waiting for its special power to finish attacking it. Repeat until he is defeated.
Kingdom Hearts 3 GUIDE | XEHANORT FINAL BOSS
Where: Keyblade Cemetery
Strategy: This battle will take place in different stages: on land, in the air and underwater. At the beginning, the goal is to defeat floating enemies. Attack and prepare to counterattack a nearby enemy. When you succeed in eliminating floating enemies you will switch to Xehanort.
Step 1: The first step is performed on earth where Xehanort will spam combo attacks. These are difficult to avoid, so it is best to suspend these combos by counterattacking them in a timely manner so that they also do damage. There are also energy bombs that it is better to avoid and escape from before the explosion.
Phase 2: the second phase will take place underwater: it will be easier to handle its combos, but now you have to worry about explosions. You need to swim far away before the explosion to avoid damage. Watch out for Xehanort who will attack you with a beam of fire. Simply take your time to dodge and attack him until you reach phase three.
Phase 3: When you reach phase three you will have to fight Xehanort in the air where you will have to manage the attacks of the two previous phases. Instead of a pillar of fire, you will deal with multiple pillars, but you can easily locate where they will be placed on the map. Wait for Xehanort to send some magical attacks from inside one of the pillars. Protect yourself, don't rush and counterattack.
Phase 4: Finally, after the battle in the air, you will have one last phase to face. During this phase Xehanort will jump out of nowhere through a keyhole. He will make this move four times, after which you can attack him before he teleports again. Eventually, Xehanort will unleash a Blizzaga in which you must avoid the beams and jump over the shock waves.
Halfway through this battle the boss will start using magical attacks from the sky, all you have to do is protect yourself. Then the enemy will make six teleport attacks that Sora will have to dodge and attack after the sixth shot. We recommend: attack him only after the sixth blow.
Finally, this battle will force Sora into the Rage Form, which means you won't have access to items or parades. This means that you'll have to get used to dodging attacks until you can return Sora to her normal form. This will happen when you're dealing with the latest new attack from Xehanort and its shadow clones. Eliminate them and attack the boss until you can perform a move called Last Ray. It's the final blow. You beat him. Well done.
Kingdom Hearts 3 GUIDE | SECRET BOSSES
#1 DARK HELL
Where: Once you've finished the main quest, return to the Keyblade Cemetery and pass Battlegate 14.
Strategy: Dark Inferno is a very strong boss. Put your best Armor and strongest Accessories on Sora. Hero's Glove is a good choice thanks to the buff he gives in defense. Make your best choices depending on what you have, but focus on Strength and Defense.
There are three stages for this boss: at first he will have no aura, then a purple aura will appear around him, and finally a red one. With each aura, the boss will become stronger and have longer combos. Dark Inferno's main attack is a flurry of sword combos once he gets closer. Keep on your guard and attack only when the combo ends.
When the boss uses the attack in which he sinks the sword into the ground and makes a group of white balls appear, run around the battlefield. Once you've reached the red phase, however, be careful because Dark Inferno will attack you at the same time as he summons the spheres, making it much harder to avoid him.
A good idea for battle is to spam your magic from a distance and then restore it when you need it again. Dark Inferno also has an attack in which a red mist appears around it, and then a few seconds later a huge explosion is launched. Make sure you jump when you see this attack.
Also know that his main sword combo will change in the red phase. Instead of coming straight at you, the boss will teleport and then launch at you. Try to save your healing items for the final stage. If you really have problems, don't forget that you can go to the Moogle Shop in Kingdom Hearts 3 and buy a Kupo coin, which will immediately revive you if you are killed, giving you a second chance.


