Would you like to use your photos to create a movie with animations, special effects and background music but are you crazy about having to use one of those very complicated professional video editing software? Yup? Don't worry, there are tons of programs for making videos with photos and music much easier to use dedicated to those who, like you, do not have professional needs and just want to have fun creating slideshows with photos and music. And the good news doesn't stop there!
In fact, you must know that there are many programs for making videos with photos and music even in the free sector. This means that you don't have to spend a penny to make your slideshows. Beautiful, is not it? Then I would say not to waste any more time and immediately take action.
Below you will find a list with some of the best free software that allow you to create video montages with photos, music, transition effects and customized text on both Windows and macOS. There are also some Web services and some applications for the smartphone, but we will talk about these a few lines further down. Enjoy your reading and have fun!
SmartSHOW 3D (Windows)
SmartSHOW 3D is one of the best programs for making videos with photos and music available on Windows. It allows you to create videos to play on PC and TV (in formats such as MP4, REVIEWS, MKV, MOV ed MPG), to be shared online on platforms such as YouTube o Facebook and to burn to DVD video; all through an extremely intuitive user interface (also in British language) and having a wide range of ready-to-use templates, animations, transitions, titles and audio effects. As its name suggests, it also includes many 3D effects and animations, to give new life to photos and create professional-looking presentations.
SmartSHOW 3D can be used for free for 10 days, after which you must purchase one of the full versions of the program: SmartSHOW 3D Standard (€ 29,40) which includes over 150 transition and animation effects, applies 3D animations to photos and texts, allows you to insert unlimited slides and audio tracks into your projects and exports HD videos in more than 30 different formats, or SmartSHOW 3D Deluxe (48,30 euros) which brings the available effects to 350, adds over 200 royalty-free soundtracks and the functions to add video clips to your project and burn the final video to DVD. More info here.
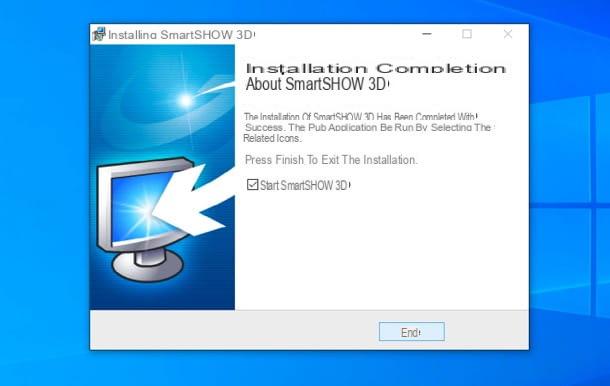
To download the trial version of SmartSHOW 3D, connect to the official website of the program and click on the button Download. Then open the .exe file obtained and click in sequence on the buttons Yes, OK e NEXT. Then place the check mark next to the item I accept the terms of the license agreement (to accept the conditions of use of the program) and complete the setup by clicking on NEXT (three times in a row) and then on Install e end.
At this point, start SmartSHOW 3D and choose if continue to use the trial version of the program, if order now one of the full versions or if insert the key to activate your copy. Then choose whether to create a new project starting from scratch, whether to make one presentation in 5 minutes (so starting with a preset video template) or if open a project already existing. Personally, I recommend the “5 minute presentation” option.
Select, therefore, the category presentation you intend to create, then the model you want to start from and click on the buttons Aggiungi photo o Add folder, to add the photos you want to insert into the slideshow (which you can also reorder, using the arrows on the right side of the window).

Successively click on your button NEXT and choose the background music to insert in your presentation: by clicking on the button music collection you can take advantage of one of the more than 200 songs available in the SmartSHOW 3D database, while clicking on the button for add music from file you can choose a song from your PC. You can also synchronize automatically music and video and adjust volume and fades using the appropriate buttons at the bottom. Finally, hit the button Done, to access the SmartSHOW 3D editor.
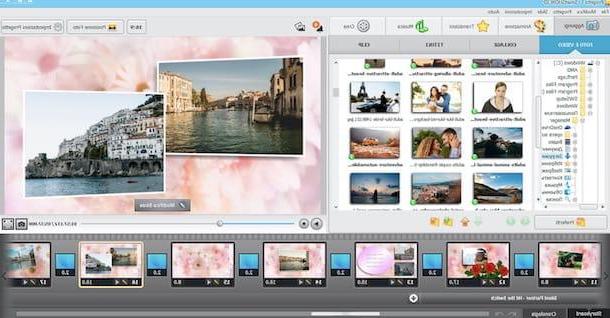
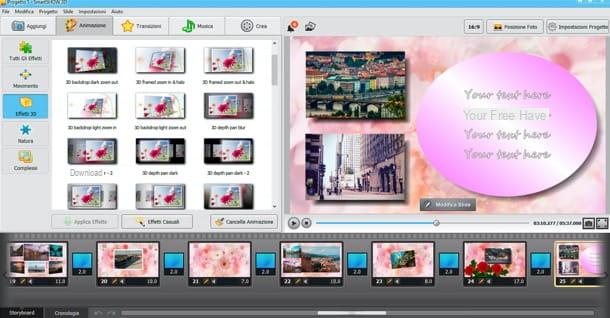
Well: now you are in front of the main window of SmartSHOW 3D, where at the top there are the cards to access the various functions of the program; in the center the instruments selected plus the player with the preview of the video made and below the timeline with all the content added to the presentation.
To add photos / videos, collages, titles or video clips to your presentation, go to the tab Add; to view the animations and transitions available (categorized), go to the tab Entrainment , while to add background music go to the tab Music. To insert an element into your presentation, all you have to do is select it and drag it to the place in the timeline you prefer.
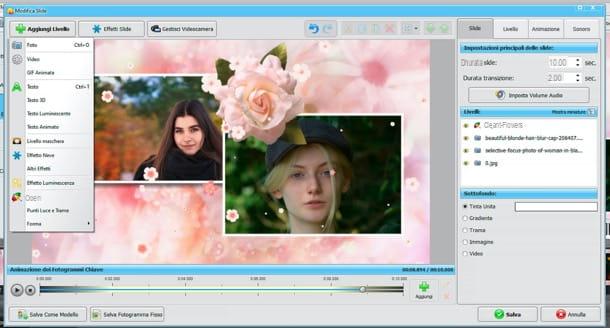
If, on the other hand, you intend to customize one slide, select the latter in the timeline and press the button Modify slide, below the player. A window will open with some buttons and tabs at the top. By pressing on Add Level you can add photos, videos, texts and effects to the slide; pressing on Slide effects you can add effects to the slide while pressing on Manage Camera you can change the framing of the scene.
The board slide allows you to adjust the duration and other parameters of the slide; that Subscription to apply various edits to photos while tabs Entrainment e Sonoro allow you to adjust animations and audio of the slide. Once the changes are applied, click on the button Save, to save them.
When you are satisfied with the result, select the tab Crea of SmartSHOW 3D and choose if create a video presentation, create a DVD slideshow o create a video for the Internetby clicking on the appropriate button.
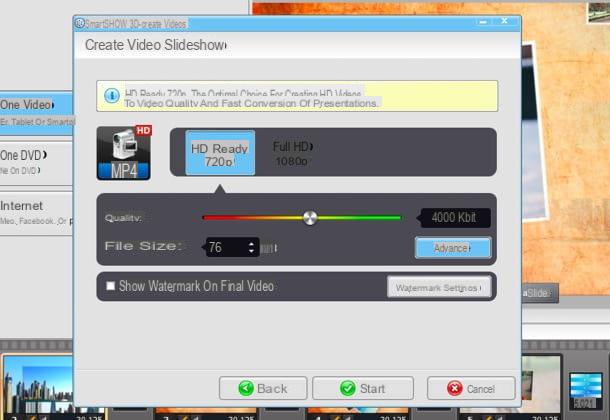
Then set Resolution e Quality of the output file, choose whether to apply one as well filigree to the latter (by checking the appropriate box) and click on the button starts, to start exporting the video.
If any steps are not clear to you and / or you want more information on SmartSHOW 3D, I invite you to consult the official website of SmartSHOW 3D.
DVD Slideshow GUI (Windows)
In a list of programs for making videos with photos and music can not be included DVD Slideshow GUI. It is undoubtedly an excellent solution at no cost for Windows operating systems thanks to which it is possible to create beautiful animated slideshows starting from any type of image and makes the final result playable on any DVD player for living room.
To download the software to your computer, connect to its official DVD Slideshow GUI website by clicking here and then pressing the blue button Download. Then wait for the 3-second countdown to finish and press the button NEXT which appears at the top right.
Once the download is complete, open the file DVDsGUIxx.exe and click on first Yes and then Next. So put a check mark next to the entry I accept the agreement and complete the DVD slideshow GUI installation process by pressing the button first Next, five consecutive times and then on install e Finish.
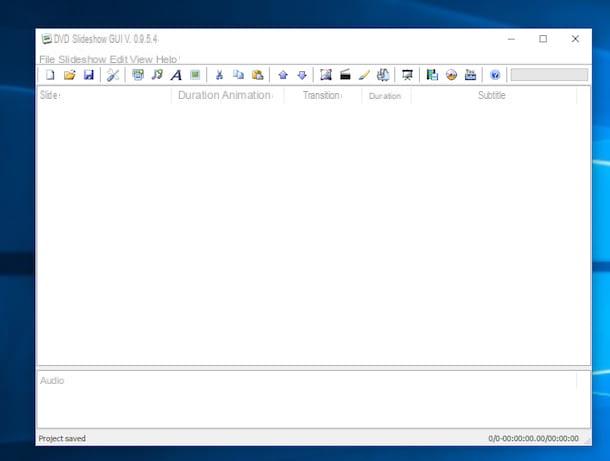
At this point, start the program and import into it all the images you want to use in your slideshow using the button Add pictures and videos located at the top left (the photo icon with the symbol + next to). Next, arrange the photos in the order you prefer using the buttons with the arrows, set the transition effects you want to use for the appearance of the images on the screen using the button Slide settings, add background music to the video by pressing the icon of music note And that's it.
To conclude, click on your button Author and burn disk (the disk icon at the top right) and wait for the slideshow to be processed first and then burned to DVD.
Photo (macOS)
Starting with version 10.10.3 (Yosemite), macOS includes a "standard" application for managing photos and videos called Gallery. Using it, you can not only view, catalog and retouch your shots, but also make videos with photos and music in an incredibly simple way. Do not you believe it? Then try it now!
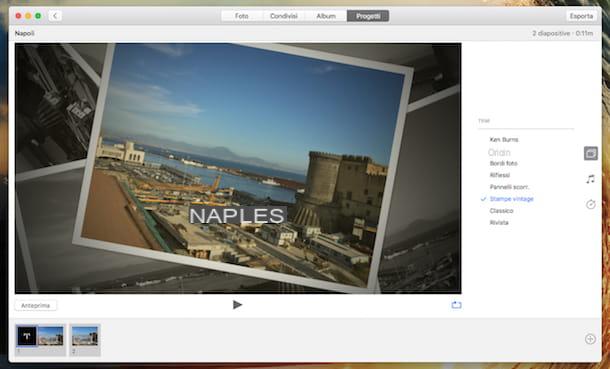
To begin with, start the Photos app on your Mac by selecting its icon from Launchpad. Then wait for the Photo window to be visible on the desktop, then click on the item Fillet located in the upper left part of the menu bar and select the item Create presentation .... Then type a name for the video you want to make, click on the button OK and then select all the photos to include in the latter.
Click on the button now Add located at the top right and use the icons with i two rectangles and music note, to select, respectively, the graphic theme and the soundtrack you want to use for the slideshow. You can freely draw from the iTunes library or use one of the default songs proposed by the application.
Finally, click on theclock, to adjust the viewing times of the photos and presses the button Export located at the top right of the to save your video with photos, animations and music. Easier than that?
iMovie (macOS / iOS)
If, on the other hand, you are looking for a more complete solution to make video montages on Mac, I recommend you iMovie which is provided for free on many Apple computers or is available as a separate download (always free!) on the Mac App Store. You can therefore find iMovie directly on your Mac by going to the folder Applications or you can download it to your computer by clicking here.
The application is certainly ideal for creating “home” presentations but it also includes advanced functions that allow slightly more experienced users to obtain excellent quality final results.
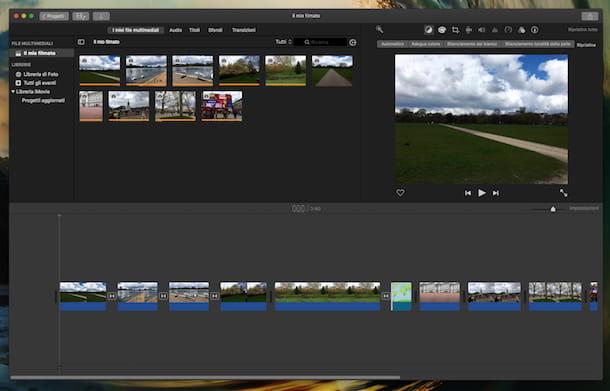
To start creating your video presentation, all you have to do is start the program by clicking on its icon attached to Launchpad, wait for the iMovie window to be visible on the desktop, press the button Create new and click on the item Footage attached to the menu that is subsequently shown to you.
At this point, select all the photos and videos you want to include in your presentation by clicking on the item first Photo Library located at the top left and then dragging them to the bottom of the iMovie window. Alternatively, you can select photos and videos from any other folder on Mac and drag them directly into the program window. Afterward, reorder photos and videos as you see fit by moving the thumbnails with the slider.
Instead, use the toolbar located in the upper right part of the program window to change the colors of the photos, activate the stabilization of the movie, adjust the playback speed and make various other changes.
To view the result of your creation in real time, drag the cursor located in the lower part of the program window to the point from which you want to start playing the presentation and then click on the button Play located on the right, below the preview of the selected scene.
When you are satisfied with the result, click on the button Share (the rectangle with an arrow pointing up) which is located at the top right of the iMovie window, click on Filletclick on your bottone Forward… and select the location on your Mac where you want to save the presentation.
For more details about how this program works you can consult my guide on how to edit a video with Mac and my tutorial on how to cut video with iMovie.
In addition to being available for macOS, iMovie can be downloaded as a mobile app on iPhone and iPad. The app is not pre-installed on iDevices but it is free for all users and it is possible to download the app directly from the App Store.
Magisto (Web / Android / iOS)
As I already mentioned at the beginning of the guide, in addition to being able to resort to the use of programs to make videos with photos and music, you can also use online services that allow you to create beautiful presentations directly from the browser, without installing programs on your computer and without putting under strain the computer for processing the movie.
One of the most complete and easy to use is Magisto which, basically, is free but has some limitations: it allows the use of a maximum number of 10 photos for montages, it does not allow you to create movies longer than 15 minutes and it does not allow you to download the videos locally (you have to watch them online ). The paid plan that eliminates all these limitations costs $ 4,99 per month.
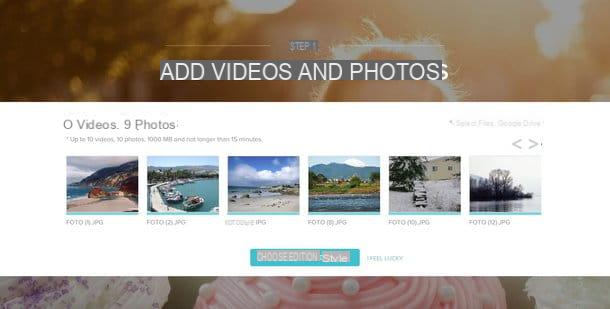
To create a video with photos and music on Magisto, click here to connect to its home page and click on the button first CREATE MOVIE and then Select files. Then create a free account on the site by filling out the form that is proposed to you, or authenticate via Facebook o Google pressing on the appropriate buttons.
When the operation is completed, if necessary, select again the photos you want to use in your montage, wait for their upload to finish and click on Choose editing style, to select the graphic theme to use in the movie (therefore the animations, the transition effects and so on).
Next, choose the music track to use as a background for the video (there are dozens to choose from), assign a name to the project and press on Make movie, to start movie processing.
As soon as your video is ready, you will receive an email from Magisto. Then click on the link to view it and add it to your personal album by clicking on Keep it e Done.
Magisto is possibly also available as an application for iOS and Android.
WeVideo (Web / Android / iOS)
If, on the other hand, you are looking for an online service to create photo slideshows that also allows you to download videos locally, try WeVideo which in its free version allows you to make videos in HD resolution (720p) with a maximum duration of 5 minutes.
To create your first “photographic” video with WeVideo, click here to link to its home page and on the button GET STARTED, to register for the service.
Once inside, watch the introductory video of the service and start creating your own by pressing the button Create new video. Then put the check mark next to the items Personnel e none click her cousin Home and then Start editing, to access the WeVideo editor.
Now you need to upload all the photos to use as the basis for your video. To do this, click on the button Upload media, choose the images to include in your slideshow and drag them all into the gray box that appears in the center of the screen.
At the end of the upload, close the file selection screen (by pressing the x located at the top right) and drag your photos into the timeline of WeVideo following the order you prefer. A window will appear in which you can specify how many seconds to display each image and you can choose whether or not to use the famous Ken Burns effect (an animation through which images are zoomed from the outside towards the center).
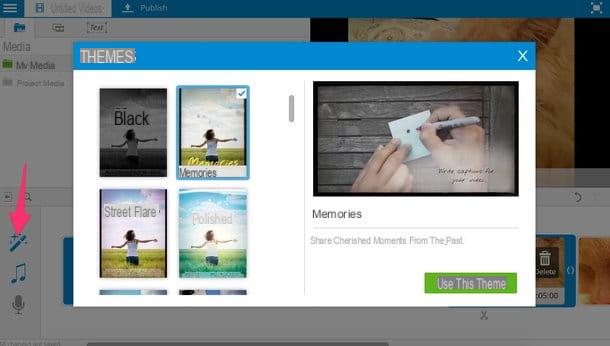
Once you have set your preferences, press the icon of Magic wand located at the bottom left, select one of the themes available in the WeVideo gallery and click on the button Use this theme, to instantly apply beautiful transition effects and background music to your photos.
Finally, press the button Publish located at the top left, type the title you want to assign the video and click on the button Set. Then put the check mark next to the item 720p HD and click on Publish, to start creating your movie. Alternatively, if you prefer, you can also select the icon of one of the online services supported by WeVideo (eg YouTube or Dropbox) and export your video directly to the latter.
Within a few minutes, your slideshow will be ready and you can download it to your PC by accessing the section Exports of WeVideo and clicking on the button Download located at the bottom left.
This service, like Magisto, is also available in the form of an application for iOS and Android.
Article produced in collaboration with AMS Software.
Programs for making videos with photos and music