


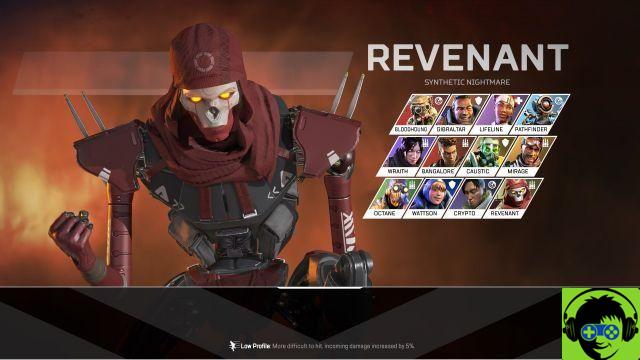
Revenant's abilities are designed to suppress and outsmart opponents before they even know you are there.
Revenant may not appear to be a stealthy assassin at first glance, but that doesn't mean he isn't able to ambush unconscious enemies. Take a look at his kit:
- LIABILITIES: STALKER
- You crouch on foot faster and can climb higher on the walls.
- TACTICAL: SILENCE
- Launches a device that deals damage and disables enemy abilities for 10 seconds.
- LAST: TOTEM OF DEATH
- Put down a totem pole that protects users from death. Instead of being killed or downed, you will return to the totem pole (with X health points)
- PROFILE BAS
- Revenant takes + 5% damage.
So what does all of this translate to? For starters, Revenant can quickly sneak up on enemies when crouched, keeping his profile and low. The wall climbing amplification means it can grab enemies above the building without preparation, as they're more likely to look at the obvious entry points.
Its tactic, a powerful silence, does not have a great range (around 3 meters), but enemies caught in it will not only take damage, but find themselves unable to retaliate with their own abilities. The Totem of Death is the ace hidden in its mechanical sleeve, as it allows a team to push back an enemy position without fear of being eliminated, although there is a limit to this immortality. You can only use it once and you will come back from the edge with a HP.
Coming back having a low profile also means he will take extra damage when hit, so you need to be aware of what your enemies are wielding.
Revenant is very good at pushing the offense and giving his team the edge in a fight.
For starters, Revenant's passive allows you to move at normal speed while crouching, meaning more stealthy players can frame an opposing team faster without being noticed (not to mention being able to use hip crouch. at full travel speed). Its increased wall run also allows it to measure most buildings, if you prefer to attack from above without your opponents knowing.
Its silence has the same throw distance as any other throwable, but the radius of the effect is not large, it moves slowly in the air, and it is easy to escape. That said, if you do manage to hit someone with Silence, they will be under its effects for ten seconds, giving you and your team time to close the gap. Enterprising RevENTS will want to use it either when a team is grouped together and vulnerable to an assault, or to lock down a single player for execution. The ability is on a 25-second timer, so while it may be available at a decent interval, you'll want to make sure you use it when you can nail the shot. Plant it on a stacked team or drill it into a single opponent at medium to close range for the best results. Use it at long range only if you want to stop a final stop and / or if you are confident in your goal. Additional Note: It can be used simultaneously with other throwables, if you like to serve an extra side of 'getting high' to your enemies.
The Totem of Death looks phenomenal on paper, but comes with some great stipulations. First, your team must interact with the totem pole to receive the buff. Second, once you are "downed" you will be restored to the location of the totem pole, but with only one HP to your name. Third, once someone is fired, the totem pole is spent on them, so you can't keep collecting free raises until they disappear. Fourth, while under the Totem of Death effect, you will only take health damage. Fifth and last, its scope is limited.
This makes the Death Totem excellent for risky pushes or for mitigating ambushes, but the whole team can't expect multiple free times. The only HP you come back with means you need to have some stims or health packs ready or else you'll end up really dead quickly.
Try to position the totem pole where it is not easy to hit from the staff and is not exposed. You want to be able to return to safety, and not to a Wraith waiting to finish you off (or a Caustic with his gas trap ready). Additionally, placing it some distance from an assault allows whoever survives to reevaluate the battle, meaning that if the other two team members are removed, the survivor has a better chance of successfully respawning. Keep it close enough to provide you and your teammates with a safe haven to heal and remember, but also well enough hidden to retreat when needed.
Understandably, Low Profile means it's easier to repair damage as a Revenant, but beware of snipers and shotguns. Precise players won't be deterred by the smaller hitbox, and shotguns have a fairly wide spread that allows for a five percent damage boost to alleviate missed rounds. Obviously accurate players with any weapon will be a problem, but as a low profile legend with no consistent evasion ability, Revenant should be played with a minimum of caution.
This is the long and short way to play Revenant. I'm sure the further the season goes, the more talented players will find better ways to use and synergize Revenant's abilities, but even casual players can become a whirlwind of murder if they use his Silence smartly and don't deal with it. the Totem of death as a crutch. For a breakdown of the Season 4 patch notes, check out the article here.
-


