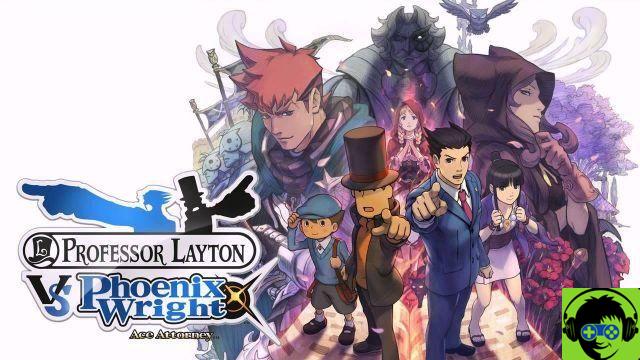
The most famous Professor and Lawyer in the videogame world are ready to challenge each other in "Professor Layton Vs. Phoenix Wright: Ace Attorney" with puzzles and objections in the first crossover episode of the two sagas. VideoGamesTricks.com offers you the complete solution to puzzles and the complete process guide of images and explanations.
Help of , VideoGamesTricks.com
The wonderful adventure narrated in the game, of which you can find the full review here, is divided into two distinct phases:
-The stages with LAYTON, in which to wander around the game world in search of puzzles with the classic gameplay seen in the saga of the famous Professor.
-The stages with WRIGHT, in which we will be called to carry out a trial, defending our client in full ACE ATTORNEY style.
The guide will show you how to overcome all the PUZZLE, saving HELP MONEY and earning PICARATS, and how to overcome all the CASES in TRIBUNAL while maintaining maximum CREDIBILITY.
LOST/FORGOTTEN PUZZLES: Once the phase in the Library is over, all the lost puzzles, i.e. those you have not found during the game, will be moved to the Great Archive or by Miss Terry. They can then be faced at any time during the adventure. You will find these puzzles, if any, during the story below with the words "Lost Puzzles" or "Forgotten Puzzles".
PUZZLE 62: Look at the last page of the guide to find out where to find it!
SPECIAL EPISODES: DLC downloadable directly from the game, in the "Extra Content" section once the adventure is over. Find the solution to the puzzles contained in the special episodes right after the main adventure guide.
IMPORTANT: The solution is divided by CHAPTERS, at the beginning of which the character who faces them is specified.
PLEASE NOTE: We tried to create the guide taking into account the storyline and therefore spoiler the key events of the game.
PROLOGUE - PROFESSOR LAYTON
PUZZLE 01
WHERE in the layton studio touch the bookcase when required
SOLUTION: Remove the green and blue streets.
PUZZLE 02
WHERE: Talk to Barton in the Thames shore area, after being informed of the incident.
SOLUTION:
PUZZLE 03
WHERE: Touch the car in the area Parco-Scena Incidente.
SOLUTION: Down x 4 right, up, right, up, down, up, down, right, up, right x 6, down x 3.
PUZZLE 04
WHERE: Touch the symbol on the wall under Tower Bridge.
SOLUTION:
PUZZLE 05
WHERE: Touch the Moon's feet sticking out of the crates inside Tower Bridge.
SOLUTION: The plot B.
PROLOGUE - PHOENIX WRIGHT
-Answer "Moon."
-Reply "Theft and Assault."
Cross-examination 1
-Push Smile in all the statements.
-Show "Crime Scene Photo" at the fifth statement. -Mm-hmm.
Cross-examination 2
-Push Smile in all the statements.
-Show the Medical Examiner at the fourth statement. -What?
-You find the defendant not guilty. -I find the defendant not guilty.
-Continue the trial.
CHAPTER 1 - PHOENIX WRIGHT
Cross-examination 1
-Put Olivia in all the statements. -I'm sorry.
-Please show the photo of the footprints on the bar at the fourth statement. -Mm-hmm.
-The error is in the Position.
-Province the contradiction.
-Answer "Defend yourself."
-Answer, "Impossible."
-Show the torch with the chocolate footprints.
Cross-examination 2
-Push Olivia into all the statements. -I'm sorry.
-Present the plaque at the first statement.
-You say "the puppet's been switched." -I don't know what to say.
-Answer, "Impossible."
-A request to have "new investigations" conducted.
-For the decisive evidence requested by the judge, show the newspaper with the article about the jewel thieves.
CHAPTER 1 - PROFESSOR LAYTON
PUZZLE 06
It's part of the story.
SOLUTION:
PUZZLE 07
It's part of the story.
SOLUTION: Press the buttons in this order, Red-Yellow-Red-Green-Yellow.
PUZZLE 08
WHERE: Talk to Goffredo in the City Centre.
SOLUTION: PRESS THE BUTTONS IN THIS ORDER:
PUZZLE 09
WHERE: Talk to Pretzel in the East End Shopping District.
SOLUTION:
PUZZLE 10
WHERE: Talk to the Knight in the West Shopping District.
SOLUTION: The correct shade and B.
PUZZLE 12
WHERE: Talk to Paprica and Petal in Piazza Cittadina.
SOLUTION: Touch the second black cloud, the last white, the second black, again the second black and finally the last black.
PUZZLE 13
WHERE: Provided by history.
SOLUTION:
PUZZLE 14
Where: Talk to Michetta, in the Bakery.
SOLUTION: Stamp the base of the scale and go up by one, stamp again and go up by one, finally stamping one last time. Move to the left side of the scale and stamp it. Now go up one box and move up one box to the right. Stamp and repeat these steps again. Now move to the right pan of the scale and repeat the steps of the left pan, going to the left after going up. Finally stamp the center to finish the decoration.
PUZZLE 15
WHERE: Talk to Muffin at the entrance to the Great Archive.
SOLUTION: Enter the right hole. Jump on the cloud at the top right. Enter the only hole. Jump on the only cloud. Enter the only hole and again the only other hole available. Go right, go up, go left, go down to the professor.
PUZZLE 16
It's part of the story.
SOLUTION: Follow the directions indicated Right, right, down, right, up, right, right, down, left, right.
PUZZLE 17
WHERE: It's part of the.
SOLUTION: Right x3, down, right, down, right, up, down, right, up, down, right.
PUZZLE 18
WHERE: Talk to Tomo in the Great Archive, right after you get permission from Miss Terry.
SOLUTION:
PUZZLE 19
It's part of the story.
SOLUTION: PUT THE DOLL C IN PLACE OF B AND CONFIRM:
PUZZLE 21
WHERE: Talk to Abraham in Parade Avenue once you're done in the library.
SOLUTION: Right x2, Left x2, Right x4, Left x2, Right x2, Left x4, Right, Left, Right x2.
PUZZLE 22
Where: Talk to Cindy in the west shopping district.
SOLUTION: Put doll C in place of B and confirm.
PUZZLE 23
WHERE: Talk to Miss Vat on Main Street once you've finished your library phase.
SOLUTION: Enter UP as answer.
CHAPTER 2 - PHOENIX WRIGHT & LAYTON
Cross-examination 1
-Push Confusio to receive the Lantern as evidence.
-Present the Lantern to Arthurius.
-After you have obtained the Great Grimoire, you choose to "show the contradiction".
-Frame the Moon's hand holding the Lantern with the lens.
Cross-examination 2
-Push Confusio and then Arturius. -Mm-hmm.
-Show the Lantern to Confusio.
Cross-examination 3
-Push Rea.
-Push Mona Linda to get the Milk Bucket.
-Show the Milk Bucket to Rea. -Mm-hmm.
Cross-examination 4
-Press Confusio several times.
-After getting the magnifying glass for the witnesses, press Confusio again.
-While Confusio lays down again you'll see a comic coming out of Mona Linda move the lens on her and question her.
Cross-examination 5 -An extra witness arrives
-Push a guy.
-When the comics appear on the other witnesses, move the lens to Mona Linda and question her.
-Show the Bucket of Milk during the testimony of a guy.
-After Un Tale gives a new testimony, press him again and then move the lens to Confusio and question him.
-You say "the witch is one of the witnesses."
-Highlight the area that includes Luna and the 2 victims on the map.
-Open the Great Grimoire and show the spell Occultus.
Cross-examination 6
-Push Confusio and as soon as the lens appears move to Un Tale and interrogate him.
-At the request you choose to continue interrogating him.
-So you press Erminio with his new deposition.
-Tell the judge there's a contradiction. -I'm sorry.
-The contradictory testimony belongs to Rea Flowers.
-Show the map.
-Open the Great Grimoire and show the spell Occultus again.
-You say that he had to "hide his crime." -I don't.
-Show the glasses. -Mm-hmm.
-You say he "couldn't find his glasses." -I don't know.
-Show the Milk Bucket.
CHAPTER 3 - PHOENIX WRIGHT & LAYTON
PUZZLE 11 LOST
Where: Talk to Miss Terry in the big archive.
SOLUTION: A very particular enigma that will make you squeeze your brains out. Start by listening to all the testimonies, then try to understand if the princess and the prince are telling the truth. Focus on the prince's statement and try to think outside the box. If you haven't guessed it yet, it's the Knight who's to blame.
PUZZLE 25
Where: Talk to Miss Iva in Parade Avenue.
SOLUTION: Number the letter boxes starting from the top. You will see that in total there are 8 boxes. Place the blue letters in boxes 1, 5 and 8, then press away.
PUZZLE 26
WHERE: Talk to Pecunio in the west shopping district.
SOLUTION: Put the mice with their tails facing up in the blue group, the others in the orange.
PUZZLE 27
WHERE: Talk to Goffredo in the City Centre.
SOLUTION: Color the last remaining piece with red.
PUZZLE 28
Where: Talk to the Knights on the main road.
SOLUTION:
PUZZLE 30
WHERE: Talk to Mona Linda in the Eastern Shopping District.
SOLUTION:
PUZZLE 32
Where: Talk to the horsemen at the Guarded Gate.
SOLUTION: The curved sword belongs to the little knight in the lower right corner.
PUZZLE 35
WHERE: Touch the tip of the highest tower in the top left corner of the Guard Post.
SOLUTION: Right, Up, Right, Left, Right, Down, Left, Right, Up, Left, Up, Right, Down.
PUZZLE 34
Where: Talk to the Thoughtful Knight in the Guard Post.
SOLUTION:
Move 1- Top right, in the white box.
Move 2- Down right, on the down arrow.
Move 3- On the white box at the top.
Move 4-A left, on the box with the arrows pointing right.
Move 5-Below the Black Horse.
Move 6- Up on the left, on the down arrow.
Move 7-Eliminate the black horse.
PUZZLE 33
It's part of the story.
SOLUTION: SOLUTION:
PUZZLE 37
WHERE: Touch the tip of the farthest tower, to the left of the entrance to the interview room.
SOLUTION: S=Left and D=Right Sx3, Dx2, Sx7, Dx2, Sx3.
PUZZLE 36
WHERE: It's part of the story.
SOLUTION: Number the buttons starting from the top from 1 to 5. Now press them in the following order:
5-2-2-3.
At this point the game will pass to Phoenix and Maya.
PUZZLE 39
Where: Talk to Petal on the outskirts of town.
SOLUTION:
PUZZLE 20
WHERE: Talk to Pretzel in the town square.
SOLUTION: Enter the only hole available. Do the same on the next floor. Jump on the cloud at the bottom. Enter the only hole available. Do the same on the next floor. Jump on the upper right cloud. Then on the only available clouds up to the dark purple plane where you must enter the hole immediately to the right and continue down through the holes until you reach the Phoenix plane waiting for you on the left.
EXAMINE THE ALCHEMIST'S ROOM
-Check the painting on the wall for the paint clue.
-Experience the white powder on the ground. -Mm-hmm.
EXAMINE THE BASEMENT
-Experience the golden goat in the center of the area. -Mm-hmm.
-Examine the well on the right.
-See the crate with the doll between the goat and the desk.
CHAPTER 4 - PHOENIX WRIGHT
Cross-examination 1
-Push the Austeri, when she says "The Professor was so threatening with that knife in his hand," move the lens over to Luke and question him.
-Ask Luna to speak so that the trial record is updated with the professor's new position.
-Push Aedo, when she says "Then I heard the magic scepter fall on the floor," move the lens up Austeri and question her.
-Show Luke the "Plan of the Residence". -Mm-hmm.
Cross-examination 2
-Push the Austeri to update the Great Grimoire with the spell "Spectrum" .
-After the previous step, the Austeri will change deposition.
-Push the Austeri again and as soon as the comic book appears, move the lens to Luke and interrogate him. During Luke's interrogation, continue without questioning anyone else until Luke says, "Yeah! We should investigate!". At this point, a comic book about Herminius appears, move the lens back and interrogate him.
-Pecunius will be joining the Witnesses.
-Ask Erminio "Where exactly did he find the arm".
-Say "there is a problem" and highlight the Magic Scepter on the Residence Floorplan.
Cross-examination 3
-Push Aedo and continue with him until he asks the opinion of Bardolino the parrot, who will answer "Craa! Oh poor, poor me!". At this point a comic book will come out about Luke, move the lens and question him. WARNing-You'll see a comic book appear even earlier on Erminio but it won't lead to anything.
-Say "Let's give it a try."
-Choose "interrogate Bardolino".
Cross-examination 4
-Show the spell "Dorus" contained in the Great Grimoire, when the Parrot pronounces the term "Forus".
-You say you "have the evidence to prove it."
-Show the "Wall Behind the Picture" evidence. -Mm-hmm.
-Say something else. -Something else.
-Show the judge the Magic Scepter. -Mm-hmm.
-Highlight the purple stone.
-When the judge asks who the witch is, you show Robin Earlington's profile. -What?
-You say the Gem has Earlington's got it. -I do.
-Highlight Earlington's purple collar. -Highlight Earlington's purple collar.
-Choose to "talk about another case." -Mm-hmm.
Cross-examination 5
-Pick on Robin when she talks about her neighbor to get him to come down and testify. -I'm sorry.
-Show the spell "Spectrum" contained in the Great Grimoire, during the deposition of Herminius.
-Show the Crime Scene at the Judge's request.
Cross-examination 6
-Please, you're hurting Erminio when he talks about some things to watch over.
-When she talks about a particular thing to look for, move the lens over to Robin and interrogate her.
-Show Miss Iva the Letter in White. -Mm-hmm.
Cross-examination 7
-Pick up Miss Iva when she says she said good night to the butler to make a comic book about Robin appear. -Mm-hmm. Move with the lens and interrogate Robin.
-Robin will have a new testimony.
-Push Robin to get a comic book out of Erminio, move the lens and interrogate him.
-The Pomodoro Juice will be added to the trials.
-You're pushing Miss Iva when she talks about the collapse of Erminio.
-You say you have proof.
-Show the Pomodoro Juice.
Cross-examination 8
-Pick on Robin when he says "he had no reason to kill the alchemist, neither with magic nor without."
-You say you have "another motive." -Mm-hmm.
-Present the Letter.
-Robin's gonna get a new testimony, press it and go on to... -What?
-...choose "No, there's a contradiction!".
-You say you don't have anything to show for it. -I don't.
-Choose the "Miss Vat Confidentiality Statement".
-You say there's a contradiction in Herminius' statement.
-Show the Crime Scene. -Mm-hmm.
-Choose to ask Erminio a question.
-Highlight the little bottle with the skull. -Mm-hmm.
-Say "Himself."
-Show the Letter.
CHAPTER 5
PUZZLE 40
WHERE: Touch the chimney top left in the Market area.
SOLUTION: Right, down, right, down, right, right, down ( to move the box down ), up x2 ( to move the box up ), right, up x2, right x2, down x2, right, down, left x2, down x2, right x2, left x2, right x2, right, left, right x3.
PUZZLE 41
WHERE: Touch the upturned barrel on the ground at the bottom left in the Vicolo Losco area.
SOLUTION: Use coins for Axes, Roses, Scorpions and Swords.
PUZZLE 42
WHERE: It's part of the story.
SOLUTION: SOLUTION:
PUZZLE 43
WHERE: Touch the hole on top of the bunk beds in the Sculptor's Studio.
SOLUTION: Down, right x2, up, left, down x3, right x2, up, left x2, down, left, right.
PUZZLE 44
Where: Talk to Ginger at her inn.
SOLUTION: RIGHT, DOWN X2, RIGHT X2:
PUZZLE 46
Where: Talk to Goffredo at Ginger's inn.
SOLUTION:
PUZZLE 45
WHERE: Talk to Riccio in Vicolo Losco ( he's the kid inside the barrel! ).
SOLUTION: Box E.
EXAMINE THE MARKET AFTER THE EXPLOSION
-Gather the little bell in the center of the area, near the wheel of the wagon.
FORGOTTEN PUZZLE 24
WHERE: Talk to Ms. Terry in the courthouse road area after the market explosion.
SOLUTION:
FORGOTTEN PUZZLE 29
Where: Talk to Miss Terry in the "Road to Court" area after the explosion at the marketplace.
SOLUTION: Place Luke's cart in the position shown. Pass Maya's cart through to its destination and then move Luke.
FORGOTTEN PUZZLE 31
WHERE: Talk to Ms. Terry in the courthouse road area after the market explosion.
SOLUTION: Place the animals, where shown and then the cow in the only enclosure. ANIMALS
FORGOTTEN PUZZLE 38
WHERE: Talk to Ms. Terry in the courthouse road area after the market explosion.
SOLUTION: Right, down x2, right x2.
PUZZLE 48
It's part of the story.
SOLUTION:
PUZZLE 49
It's part of the story.
SOLUTION: Place the last component in the only space left in the picture.
PUZZLE 50
It's part of the story.
SOLUTION: SOLUTION:
PUZZLE 51
It's part of the story.
SOLUTION: Move Maya one down. Move the professor left, down x2, left x2, down. Move Maya one up and one down, then one up and one down again. Now move the Professor down, left and down to get him out. Inevitably return to Maya and go right, up, left, down, right, down x2, left, down, up, down, right, down, right x2, left x2, right x2, up, down, left x2, right x2, up x5, right.
PUZZLE 52
WHERE: On the outskirts of the village, touch the cave covered with branches just below the large tree with gnarled roots.
SOLUTION: Cut the center branch.
PUZZLE 53
WHERE: At the lake with the red flowers, talk to the shade.
SOLUTION: Flip the logs as shown.
PUZZLE 54
WHERE: Talk to the shadow in the center near the blue cauldron in the Shadow Laboratory.
SOLUTION: Pour the red potion into the empty 5 cup. Pour the blue potion into the empty 3 cup. Now pour the blue 3 cup into the big one where there are already 3 amounts of red potion. You are missing only 2 amounts of green potion, pour the red potion into the empty 3 cup. Pour the blue potion into the red cup with 2 amounts of red potion. Pour the last 2 amounts of green potion with the others.
PUZZLE 55
It's part of the story.
SOLUTION: AEBDC, place the shadows in this order.
CHAPTER 6
PUZZLE 56
WHERE: Touch the central wall in the depot with the wagons.
SOLUTION:
PUZZLE 57
It's part of the story.
SOLUTION: After trying to insert the key into the lock from different angles, click the "One moment" button that will appear in the lower left corner. Now recompose the key as shown.
PUZZLE 58
WHERE: Touch the red-eyed stone statue on the right in the Closed Ruins.
SOLUTION:
PUZZLE 59
It's part of the story.
SOLUTION: Place the large and one medium block on the left platform. Place two small and one medium blocks on the center platform. Place the last small block on the right platform.
PUZZLE 60
It's part of the story.
SOLUTION: Turn down the bridge section, further to the right, shown.
PUZZLE 61
It's part of the story.
SOLUTION:
CHAPTER 7
INSPECT THE TOWER IN THE SQUARE
-Touch the tunic to the floor to add "Flour-covered tunic" to the objects.
-Touch the "Tower Plan" to add it to the objects, it's leaning against the right column.
-Touch the small shining object in the center of the area to add the "Pendant" to the objects.
-Please touch the gold cube on the left column to add "Device" to the objects.
FORGOTTEN PUZZLE 47
Talk to Miss. Terry at the entrance to the guard post.
SOLUTION: Very simple enigma, just turn 5 or 6 pieces and you'll get it done quickly. Remember to also rotate the central piece at the top of the moon.
PUZZLE 63
It's part of the story.
SOLUTION: Place the numbers as shown.
CHAPTER 8
Cross-examination 1
-Push Luna to the first statement to get Daphne on the stand. -Mm-hmm.
-Push Luna to the second statement and when the girl has veiled eyes move the lens to Daphne and question her. In this way a new statement will be inserted in Luna's deposition.
-Show the "Report of the Guards" to the second moon statement.
-Show the "Footprints" to the statement where Luna says Daphne followed her.
Cross-examination 2
-Pick up guard number 9, when he says he "reported to the captain" move the lens and question Ser Roman. When he says that he has "entrusted the task to a young and active guard," move the lens and question Ser Otto. In this way the testimony of guard number 4 will be updated.
-Show the "Footprints" to Guard Number 4.
-You say, "both versions are correct."
-Show the Flourred Tunic. -Mm-hmm.
Cross-examination 3
-Pick up guard number 8 and when he says "nobody heard anything", move the lens and question guard number 10 to update the tenth statement.
-Show Lady Miranda the "Plant of the Tower". -Mm-hmm.
-Highlight the Bell on the floor plan of the tower. -Mm-hmm.
-Show the "Congengo" to guard number 10. -Mm-hmm.
-Show the Pendant. -Mm-hmm.
PUZZLE 64 NOT SOLVABLE
It's part of the story.
SOLUTION: You can't solve it now. You only have to light one red gem and then continue the process.
-Choose "Move an objection."
-You say the new evidence is "...wearing to the moon."
-Highlight the white bracelet that Luna has on her arm that holds her vertically.
PUZZLE 64
It's part of the story.
SOLUTION: Address the rays as shown and finally rotate the center gem.
The adventure will pass to the Professor and Luke.
PUZZLE 65
It's part of the story.
SOLUTION: Touch the arrows in this order: Right-Left-Left-Right.
PUZZLE 66
It's part of the story.
SOLUTION: Touch the arrows in this order: The highest, the lowest, the rightmost and the leftmost, in short all 4 arrows located in the outermost perimeter of the central square.
PUZZLE 67
It's part of the story.
SOLUTION: Starting from the top and continuing to the right, number the squares from 1 to 9. Now touch the following arrows:
1-A vertical arrow between 6 and 9.
2-Horizontal arrow between 5 and 6.
3-Horizontal arrow between 2 and 3.
4-A vertical arrow between 3 and 6.
5-Horizontal arrow between 7 and 8.
6-A vertical arrow between 4 and 7.
INSPECT THE MOON ROOM
-Zoomate sla curtain over the bed.
-Please touch the pink book.
-Top the door to the right of the area to continue.
INSPECT THE NARRATOR'S STUDIO
-Touch the paper on the wall, just above the desk to find a "Photo".
-Touch the rod holding the piano lid where the rod itself starts to unlock puzzle 68.
PUZZLE 68
It's part of the story. In the Narrator's study, touch the rod holding the piano lid where the rod itself starts.
SOLUTION: Orient yourself with the rotating glass in the upper screen. When the harp passes into the Goddess' hands, a score appears for a few seconds around some of the many stars present. You will have to place the notes in that order.
PUZZLE 69
It's part of the story.
SOLUTION: The riddle changes from time to time, you simply have to watch the enemy knight's attacks and repeat them.
CHAPTER 9
Cross-examination 1
-Push Rea into all the statements and continue, listening to Maya's advice.
-Pick up Rea again when she says she was waiting "near the tower, next to the guards. "
-Choose to "continue to push", and a new statement will be added.
-Push Rea on the declaration of the Tunic of Invisibility.
-Choose "Show a Trial".
-Show the Floured Tunic.
Cross-examination 2
-Push Rea in all statements.
-Please show the pendant to Rea during the third statement.
-The testimony of Rea will be updated.
-Show the spell Soporifer, from the Great Grimoire, during the new first declaration of Rhea.
-Say it was something else that wasn't magic."
-Choose "Laura."
-Choose "The same Laura."
-Highlight the Neck of the Supreme Inquisitor Laura.
Cross-examination 3
-Push Laura to the second statement. -Mm-hmm.
-You say, "there's something very strange about the statement." So we'll update Laura's Testimony.
-Push Laura to the fourth statement and shortly afterwards you'll see a comic book from Rea appear, move the lens and question her.
-You say, "there's something strange about Rea's statement." The description of the Invisibility Tunic will be updated.
-Now show the Tunic of Invisibility at Laura's last statement. -What?
-Show the Fingerprints to Laura's third statement. -Mm-hmm.
-Now show the Tunic of Invisibility again at Laura's last statement to make Rea give up for good.
-Show the Footprints as evidence. -Mm-hmm.
Cross-examination 4
-Play Laura and Rea in all statements to update the testimony and get a new final statement from Laura.
IMPORTANT: Please proceed in an orderly manner, first Laura's 2 statements, then Rea's, the new testimony will unlock after Layton has set an OBJECTION and Wright realizes that Laura is trying to challenge him.
-Please call Laura to this new and final statement. -Mm-hmm.
-Say you're ready to show some proof."
-Show any spell from the Great Grimoire. -Mm-hmm.
-In the comparison of testimonies, choose the first statement of Rhea, the one in which he says "Laura ERA their venerable ruler".
-Choose the Narrator.
-Choose to betray the Narrator.
EPILOGUE
Cross-examination 1
-Push the Narrator with every statement!
-Choose Luna.
Cross-examination 2
-Put Luna in all the statements. At both the third and fourth will appear a comic strip about the Narrator, move the lens and question him both times.
IMPORTANT: After the first cartoon of the Narrator say "you have no proof" and continue the process.
-The Evidence will be updated with a drawing of a Fire Dragon.
-Push Luna again to the third statement and, when the comic appears, move the lens to question the Narrator again.
-This time you choose to show the proof! -I'll show you the proof!
-Show the Dragon of Fire. -Mm-hmm.
-Say "The city itself."
-Please lower the view onto the tower railing and rotate the frame until you find the "Dragon" shown.
-Show the Picture of Two Little Girls. -Mm-hmm.
-Choose Laura.
-Show the Pendant.
-Show the Bell.
-Show the pink fairy tale book "The Origins."
-Show the "Goodbye Letter."
Cross-examination 3
-Push Laura in all statements and on the fifth move the lens to the Narrator and question him when the cartoon appears.
-Moon will awaken from Trance. -Mm-hmm.
-Push Laura back to the fourth statement to make a comic book about Luna appear. Move the lens and interrogate her.
-Show the Machine.
-Choose Laura.
PUZZLE 70
It's part of the story.
SOLUTION: Place the symbols over the circled ones
NEW GAME +
PUZZLE 62 ( THIS PUZZLE IS OFTEN MISSED )
WHERE:This particular Enigma is often missed during gameplay. If you have missed it you won't find it at Miss Terry's but you'll have to finish the adventure and choose to restart the game from the Ruins. Touch the altar to move on to Chapter 7. Quickly get through the stage with Wright and once you enter the Guard Post with Layton, talk to the Captain of the Guards. After the chat, the game will automatically continue with a few scenarios. As soon as you regain control, go back to the Watchtower and talk to the Captain again.
SOLUTION:
SPECIAL EPISODES
PUZZLE 71
WHERE: Download Special Episode 1.
SOLUTION:
PUZZLE 72
WHERE: Download Special Episode 2.
SOLUTION: Enter the following words into the parrots from the top:
-LAYTON
-PRENDS
-UN
-TE'
-ZUCCHERATE
PUZZLE 73
WHERE: Download Special Episode 3.
SOLUTION: Recompose the bas-relief following the order shown.


