


You are a photography enthusiast and would like to transfer some of your best shots onto iPad, so that you can easily show them to friends and family? Do you have so many photos saved on your iPad that you can no longer find your way around your image library? Then you've come to the right place at the right time.
With today's guide, we'll see how to archive photos on iPad so you can easily copy photos from your PC to the Apple tablet and make the iOS Camera Roll more tidy. I assure you that a little effort can be done in no time. Let's get started right away!
If you want to know how to archive photos on iPad to transfer the photos on your PC to it, the first step you need to take is to connect the tablet to the computer via Dock / Lightning cable and start iTunes (if it doesn't start by itself). Then select the item relating toiPad from the menu of devices located at the top right and go to the card Gallery.
At this point, metti il segno di spunta accanto alla voce Sync photos from and select the source from which to copy the images to iPad from the adjacent drop-down menu. You can select any folder on your PC by clicking on the option Choose folder, or the iPhoto (on Mac) by selecting the appropriate item. Finally click on Apply and the transfer of photos to iPad will start.
If you do not want to copy all the images in the selected folder on the iPad but only some albums or events you have chosen, put the check mark next to the item Selected albums, events and faces, and automatically include and select which items to sync to your device from the box below. For more information on this process, read my guide on how to upload photos to iPad.

If you want store photos on iPad organizing them in albums, you can safely use the application Images present "standard" on the Apple tablet and order all the images in your camera roll. How? I'll explain it to you right away.
All you have to do is go to the tab Gallery, press the button Modification (top right) and select all the images you want to collect in an album. At this point, press the button Aggiungi ... (always located at the top right) and select the item Add to new album from the menu that appears to create a new album in which to transfer the selected photos.
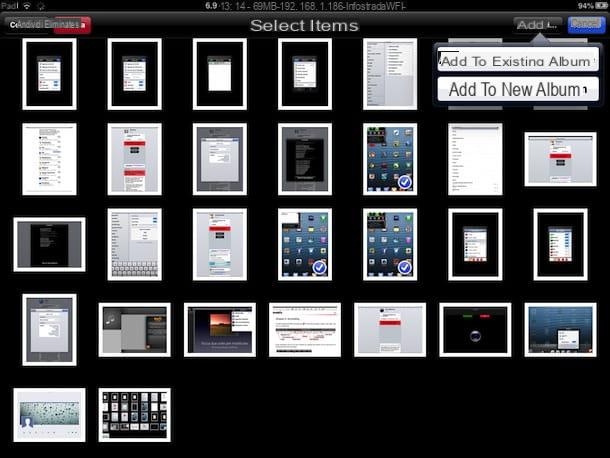
Later, you can select other photos from the iOS Camera Roll and transfer them to an existing album by repeating the same procedure and selecting the item Add to existing album from the menu Aggiungi ....
And if you want to have more control over your shots, retouch them and organize photos based on custom tags as well as simple albums, you have to buy iPhoto, the Apple photo management app that costs 4,49 €. The price is not very low but difficult to find a more complete solution on iOS.
How to archive photos on iPad


