


Browsing through your photo collection, did you find any shots that are slightly wavy? These are things that can happen to anyone, even professional photographers. Fortunately, however, in post-production it is possible to try to remedy the mistakes made during the shooting phase, as long as the photos in question are not particularly compromised (in this case, it is difficult to obtain good results).
If you want to know more, keep reading: in this guide, you can find an explanation on how to edit blurred photos using some photo editing programs, some web applications that can be used directly from the browser and mobile device apps that can be useful for the purpose. I already anticipate that almost all the solutions I will talk about are 100% free and that, while not doing "miracles", they guarantee more than satisfactory results (always provided that the starting image is not too blurry).
So, are you ready to try your hand at this new tech venture? Yup? Perfect: make yourself comfortable, take all the time you need to concentrate on reading the next paragraphs and, more importantly, try to put into practice the "tips" that I will give you. If you do, you should at least be able to save what can be saved (but don't expect miracles!). I wish you happy reading and I wish you a big good luck for everything!
How to edit blurred photos with Photoshop
If on your computer it is installed Photoshop, know that the famous Adobe photo editing program (available for Windows and macOS) includes an automatic filter that allows you to remove blur from photos in just a few clicks.
If, on the other hand, Photoshop is not yet installed on your PC, know that you can test its features for free for 7 days: at the end of the trial, then, you will be required to subscribe to the Adobe Creative Cloud plan, starting from 12,19 €. More info here.
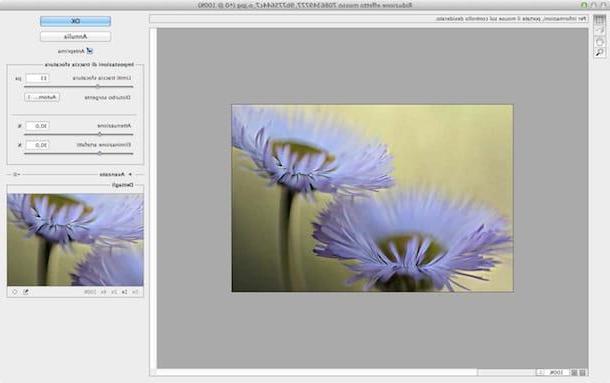
All clear? Well, then let's take action. Once Photoshop is open, import the photo you want to retouch into it by selecting it from the menu File> Open… (top left), then select the items Sharpness> Blur Reduction from the menu Filter and, in the window that opens, wait for a preview of the “corrected” image to be generated.
If you are satisfied with the result, press the button OK to correct the moved parts. If not, change the values of the control bars Trace limits blur, attenuation ed Eliminate artifacts and help with the real-time preview to find out when the moved parts of the image are adjusted appropriately.
If you need to zoom in on a portion of the photo to analyze in detail the application of the filter, click on it and use the box located at the bottom right to choose the preferred zoom level (eg. 2x, 5x, Etc.).
After applying the filter to correct blurred images, you can save your edited photo in Photoshop by selecting the item Save with name from the menu Fillet program (top left). That's it: it was easy, wasn't it?
How to edit blurred photos with GIMP
Another solution I recommend you try is GIMP: it is a very popular open source photo editing program (available for Windows, macOS and Linux) which is considered the best free alternative to Photoshop.
To download GIMP on your computer, connected on this page, press the button Download x.xx.x and then click on the button Download GIMP x.xx.x directly which is located on the right. Once the download is complete, if you are using a PC Windows, open the file .exe you got and presses on the buttons Yes, OK, Install e end.
A Macinstead, drag GIMP in the folder Applications macOS, right-click on the program icon and select the item apri from the menu that opens twice in a row, so as to "override" the restrictions that macOS applies to software from non-certified developers (this is only necessary at the first start).
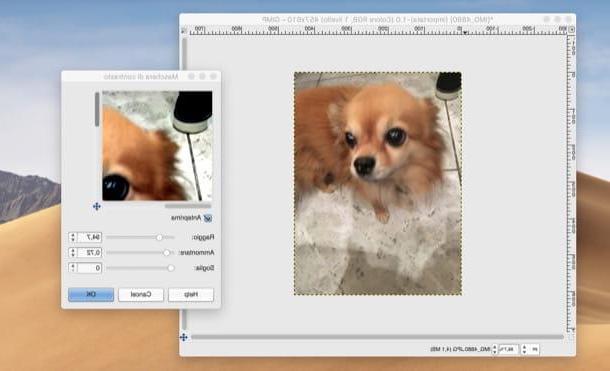
After installing and starting GIMP, drag the image you want to modify into its main window (the central one), open the menu filters (top) and select items Enhancement> Unsharp Mask da quest'ultimo.
In the window that appears on the desktop, change more parameters radius e Amount helping you with the preview you see in real time, so as to achieve the desired result. At the end of the work, if you have managed to correct the blur present in the shot and you are satisfied with the result you have obtained, save the output image by selecting the item Esporta eats… from the menu Fillet of GIMP and choose the location and format in which to export the image. Easier than that?
How to edit blurred photos online for free
You would like to know if it is possible edit blurred photos, perhaps using some free web application? Yes, of course! One of the best online services useful for this purpose is Photopea, which works on practically all major browsers, without installing any additional plugins (as the service is built with HTML 5 technology).
Before explaining how it works, I remind you that Photopea is a free service, even if there are advertising banners on the page that are not invasive at all. To remove them, you need to subscribe to its Premium version, which starts at $ 9 / month.
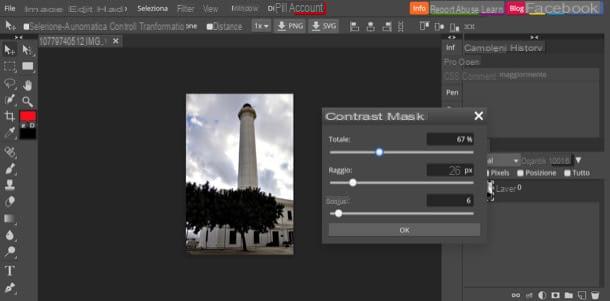
To correct blurred photos with Photopea, you must first connect to its main page and press on (X) which appears at the top right, in order to remove the welcome message. If necessary, then, translate the service interface into British by selecting the item cityno from the menu More > Language at the top right.
At this point, import the photo you want to retouch into the service by selecting the item Apri ... from the menu Fillet (top left), open the menu Filter e seleciona le voci Contrast> Unsharp Mask ... from the latter. Using the box that appears on the screen, then move the cursors on the adjustment bars Total e radius trying to get the best possible result (I advise you not to exaggerate too much, because otherwise you could get the opposite result and “distort” the image).
If using the unsharp mask tool you have managed to obtain an appreciable result and make the photo of your interest a little less blurry, save it on your computer by opening the menu Fillet and selecting the voice Export as. You will be able to choose the format and location to save the output file.
How to edit blurred photos on iPhone and Android
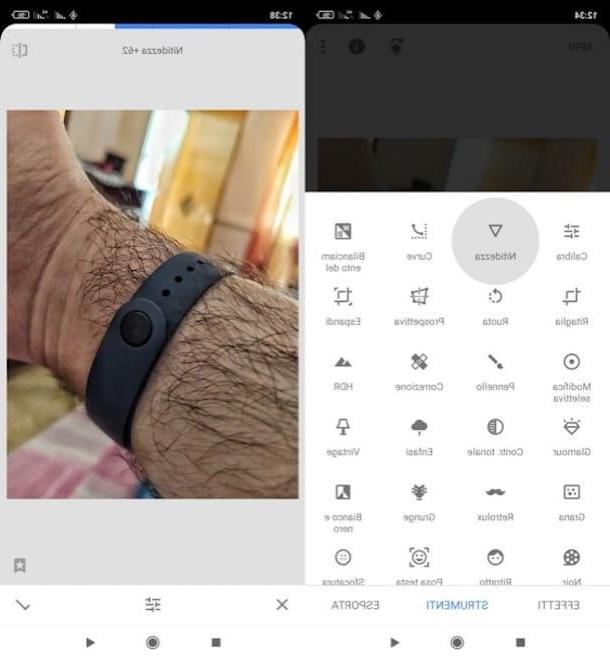
It is your intention edit blurred photos on iPhone and Android, know that there are various apps suitable for this purpose. One of the best, in my humble opinion, is Snapseed which, while not offering a dedicated tool to reduce blur, may be suitable for the purpose in question. It is available for Android and iOS / iPadOS.
After installing and starting Snapseed on your device, tap anywhere on the screen and select the photo to edit. Then press the button Instruments and select the one called Sharpness. At this point, swipe your finger to the right or left, and when you are satisfied with the result, press on the checkbox (bottom right).
If you have no other changes to make, press the button Export (bottom right) and select the export / share option you prefer.
How to edit blurred photos


