


You want to make a funny joke for your friends and the idea that came to your mind is to create a photomontage by applying your face over the one that portrays a famous actor, thus making everyone believe that you have participated in an important red carpet: it's so true? Well, then let me tell you: the idea is good and I'm sure that, if done well, your most distracted friends will fall for it for sure!
How do you say? You would like my help because you don't know how to go about it change the face to one Photo? Are you afraid of not being able to do it independently, because you are not familiar with the use of the computer? Don't worry, here I am ready to help you. To perform an operation of this type it is not absolutely necessary to be an expert in using the computer; it only takes a few steps and, using software for Windows or macOS, an application for smartphones or tablets or even an online tool, it is possible to succeed in the blink of an eye.
Are you still not convinced of the simplicity of this operation? In this case, you should definitely continue reading this tutorial. If you want to succeed in replacing a face with a photo, the only thing you need is a few minutes of free time, a little patience and a good dose of creativity. I am absolutely sure that, among the solutions indicated in this guide of mine, there are some that will surprise you for their ease of use. You will see that making a photomontage will be absolutely child's play! Happy reading and have fun!
Programs to change the face of a photo
If your intent is to change the face of a photo, you can choose to use some software for Windows and macOS, such as those I am talking about in the following lines, in order to obtain a result that is as professional as possible.
Foto Face Swap (Windows)
One of the software you can use to change the face of a photo è Foto Face Swap, a paid program at a cost of $ 20, available only for Windows and usable for free for a limited duration.
To download it on your PC, connected to its official website, click on the item Download, wait for the installation file to download and, when finished, double-click on it. To install the software, click first Yes from the User Account Control window and then on Next. Then put the check mark on the item I accept the terms in the license agreement and finish the setup by first clicking on Next and then install, Finish e OK.
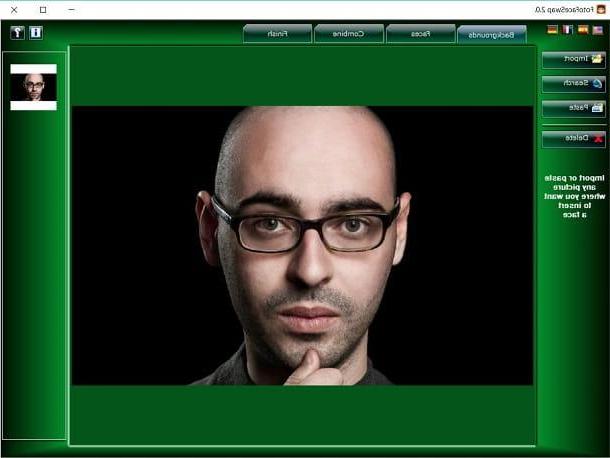
Once the program has started, select the tab Backgroundsclick your Import to import the photo montage background image, then click the tab Faces and Import, to load the image with the face to be selected.
In this last tab, move the rectangle to the face of your interest, then go to the section Combine, in order to view the result, and possibly move and cut out the contoured face, using the tool Move/Resize located in the left sidebar. In this last section there are also other useful tools to improve photomontage, including the one called Face Eraser which serves to make the result more precise.
When you are satisfied with the changes made, click on the tab Finish and press pulsating Save to save the montage on your computer.
Preview (macOS)
Stai using a Mac, you will be happy to know that, to change the face of a photo, you can use Preview, macOS's default tool for viewing images.
This native software is already pre-installed on the Apple operating system, so to use it, just open it by double clicking on the chosen image, the one whose face will be cut out. In the case of Preview is not set as the default program for opening images, right click on the photo you want to use and select the items Open with> Preview give the menu to compare your schermo.
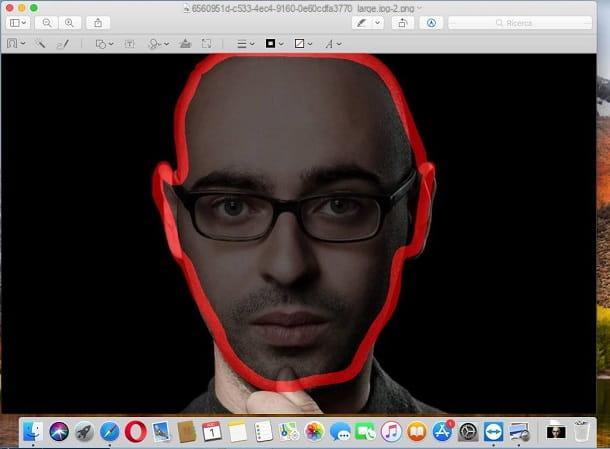
Once the program has started, click on the button Editing tools (and the symbol of a pencil, top right). Now, in the toolbar displayed, click on the icon of Selection (is the symbol of a dashed rectangle) and then choose the item Smart lace give the menu answer.
The mouse cursor will then turn into one cross: drag it on the face, to delimit it and cut it out. When done, let go of the mouse button and click the button Cut out you see in the toolbar, in order to make the background disappear.
At this point, press the key combination ⌘ + C to copy the cropped face, always open with Preview the image to apply it to and, in the latter, press ⌘ + V.
The cursor a will appear on the pasted image shape of a hand: this is useful for moving the face over the background photo to the most appropriate point. Also, don't forget to use the dots located at the edges of the cut-out face, to adapt the face to the background image, and to save the final result by going to the menu File> Export Preview.
Photoshop (Windows / macOS)
One of the most used solutions to carry out photo editing work is certainly Photoshop, very famous professional program (therefore for a fee) available for Windows and macOS. Its prices start at € 12,19 per month, but if you wish, you can download and install Photoshop free on both operating systems through the use of a free evaluation version, which gives access to all the features for a duration of 7 days.
If you intend to do this, then use Photoshop on Windows or macOS for change the face of a photo, follow the preliminary download and installation procedures of the program that I indicated in my guide on the subject.
The operation of the software is identical on both operating systems, so, once started, open the images you want to use to create the photomontage (the one with the face to cut out and the one in which you want to apply the face). You can perform this operation simply by dragging the images into the program's work window, or by selecting the item apri from the menu Fillet.
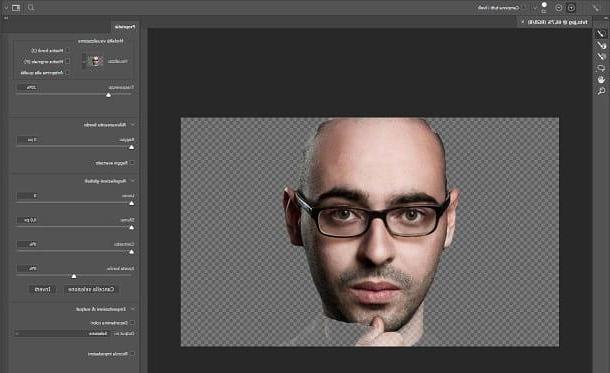
At this point, click on the tool icon Bow (The symbol of a rope) from the Photoshop toolbar (it is the one located on the left side of the screen), and select the item Magnetic lasso tool from its context menu. Now, crop the face of the imported photo, trying to be as precise as possible. Don't worry, the magnetic lasso gives you a hand, as it automatically detects the edges of the face to be cropped.
Once you have made your selection, click on the button Select and Mask located at the top right and, in the new section that opens, use the levers you see on the screen (such as radius e Fade), to refine the selection and make the edges of the face as precise as possible. When done, click OK.
Now, copy the cut-out face from the original photo by pressing the key combination on the keyboard Ctrl + C, go to the tab of the other open image in which to apply the cut out face, and press the combination of keys Ctrl + V to paste it.
Once this is done, move the cropped face, so that it matches the background photo as best as possible: to do this, hold down the left button and move the selection box with the mouse. In addition, it uses i square you see in the margins, to resize and flip the cut-out face.
When you are satisfied with the result, press on √ symbol, to save the changes. To save the montage on your computer, click on the entry Save with name from the menu Fillet of Photoshop.
And if you want to learn more about the functioning of Photoshop, I suggest you refer to my tutorial dedicated to the topic.
App to change the face of a photo
To change the face of a photo you can do it quickly and easily, even by using one of the many Android and iOS applications, such as those I recommend in the following lines.
MSQRD (Android/iOS)
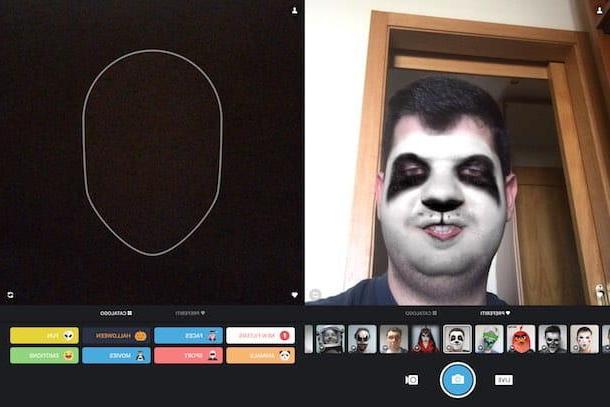
A useful application for change the face of a photo in real time it is MSQRD, free app that features different filters to change your face in real time while framing it with your phone (or tablet) camera. It also includes filters for two people to use to swap faces.
After downloading MSQRD on Android or iOS by pressing, respectively, on the buttons Install / Accetto e Ottieni / Installa of Play Store and App Store (on iOS you may be asked to start the installation using Face ID, Touch ID or Apple ID password), start the app and consent to the notifications regarding permissions, in order to use all the features of the app.
On the main screen, tap on Use MSQRD without logging in, then bring the screen of the device up to your face and select one of the filters present, to create a photomontage in real time. To take a photo, press the button with the camera symbol twice in a row and then share the final result on the social network of your choice, by pressing the respective button (for example you can find the symbol of Facebook and Instagram).
Photo Lab (Android/iOS)
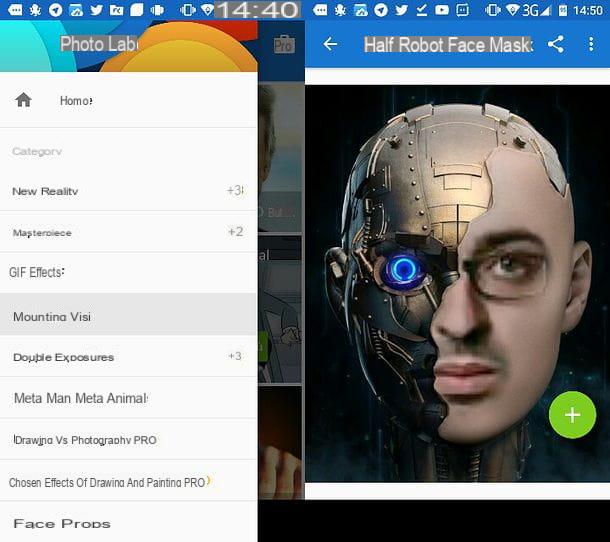
If you are looking for a more advanced tool for making photomontages on mobile devices, turn to the free app for Android and iOS called Photo Lab.
After downloading it from the default store of your device (on Android tap su Install / Accetto while on iOS cheap with Ottieni / Installa and eventually start the download via the Face ID, the Touch ID or type the iCloud password), skip any requests relating to the subscription or the trial of Photo Lab Pro, version without watermark and without advertising with prices starting from € 9,99 per year.
Using this application in its free version it is however possible to change the face of a photo. To do this, click on the item Categories from the menu bar at the bottom and tap on the wording Face mounting.
Then select the effect to apply and press on the photo to be modified that you find in correspondence with the section Faces. Then tap on the confirmation button, to insert the image and wait for the final processing of the photomontage.
To save the result in the memory of your device, press on symbol of sharing and finally, tap on Download (The arrow symbol downward).
Changing the face of a photo online
If your intent is to make a photomontage without installing software on your PC, I want to suggest the use of some online tools which are particularly suitable for this purpose.
PhotoFunia
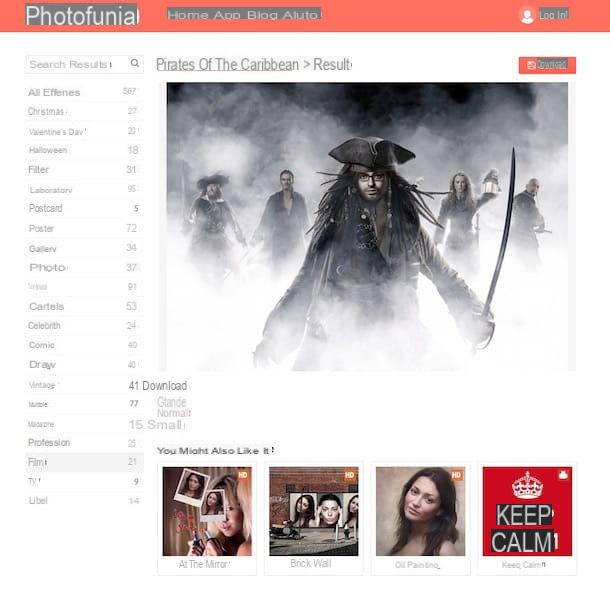
Among the Internet sites dedicated to photomontages, one of the most famous is Photo Funia, web portal also available as a free application for Android and iOS that offers various resources to change the face of a photo.
To start, connect to the home page of this service, in order to locate and click on the photomontage categories in the left sidebar. Once you have identified the type of photomontage, click on the preview image to select it, click on Choose photos I used the button Upload from PC to import the image to use.
You can also press on the item Camera or on the one named Online if you want to take a photo via your computer's webcam or upload an image from a social network or cloud storage service, including Facebook o Google Drive.
Once the image has been imported, make the cutout and, at the end, press on Cut out, then click Go to see the final result. To save the montage on your computer, click on the button Download located in the upper right corner.
Pixiz
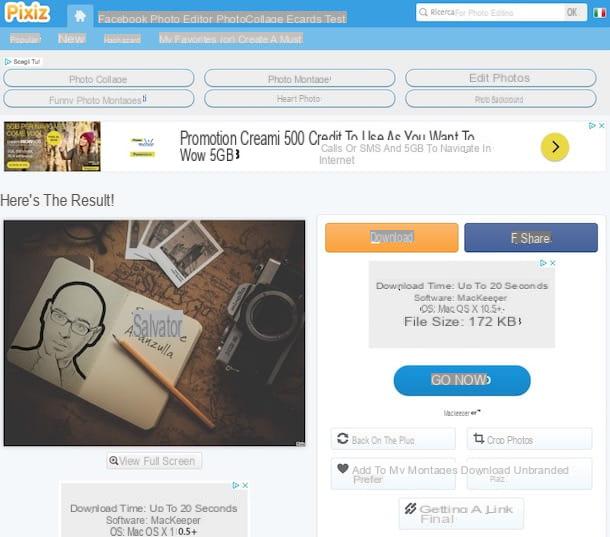
Another online resource you can avail for change the face of a photo is the website Pixiz, which provides many free resources for the creation of photomontages. It is also available as a free app for Android and iOS.
To use Pixiz, connect to its home page, in order to find the effect you like best. Once you have identified the photomontage to make, click on the chosen image and import the photo to replace by pressing the button Select image. Alternatively, select the pulsating (+), to view the options Webcam e Facebook, to import a photograph taken via the webcam or import it from Facebook.
Now, click Go and wait for the final result of the photomontage made through automatic cropping. If, on the other hand, you want to apply a manual crop, remove the check mark next to the item Automatic cropping, awarded his Go, edit the imported image and select OK to view the result.
If you are satisfied with your photomontage, download it to your computer by pressing the button Download, or press the button Unbranded Pixiz Download to download the image without the watermark.
Other tools to change the face of a photo
In the following lines I want to tell you about other useful resources to change the face of a photo, so that you can more easily succeed in your goal through an online tool, software or app suitable for your needs.
- GIMP (Windows / macOS / Linux) - is a very popular free cross-platform opensource software that is often used as an alternative to Photoshop. Being an editing program, it can be used in a similar way to Adobe software to change the face of a photo. I have explained to you in detail how to use it in my dedicated guide.
- PhotoFunia (Android / iOS) - is the free mobile application of the popular photomontage website I told you about in the previous paragraph. It is useful if you want to quickly change the face of a photo through your smartphone or tablet.
- LoonaPix (Online) - This is another popular web service that can be used for making photo montages. It has a wide choice of templates and templates to apply a face on the photo of a famous or imaginary person.
- Photopea (Online) - online photo editing service that almost perfectly matches the Photoshop interface. This means that you can use it to change faces in photos just like the famous Adobe photo editing program. It's free and requires no plugins to work (it's made entirely in HTML5).


