


Even in the digital world, the signature is a very important means through which you can protect your work and avoid unpleasant incidents, such as the "theft" or the reuse of material without permission, when you publish your creations on the Internet, first of all. digital photos.
With today's guide, I therefore want to explain to you how to sign digital photos thanks to tools that will allow you to protect the copyright of your shots, preventing unauthorized use. There are so many software to add signatures and logos to photos, from the most advanced ones that cost a lot of money (or in any case require a monthly subscription) to the cheaper ones intended for less professional purposes: find the most suitable one for your needs and find out how to use it by following the instructions I am about to give you.
How do you say? Do you take lots of photos with your smartphone and would you like to sign your shots without having to go to your PC first? You can do this too, I'll tell you about it in the final part of the tutorial. But now let's go in order and begin to see how to apply a logo or a signature to digital photographs using the computer.
Photoshop (Windows / Mac)
If you are a professional photographer, or otherwise you want to learn how to sign digital photos in a professional way, you have to spend some money and rely on the Digimarc watermark that inserts all the copyright data into the photos without "dirtying" the image, that is, without any writings or logos being seen with the naked eye. The basic price for having a Digimarc account is 59 $, the subscription is valid for one year and for a maximum number of 1.000 photos.
The easiest way to apply a Digimarc digital signature to photos is to use Photoshop. In fact, you just have to import the photo to be signed in the program (menu File> Open) and will select the voice Digimarc> Include watermark from the menu Filter to access the window for entering the copyright data in the photo (click on Customize to enter your Digimarc account data).
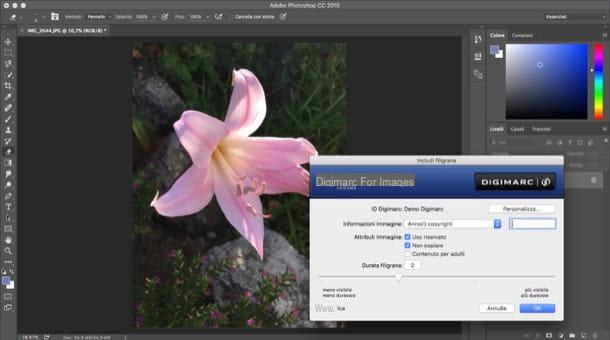
If the Digimarc plugin is not yet installed, connect to this web page and download it on your PC by clicking on the item relating to the version of Photoshop you use. Once the download is complete, grab the file (or files) with the extension .plugin you just downloaded to your computer, copy them to the folder C: > Program Files > Adobe Photoshop xx > Plug-Ins if you are using a Windows PC or in the folder Applications> Adobe Photoshop XX> Plug-Ins if you are using a Mac and restart Photoshop.
To read the watermark of the photos in which the Digimarc signature has been used, open Photoshop and select the item Digimarc> Read watermark from the menu Filter.
Alternative procedure
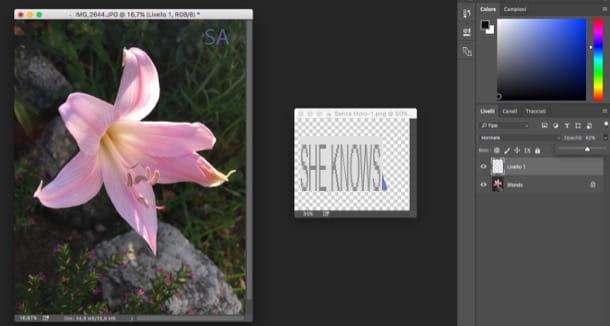
Do you want copyright information to be prominently displayed on your photos? In this case you just need to open an image with a transparent background in Photoshop and insert it into the photo you want to "sign". The image in question can be your company logo, a stylized signature or anything else. You can also create it directly in Photoshop by going to the menu File> New and setting the background content of the new image on Transparent.
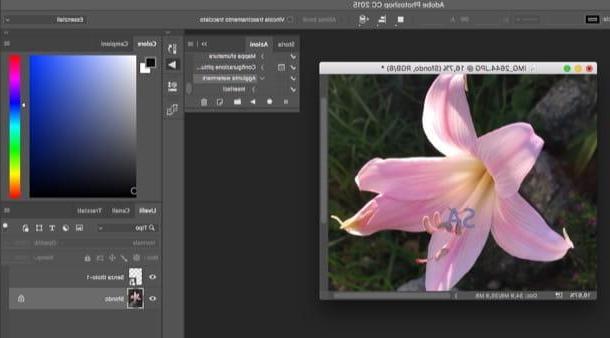
Once you have created your logo or signature, you can insert it into any photo by simply selecting the item Insert embedded from the menu Fillet of Photoshop (or by making the most banal copy-and-paste). Subsequently, you can customize the logo using the level adjustment tools located at the bottom right (e.g. the drop-down menu for choosing the blending method or the adjustment bar of theopacity) and tools for moving or resizing images. For more information on this, try taking a look at my tutorial on how to blend two images in Photoshop.
If you prefer i textual watermarks, not much to say, select it text tool Photoshop and type the text you want to insert into your image (customizing it with the text formatting tools included with Adobe software).
Would you like to insert your logo in multiple images at the same time? This can also be done but, I warn you, it takes a bit more effort. What you need to do is create an action relating to the insertion of the logo (or signature) in the photos and exploiting it in the Photoshop image processor (which precisely allows you to process multiple images in series). Here are in detail all the steps you need to take.
- Copy all the photos to be signed in the same folder;
- Open a photo in Photoshop;
- Select the item Actions from the menu Window;
- Click on the icon sheet present in the actions box (which in the meantime has appeared in the upper right corner of the screen);
- Assign a name to your action (ex. Watermark added) and click on the button Register;
- Go to the menu File> Place Embedded in Photoshop;
- Select the file with the logo you want to insert in your images, place it in the place of the photo you prefer and press the button Submit on your PC keyboard;
- Click on the button stop present in the Photoshop Actions pane.
You have now created an action, i.e. a script, for inserting the watermark into your digital photos. To use it and apply the same watermark (in the same position) to multiple images in series, go to the menu File> Scripts> Image Processor of Photoshop.
Then click on the button Select folder, indicate the folder where you stored the images to be signed and set your preferences regarding the destination folder of the photos and the output format (you can choose between JPEG, PSD and TIFF). Finally, put the check mark next to the item Take action, select the name of the action you created earlier from the drop-down menu at the bottom right (eg. Added watermark) and click on the button Run to start batch image processing. If you want, you can also add information from copyright of the photos by typing a text in the appropriate Photoshop field (the text will be included in the image metadata and will not be visible to the naked eye).
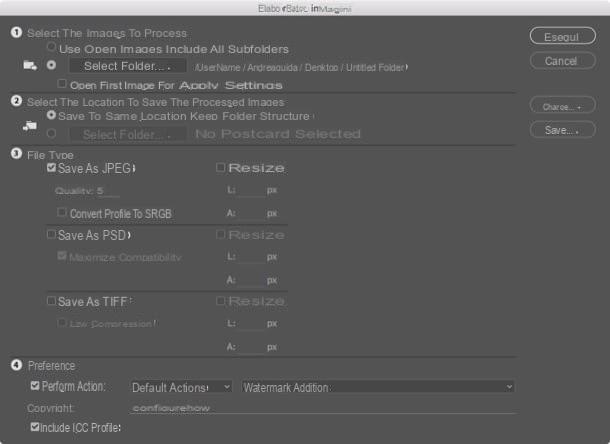
In order for the action to be completed correctly, you do not need to change the name or the folder where the file with the watermark is located. If you want, you can also use the same technique to automate the insertion of a text watermark.
Please note: if you don't have Photoshop installed on your computer, you can apply logos and signatures to your images with GIMP, now a very famous free and open source alternative to Adobe software. If you want to know more, read my tutorials on how to sign photos with GIMP and how to overlay photos with GIMP.
FastStone Photo Resizer (Windows)
If you want to keep yourself on an amateur level but still want to sign digital photos effectively, I recommend that you use a program capable of printing a watermark (i.e. a logo or a semi-transparent writing) to the images. In this way, you can insert your name, the address of your website or the logo of your company in all the photos and prevent someone from using them as their own (obviously you will have to insert the watermark in "strategic" points "And not in easily camouflaged or cut-out points).
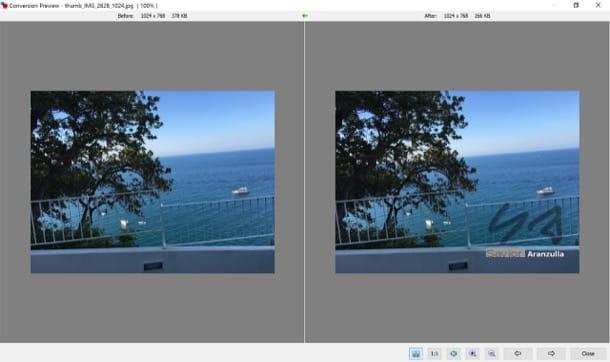
One of the best free programs to add watermarks to batch photos is FastStone Photo Resizer, which allows you to insert both writings and logos in hundreds of images at the same time. If you want to try it, connect immediately to its website and click on one of the first two buttons download for free to download it to your PC.
When the download is complete open, double clicking on it, the file you just downloaded (FSResizerSetupxx.exe) and first click on Yes and then Next, I Agree, install e Finish to complete the installation process of FastStone Photo Resizer.
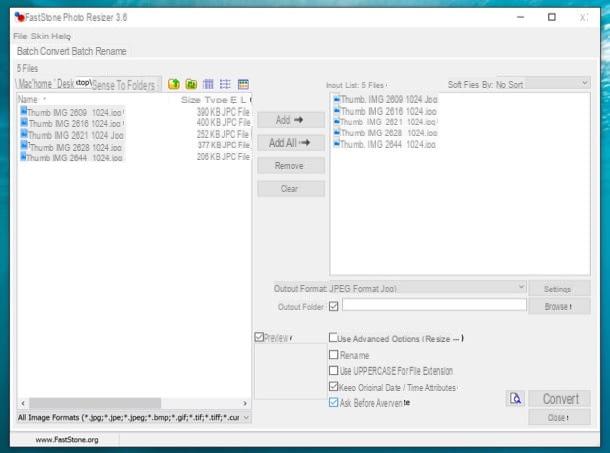
Now, launch the program via its shortcut on the desktop or in the Windows Start menu and use the left panel to navigate to the folder where the photos you want to sign are stored. Then click on the button Add all to select them all, or click on single images to select them manually.
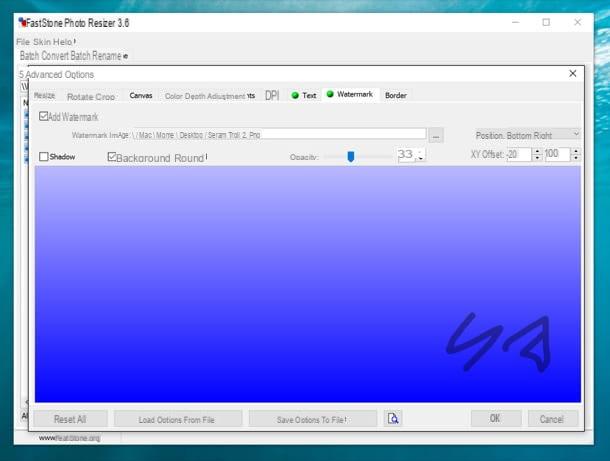
When the operation is completed, access the settings relating to writings and watermarks by placing the check mark next to the item Use Advanced Options (bottom right) and clicking on the button Advanced Options.
In the window that opens, click on the tab Watermark if you want to add a logo to your photos or on the card Text if you want to add a custom writing, put the check mark next to the item to activate the option and set the writing or logo you want to apply to the images by helping you with the real-time preview.
To add a graphic watermark to your photos, click on the button [...], select the image you want to use as a watermark (I recommend using a GIF or PNG image with a transparent background) and edit position e opacity of the logo using the appropriate adjustment bars.
If you want to sign your photos with a text watermark instead, type the scritta that you want to imprint on the images in the field Add text and choose whether to add shadows (Shadow) and backgrounds (background) to the watermark by placing the check mark next to the appropriate options. To adjust the degree of opacity of the writing use the adjustment bar Opacity, while to change the Font click on the appropriate button located in the center of the window.
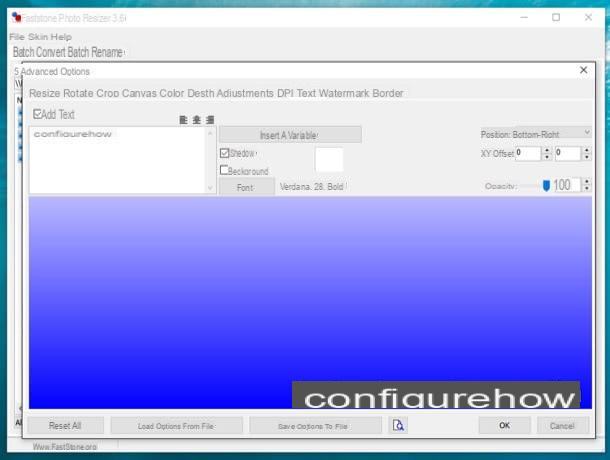
Once you have adjusted all the watermark settings, click on first OK to save the settings, then click on KATEGORIEN to select the folder in which to save the signed photos and finally to Convert to start saving the “marked” images. Simple, right?
ATTENTION: FastStone Photo Resizer is free for personal purposes only. If you intend to use it for commercial purposes, you must purchase a license for it for $ 19,95. More info here.
Preview (Mac)
If you use a Mac and, at least for the moment, you don't have the need to sign many photos at the same time, you can rely on Preview, the default macOS application for viewing and editing images (as well as PDF documents).
Clicking sull'icona della carrying case located at the top right, you can access a couple of Preview tools that allow you to sign photos incredibly quickly and easily. The first is the tool itself signature (the pen icon at the top left) which allows you to create a signature via the Mac trackpad or via the webcam. The second is the tool text (the icon of the letter "T") which instead allows you to customize images and documents by entering custom text boxes.

Both the signatures and the text boxes added with Preview can be moved, resized and customized in various ways (for example by changing the color of the writing or adding shadows).
App to sign digital photos on smartphones and tablets
You would like it sign digital photos directly from your smartphone or tablet? This can also be done. All you need is an application for adding watermarks to photos.
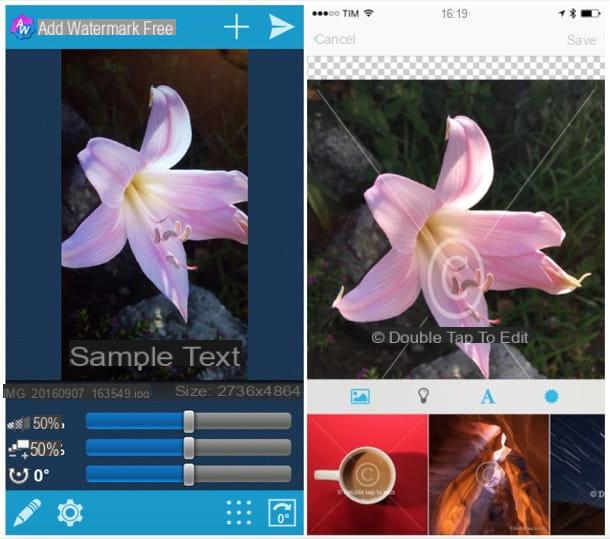
Personally I recommend Add Watermark for Android and Watermark for iOS, which can be downloaded at no cost but both have limitations that can only be removed by purchasing their full (paid) versions. The free version of Add Watermark for Android does not allow you to use custom graphic watermarks and saves the output images at a maximum resolution of 1024 pixels, while the basic version of Watermark for iOS imprints its logo on the processed images and offers a limited set of fonts and watermarks to be applied to images. The full versions of the apps cost, respectively, € 1,99 and € 0,99.
The operation of Add Watermark for Android and Watermark for iOS is extremely intuitive. After selecting the image to be signed, just select one of the options available for watermarking (graphic and / or text watermark) and customize the final result, which can be saved directly in the Android or iOS roll.
How to sign digital photos


