


You have most likely heard of often DNS, which is the Domain Name System. For those unfamiliar with it, DNS is basically the system used to translate website names into addresses IP, making them understandable to machines. However, some do not know that, in Windows 10, DNS data is stored locally to improve and speed up web browsing. So sometimes we may want to clear the cache DNS in Windows 1o.
Let's see together how to clear the DNS cache in Windows 10.
Preliminary information
We always recommend doing an installation through one 100% genuine and original license, this is to avoid data loss or hacker attacks. We are aware that purchasing a license on the Microsoft store has a high cost. For this we have selected for you Mr Key Shop, a reliable site with free assistance specialized in in your language, secure payments and shipping in seconds via email. You can check the reliability of this site by reading the many positive verified reviews. Windows 10 licenses are available on this store at very advantageous prices. Furthermore, if you want to upgrade to the latest versions of Windows operating systems, you can also purchase the upgrade to Windows 11. We remind you that if you have a genuine version of Windows 10, the upgrade to the new Windows 11 operating system will be free. Also on the store you can buy the various versions of Windows operating systems, Office packages and the best antivirus on the market.
Clear DNS cache in Windows 10: procedure
There are several reasons why we empty the cache. In reality it is mainly done for a reason. When websites change their IP address for some reason, there may be a mismatch between the cached address and the new address. In this way, some sites may be unavailable, precisely because the cache has not yet been updated based on the change made. In addition, we may want to clear the cache for privacy reasons, so as not to memorize the addresses of each site visited.
So now let's see how to clear the DNS cache on Windows 10. The procedure is really simple and is also suitable for less experienced users.
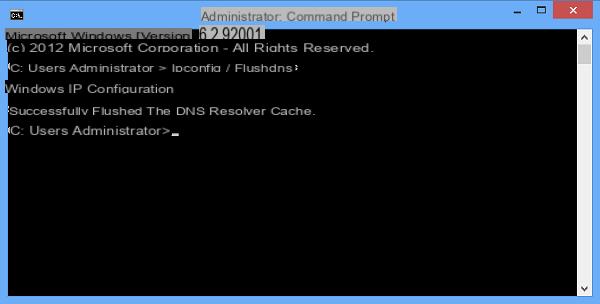
First of all we press the keys at the same time Windows + R to open Run. In the box we type
ipconfig / flushdns
and click on OK. Once this is done, we have completely cleared the cache.
If you want deactivate completely the ability to save addresses in the cache you have to follow this procedure.
First of all let's open Management activity. We can open it with the key combination Control + Shit + Esc. We click on the option More details and let's move to the tab Services. At this point we have to scroll through the list until we find the item Dnscache. We click with the button right mouse and click on the option Stop.
Having done this, we deactivated the DNS cache for our future browsing session.
Conclusions
As we have seen, therefore, clearing the DNS cache can be beneficial in certain situations.
Doubts or problems? We help you
Remember to subscribe to our Youtube channel for videos and other reviews. If you want to stay up to date, subscribe to our Telegram channel and follow us on Instagram. If you want to receive support for any questions or problems, join our Facebook community or contact us on Instagram. Don't forget that we have also created a search engine full of exclusive coupons and the best promotions from the web!


