


Would you like to embellish your room by hanging a Pop Art painting on the wall but you are not yet a millionaire to buy one and you have never done very well with painting? No problem. To create a Pop Art painting all you need is a computer, a colored sheet of paper, a printer and some free time.
Impossible? Then run to download the free program Paint .Net and follow my directions on how to create a Pop Art photo. In no time at all you will be able to transform a photo of yourself (or that of a relative / friend of yours) into a splendid Pop Art painting to hang on the wall. Let's get started right away!
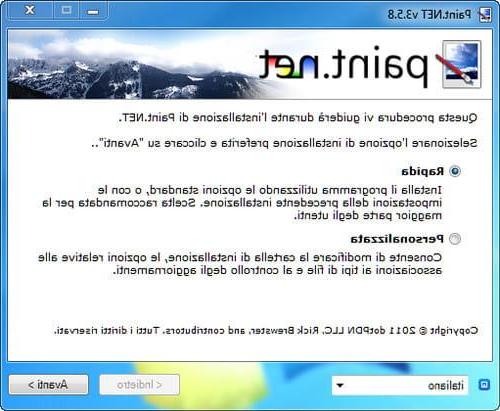
The first step you need to take is to connect to the Paint .Net website and click on the item Paint.NET v3.5.8 (located on the right) to download the program to your PC. When the download is complete, double-click on it to open the archive you just downloaded (Paint.NET.3.5.8.Install.zip) and start the program Paint.NET.3.5.8.Install.exe to start the installation process of Paint .Net.
In the window that opens, make sure there is a check mark next to the item Rapida and click on NEXT. Then accept the conditions of use of the program, putting the check mark next to the item Accept, and click your cousin NEXT and then end to complete the installation process and start Paint .Net.
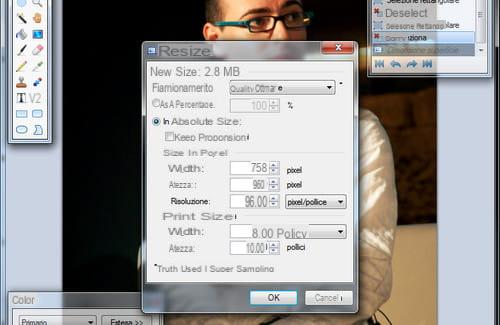
Now you are ready to create a Pop Art photo. Then click on the item apri contained in the menu Fillet di Paint .Net and select the photo you want to turn into a Pop Art painting. Remember to select a vertical photo (taller than long). With the image loaded, select the item Resize from the menu Image and, in the window that opens, remove the check mark from the item Maintain proportions.
Then set the image values to Width 8 inches e Height 10 inches (below) and click on the button OK to resize your photo so that it can cover all the space of an A4 sheet. If the result you get is disproportionate (too enlarged), try to crop the sides of the photo a little by calling the tool Surface size from the menu Image, setting theanchor "in between" and reducing the width of the image by a few pixels.
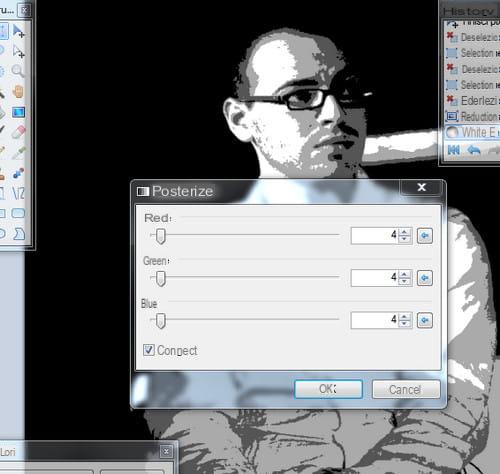
At this point, you need to turn your photo into a black and white image suitable for create a Pop Art photo. Select quindi la voce Black and White from the menu Adjustments of Paint .Net to remove colors from the photo and select the function Posterize from the same menu to apply a poster effect to the image.
The adjustment of the poster effect depends on your tastes: try to get a "cartoonish" look of a typical pop-art painting by moving the value indicators Redheads, finanacing e Blue to the left and click on OK per salvare i Cambiomenti.
Mission accomplished! Now all you have to do is save your photo transformed into a Pop Art painting by selecting the item Save with name from the menu Fillet e clicking on your button OK to confirm the saving, and print it with the program you prefer on a colored A4 sheet (blue, yellow, green or any other color you prefer): you can find them in any stationery shop for very few euros.
The final result will be a very bright print that will look like a real Pop Art painting with your face (or that of your loved ones) made at no cost. Not bad?
How to create a pop art photo


