


Looking at the photos you took over the past weekend, you noticed the heads of some (unwelcome) tourists ruining some of your shots. Fortunately for you, there is photo editing, thanks to which you can try to save even the most “unhappy” shots. How? If you give me some of your free time, I'll explain it to you right away.
In the tutorial you are about to read, in fact, I will illustrate you how to erase objects from photos using some well-known photo editing programs and some online services that can be used directly from the browser which, if used in the right way, can do real “miracles”. And if you don't have your PC at hand, you can rely on apps to retouch photos directly from your smartphone or tablet.
So, are you already in the "command posts", ready to start? Perfect! Let's put aside the chatter immediately and take action. Try the various solutions listed below, choose the ones that best suit your needs and you will see that, thanks to my help, you will be able to save your shots (unless they are really "irrecoverable"). Happy reading and have fun!
Photo (Windows 10)
If you use a PC on which it is installed Windows 10, the latest version of the operating system developed by Microsoft, you can delete objects from photos using an application already on your computer: I am referring to Gallery, the default image player in Windows 10.
To edit an image with the Photos app, double-click the image to open it within the program (if you've changed some Windows 10 settings and Photos isn't the default reader for images, right-click on the photo to edit and select the items Open with> Photos from the menu that appears). At this point, in the window that opens, click on the button Edit and create collocato in alto a destra and seleziona la voce Modification from the menu that appears on the screen.
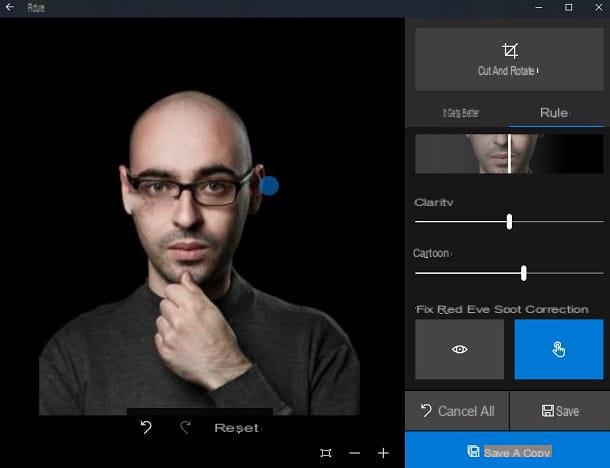
Now, select the tab Rule from the right sidebar, select the tool Point correction (at the bottom of the window) and “tap” with the mouse cursor on the object you want to remove. As soon as you have achieved the desired result, save the retouched image by clicking on the button Save (l'icona del floppy disk) located at the bottom right and that's it.
Photo (macOS)
I use a Mac? Even on Apple-branded computers it is possible to delete objects from photos without necessarily having to turn to third-party solutions. In this case, it is possible to carry out this operation by resorting to Gallery, the app that allows you to manage and edit photos on macOS.
To delete objects from an image with Photos, click on the icon in the shape of colorful flower located on the Dock or Launchpad and locate the shot you want to edit. If the image in question is not present in the Photos app (perhaps because it is an image imported from the Internet or from a USB stick), right-click on its preview, select the item Open with and then Gallery.
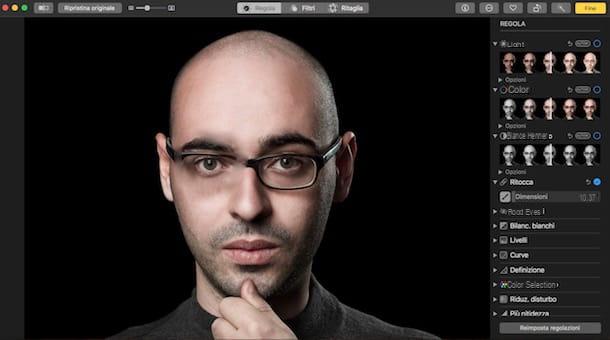
Now, click on the thumbnail of the image you imported into the Photos app to view it in full screen and click on the button Modification located at the top right. In the editor that is shown to you, expand the menu related to the function Retouch (the symbol of plaster located at the bottom right), move the cursor on the adjustment bar to select the size of the brush and then click on the button showing the brush, to activate the tool.
Then "tap" with the mouse cursor on the point of the photo where the object you want to remove is present, until you reach the desired result. When you are satisfied with your work, click on the yellow button end located at the top right to save the image. Easier than that ?!
GIMP (Windows / macOS / Linux)
If the programs pre-installed on your computer seem a little too limited for removing unwanted elements from photos, perhaps it is better that you turn to third-party solutions. One of the first that I recommend is GIMP: it is a free and open source software, available for Windows, macOS and Linux, which over the years has become a real reference point for lovers of “free” photo editing.
Before showing you how to use GIMP, it is necessary to guide you in installing the program on your computer. First, connected to his website, click on the red button Download xxxx and, on the page that opens, click on the orange button Download GIMP xxxx directly.
When the download is complete, open the file you just downloaded and follow the wizard to complete the installation of the program: if you use Windowsclick on your bottone Yes and then on the buttons OK, Install e end. If, on the other hand, you use a Mac, drag the GIMP icon into the folder Applications, right click on the program icon and select the item apri from the menu that opens (this operation is necessary to "bypass" the restrictions applied by Apple to software from non-certified developers and must be carried out only at the first start of GIMP).
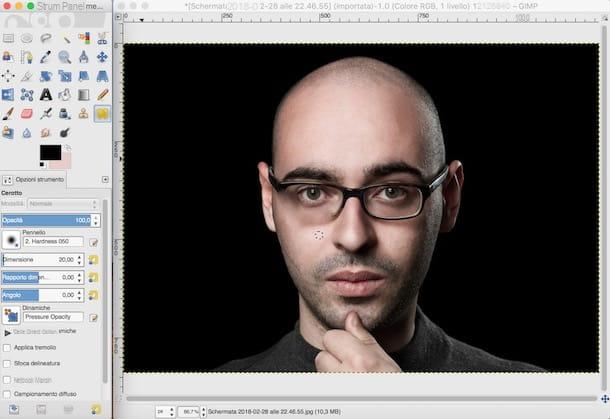
Once the program has started, select the photo you want to retouch by selecting the item Apri ... from the menu Fillet, then move to the GIMP tools panel located on the left, select it patch tool and eventually change the settings under the panel Tool options (located at the bottom left) to adjust the size and style of the brush to use.
Then select an image sample to use to cover the object you want to remove from the photo by pressing the key on the keyboard Ctrl (your Windows) or cmd (on macOS) and clicking on it. Now, "tap" repeatedly on the object you want to "disappear" from the photo and, as soon as you are satisfied with your work, save the retouched photo by selecting the item Save as ... from the menu Fillet. If you want to get more details on the features and functionalities of GIMP, do not hesitate to read the insights in which I explain how to use GIMP and how to edit photos with GIMP.
Photoshop (Windows / macOS)
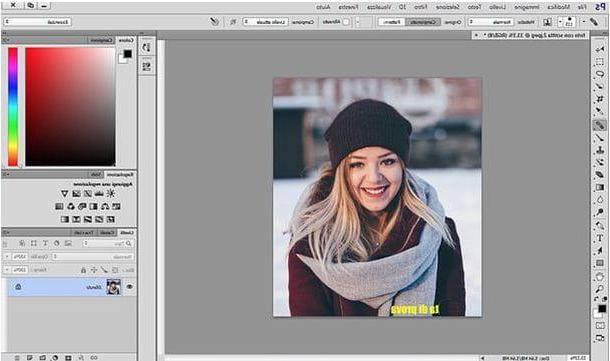
Haven't the solutions I proposed to you so far particularly convinced you? In this case, you could use the photo editing program par excellence, that is Photoshop. Even if you are not a photo editing expert, surely you have already heard of this professional software, since it is used and appreciated by professionals all over the world.
As you may have already guessed, since this is a solution designed for professionals, Photoshop is paid: to use it you need to subscribe to the Adobe Creative Cloud monthly service, whose basic plan starts at € 12,19. However you can try the trial of Photoshop for a trial period of 7 days and then decide calmly whether to subscribe to continue using it or not.
If you are going to use Photoshop to remove unwanted objects from photos, don't forget to consult the tutorials in which I explain in detail how to use Photoshop, how to strip with Photoshop and how to remove writing with Photoshop: there you will find some useful "tips" to make the most of the program.
Photopea (Online)
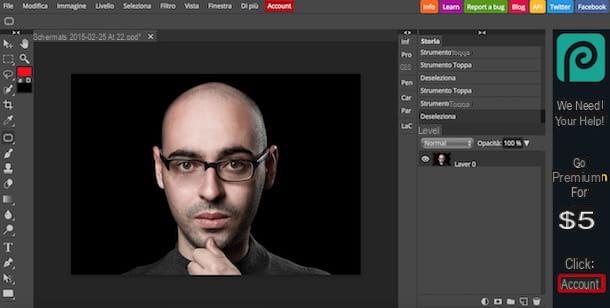
If you are looking for an online service that can allow you to remove objects from photos, obtaining results that are not too different from those obtained with the aforementioned programs, Photopea could be for you. It is a web application that can be used without having to create an account and, above all, without having to install additional plugins, since it is based on HTML5 technology.
However, I inform you that it is possible to subscribe to the Premium version of Photopea (which starts at $ 5 per month), thanks to which it is possible to remove the advertising banners (not too invasive) present on the website of the service and to contribute financially. to its development.
To retouch a photo with Photopea, linked to its main page, click on the symbol of (X) to remove the welcome message that is shown to you and open the photo you want to act on by clicking on the item apri from the menu Fillet (top left).
At this point, click on the symbol of plaster located in the toolbar on the left and, from the drop-down menu that opens, select one of the three available tools.
- Zone reconstructor brush - to use it, select the size of the brush from the drop-down menu and “tap” on the object you want to remove.
- Rebuilder brush - to use it, select the portion of the image to use to fill the object you want to delete (just press the combination Alt + click) and then draw with the cursor on the area you want to cover.
- Patch tool - to use it, select the area where the object is present and cover it by dragging it to an area of the photo you want to use as a sample.
When you are happy with your work, select the item Export as from the menu Fillet, select the format in which you want to export the retouched photo and, finally, click the button Save.
App to delete objects from photos
Do you want to retouch your shots directly from your smartphone or tablet? Well, then you will find them very useful app to delete objects from photos which are listed below. Try them out and then use the ones that best suit your needs.
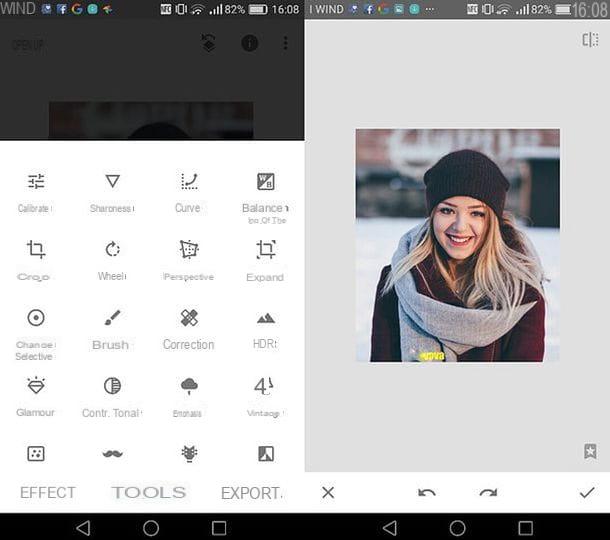
- Snapseed (Android / iOS) - a free photo editing app designed by Google. It integrates numerous tools that allow you to retouch your photos and eliminate unwanted elements present in them. Its “clean” interface makes it one of the best on the market. If you want to learn more about how it works, read the tutorial in which I explain how to use it to the fullest.
- Pixlr (Android / iOS) - this is a free app that allows you to make various corrections to your photos, including deleting unwanted objects. It also integrates a function that allows you to create photo collages (a “plus” that can always be useful). For more details about how it works, read my in-depth article dedicated to photo editing apps.
- Pixelmator (iOS / macOS) - is one of the best photo editing apps on Apple devices. At the time of writing, the Pixelmator version for iOS costs € 5,49, while the macOS version costs € 32,99 and offers advanced features that, for obvious reasons, are not included in its mobile counterpart.


