


Would you like to insert your signature inside an image but you don't know how to do it? Your camera has an annoying date stamped on all the photos you take and are you looking for a way to get rid of it easily? Don't worry: in one case or another, I assure you that you've come to the right place at the right time!
In fact, I am about to offer you a guide on how to edit photos with lettering, in which we will see together how to add personalized writings to photos and, if necessary, how to remove unwanted texts already imprinted in digital images. I already anticipate that it is possible to carry out these operations using both free and paid programs, online services and even apps for mobile devices.
So, what are you doing still standing there? Strength and courage: make yourself comfortable, take all the time you need to concentrate on reading the next paragraphs and, more importantly, try to put into practice the "tips" that I will give you. I am sure they will be useful for completing your technological "enterprise" today. Happy reading and, above all, have fun!
How to edit a photo with writing
Let's start this tutorial by looking how to edit a photo with writing through some programs present "standard" on Windows and macOS and some third-party solutions.
Paint (Windows)
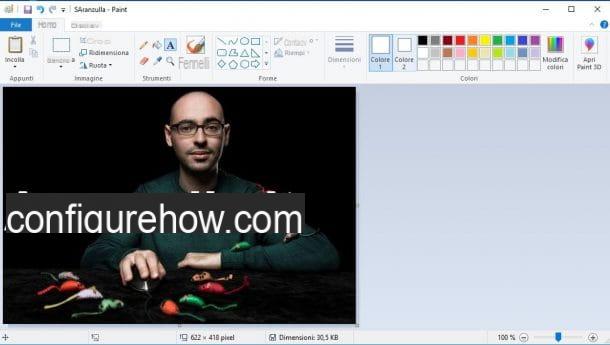
If you have a PC Windows, the first solution I recommend you try is Paint, the famous Microsoft graphics program that you can use to write on photos (but not to remove any writing on them, given the lack of tools suitable for this purpose).
To proceed, open the photo of your interest with Paint, by right clicking on its icon and selecting you Open with> Paint from the menu that opens. In the main Paint window, click on the icon A, placed in the toolbar located at the top, click in the point of the photo where you want to add the writing and type your custom text in the box pop-up on the screen.
To change the color of the writing, the font, the font size and so on, select it with the mouse and then use the drop-down menus located in the menu Text, to customize it to your liking. Keep in mind that, in the event of an error, you will not be able to select the text and remove it: the only thing you can do is cancel its addition by pressing the keys at the same time Ctrl + Z on the keyboard or by clicking on freccia rivolta sinistra verse (top left, near the Paint logo).
When finished, to save the changes made to the photo, all you have to do is click on the button Fillet, located at the top right, and then on the entry Save, in the menu that opens.
Preview (macOS)
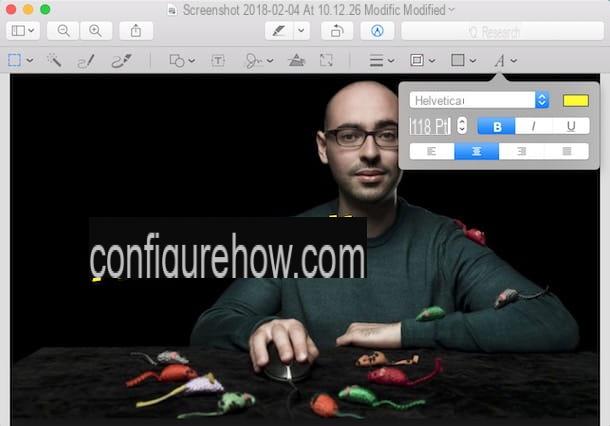
Also MacOS includes "as standard" a program that allows you to add text to photos (but not to remove them, unfortunately): I'm talking about Preview, the default image and PDF reader of the Apple operating system.
To use it, open the photo of your interest with Preview by double clicking on its miniature. If Preview is no longer the default reader for graphics files, right-click on the instead miniature of the image you want to open in it and select the items Open with> Preview give the menu check if you press.
Successively, fai clic sull'icona della pencil placed in the Preview window (top right) and, in the menu that opens, click on the icon T. Then type the text you want to add to the photo in the text box pop-up on the screen.
To change the text by customizing its font, size and other properties, click on the icon A located at the top right and then use the various menus that appear. By closing the Preview window, the changes will be automatically saved on the source file (to save a copy, you have to go to the menu File> Export, top left.
Photoshop (Windows / macOS)
On your computer it is installed Photoshop? Very well! The famous Adobe photo editing program, which is available for both Windows and macOS and is included in the subscription Adobe Creative Cloud (starting from 12,19 euros / month), it offers useful tools to both add and remove writings from the photo.
After installing and launching Photoshop on your computer, go to the menu File> Open (top left) and select the photo you intend to edit.
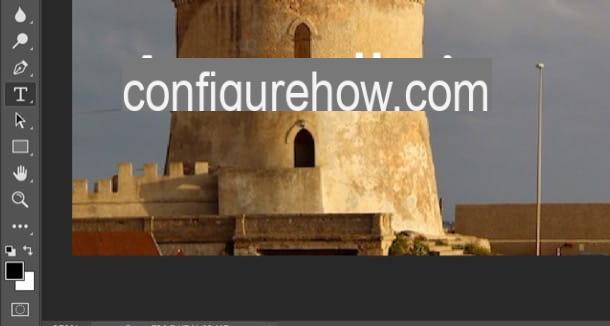
Now, if your intent is to add text to the image, call it up Text tool from the Photoshop toolbar (on the left), click on the point of the photo where you want to insert the text and type your text in the field appeared on the screen.
To customize the color, font and other characteristics of the writing, then use the menu appeared at the top. To move the writing to another point in the photo, instead, recall it Move tool (l'icona della cross located in the Photoshop toolbar, on the left) and drag it to the desired point.
Is your intent to remove a text from a photo? Then know that Photoshop integrates multiple tools that can come in handy for this purpose. The simplest and quickest to use is the Spot Healing Brush, which you can select from the program toolbar (the plaster on the left).
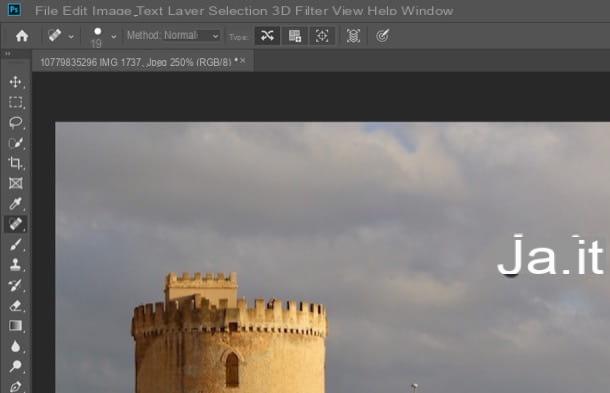
After recalling the spot correction brush, "pass it" on the writing to be removed and, as if by "magic", it will be erased. For best results, I recommend using a brush with soft edges and a size suitable for the part of the photo to be treated. If you make a mistake, however, you can always press Ctrl + Z (your Windows) or cmd + z (on macOS) to undo the last "swipe" of the brush.
When you are satisfied with the work done, you can save the image you have edited by going to the menu File> Save with nome Photoshop and specifying, in the window that opens, the name and location in which to save the file.
For more information on how to write on photos with Photoshop and how to remove writing from photos with Photoshop, read the insights I just linked to you.
GIMP (Windows / macOS / Linux)
Also GIMP, the best free and open source alternative to Photoshop, can come in handy for adding or removing text from photos. This software, in fact, integrates various tools that can be useful to complete both operations.
After installing and starting GIMP on your computer, import the photo you want to edit into it: to do this, open the menu Fillet (top left), select the item apri from the latter and choose the photo you want to act on.
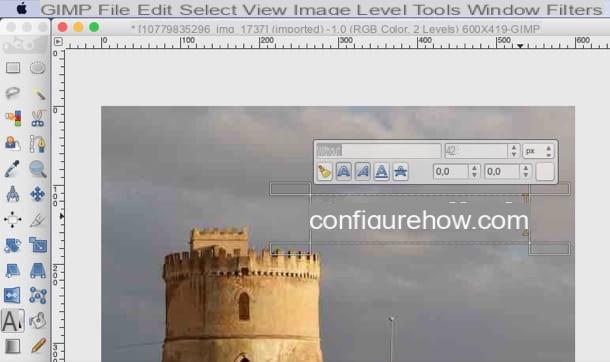
Then it calls it back Testo instrument (l'icona della A) present in the GIMP toolbar, located on the left of the screen, click on the point in the photo where you want to add the text and type the text in the field appeared on the screen.
To change the text you have added, you can select it and use the text formatting tools in the box that appears next to the text itself. To move the text, on the other hand, call up the tool Move (l'icona della cross located in the toolbar, on the left) and drag it to the desired point.
If, on the other hand, your intention is to remove a text from the photo you imported into GIMP, invoke it Band-aid tool from the toolbar located on the left and select a sample of photos to use to fill the text to be removed: to do this, hold down the key Ctrl (your Windows) or cmd (on macOS) and click on the point of the photo to use for this purpose. Then make repeated clicks on the writing to be removed, until you reach the desired result.
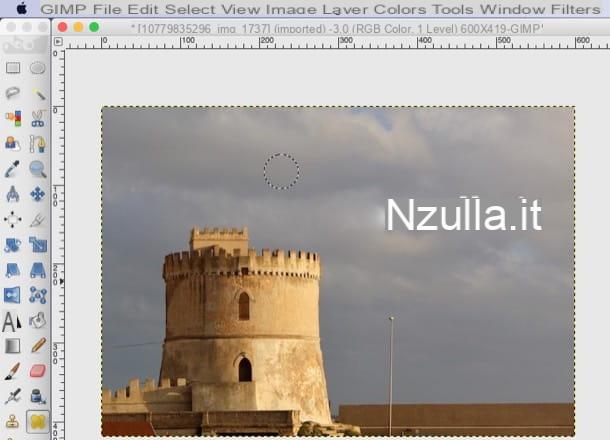
When finished, open the menu Fillet, select the voice Esporta eats… from the latter and, after choosing the location and format in which to export the output photo, click on the button Export, to save her.
If you want more information on how to write on photos with GIMP and how to remove writings from photos with GIMP, please consult the insights I have dedicated to these topics.
XnConvert (Windows / macOS / Linux)
Do you want to add a text to multiple photos at the same time? Then I think I have the solution for you: XnConvert, a very famous application for Windows, macOS and Linux that allows you to apply various changes to photos (including adding text), acting in batch mode, then editing multiple files in series.
To download it to your computer, go to its download page, scroll down and click on the button Zip Win 32bit o Zip Win 64bit, depending on the version of Windows installed on your computer. If you have a Mac, instead, click on the button Mac DMG 64bit.
When the download is complete, if you use Windows, apr l 'ZIP archive that you downloaded from the XnConvert site, extract the contents into any folder and run the file xnconvert.exe. A MacInstead, open the package .dmg you downloaded, drag XnConvert in the folder Applications of the Mac, right-click on the program icon and click on the item apri twice in a row, in order to "override" the restrictions imposed by Apple on non-certified software (this is necessary only at the first start of the program).
At this point, select the tab Origin present in the main window of XnConvert and drag in it the photos on which you want to add the same writing. Then select the tab Destinationclick on your button (...) and choose the folder where to save the output files you will get from the program.
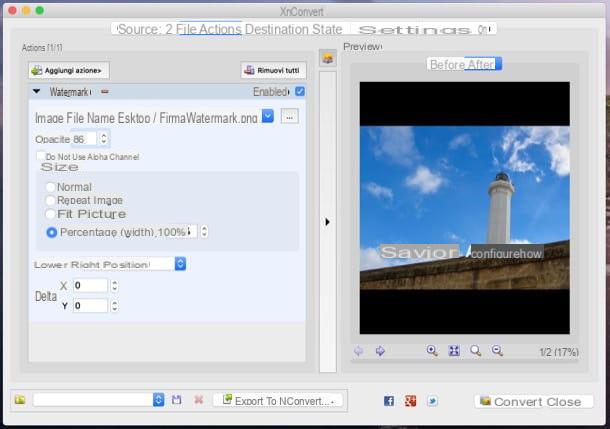
Once this is done, go to the section Actions of XnConvert, click on the button Add action at the top left and select the items Image> Watermark from the menu that opens. Now, click the button (...) located at the entry Name of the image file and select the file in PNG containing the writing to be applied to the photos imported into XnConvert (if you have not yet created a file of this type, do it now following the instructions I have already given you in this in-depth study).
In conclusion, use the appropriate menus and text fields on the left of the window to change the opacity, size and position of the writing you added to the photos, and click on the button Converted, to start processing. When the operation is completed, the output files containing the writing will be exported to the previously chosen folder. Convenient, right?
How to edit photos with lettering online
As I told you in the introduction of the article, it is possible edit photos with lettering online using some Web applications working directly from the browser: here are some of the most interesting.
Photopea
To edit your photos online, I suggest you make use of Photopea: a free web application, developed in HTML5, which works without registration and without downloading any additional plugins in the browser. Its pages host advertising banners (not at all invasive), which can possibly be removed by subscribing to a $ 5 / month subscription.
To use it, connect to its main page and, if necessary, translate its interface into British, selecting the items More > Language > cittàno top menu. Then import the photo to be edited in the service: to do this, click on the button Open from computer located in the center of the page and select the photo of your interest.
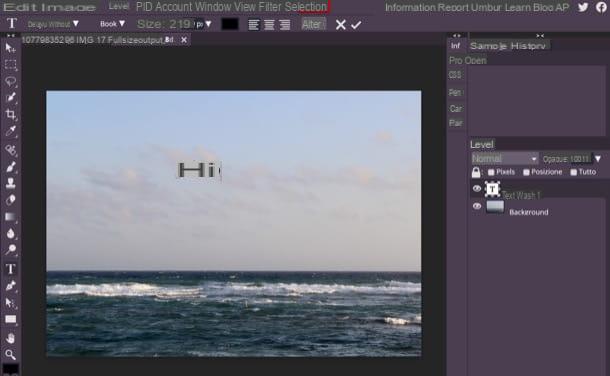
To add a text to the image, click on the T present in the toolbar of Photopea, on the left, and click on the point of the image where you want to insert the writing. Then use the menus above to choose the font, size and color of the writing, type the text in the appropriate field appeared on the screen and confirm by clicking on the button (✓) present at the top.
To remove a text already present in a photo, instead, recall the tool Spot Healing Brush (the patch icon in the toolbar, on the left), use the drop-down menu at the top left to select the size of the brush and "color" on the writing to be removed. If you make a mistake, press the keys at the same time Ctrl + Z (your Windows) or cmd + z (on macOS), to undo the last operation made.
When finished, go to the menu File> Export As, at the top left, select the output format you prefer to use and then click on the button Save, to download the final image to your PC.
How to edit photos with writings on Facebook
Your goal is edit photos with writings on Facebook? Well, in this case, you can take advantage of some tools made available by the famous social network, suitable for this purpose.
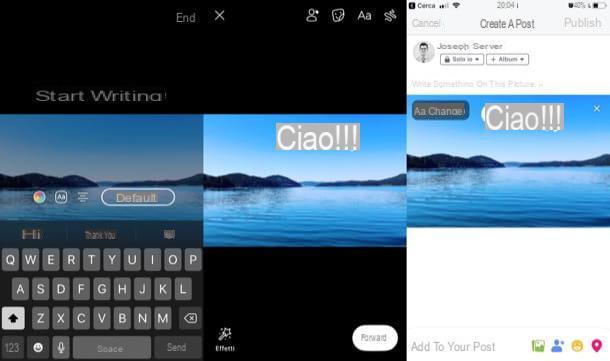
- Give smartphone and tablet - log in to Facebook via the official app of the social network for Android or iOS, press the button Gallery located in the frame What are you thinking about? and, after selecting the photo you want to post on Facebook, presses on the item end at the top right. In the screen that opened, then tap on photo of your interest (in case you have loaded more than one), press the button Modification at the top left and tap the button Aa, to insert the inscription. Type, therefore, the text to be included in the shot, tap the button Aa to select the font you want to use; press the icon of palette to select the color of the text and tap on the item end (top right) to save the changes made. When you are ready to do so, post the photo, pressing the item first NEXT and then on that Public, top right.
- From computer - log in to Facebook from its main page or its application for Windows 10, click on the button Photo / video located in the frame What are you thinking [your name]?, load the photo on which you want to add a text, hover the mouse cursor over the miniature of the latter and click on the icon brush. In the opened window, click on the button Aa, select the color, position and font to use (using the buttons located on the left sidebar) and click the button Add text. Write, therefore, in the testo field appeared on the screen, the phrase to be inserted in the photo and adjust the position and size of the same using the blue button depicting the arrows. When you are ready to do so, save the changes made by pressing the button Save and, after choosing where to publish the photo (News section and / or The tua storia), click the button Public.
Want more information on how to write on Facebook photos? Then take a look at the guide I just linked to you.
App to edit photos with text
You would like it edit photos with writings directly from smartphones and tablets? In this case, check out the following apps, which are suitable for this purpose - I'm sure you will find some that suit your needs.
- Photor (Android / iOS) - is a free app (with in-app purchases starting from 1,09 euros, to unlock some additional packages) that allows you to improve your shots thanks to some photo editing functions. If necessary, it also offers the possibility to write on photos with a certain ease.
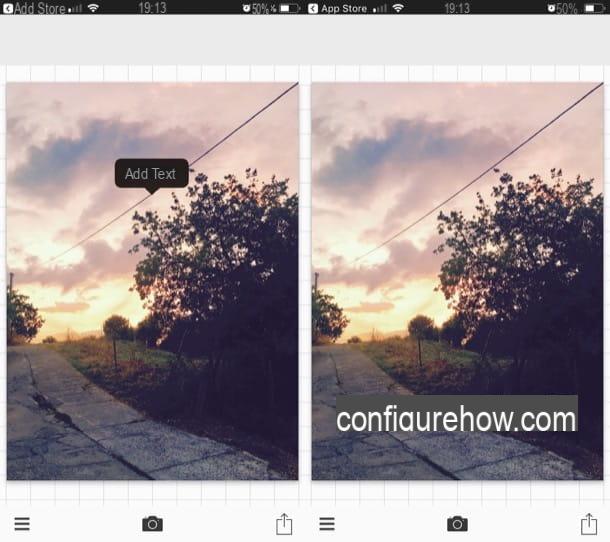
- Phonto (Android / iOS) - this well-known photo editing app allows you to write on photos by selecting multiple fonts, giving the user the ability to customize the writings by choosing their color, shading and so on. To unlock some packs of extra filters and styles and to remove ads, you need to make in-app purchases starting at € 1,09.
- InstaQuote (iOS) - as you can understand from its name, this app was designed to insert quotes on photos, but it can also be used to insert various types of writings on your shots. It includes various ready-to-use templates, dozens of fonts and various editing tools. To unlock all its tools, however, you have to buy the Pro version, which costs 2,29 euros.
For more information on how to use these and other apps to edit photos with text, take a look at the guide I linked to you: I hope it will be useful to you.
How to edit photos with lettering


