You would like to update your profile photo within the social networks you are subscribed to and would like to know how to take a photo from your Mac. Well, let me tell you, that's a great idea! Macs are equipped with great webcams that can be used not only for video chatting with friends on Skype, but also for taking pictures and recording videos of more than good quality. Did you know that? If the answer is no, don't worry, we'll fix it right away.
In today's guide I want to talk to you about how to take a photo from your Mac, giving you all the information you need to do it. It doesn't matter which Mac model you have, laptop (MacBook) or desktop (iMac) because it makes no difference; to take a photo from the Mac the procedure to follow is always the same. That said, if you want to know how to take a picture from the Mac all you have to do is take a few minutes to calmly read the procedures that I'm going to indicate in this guide of mine. Lastly, don't forget to say “cheese”; I'll take care of the rest, since I'm going to show you how to make fantastic computer shots of the bitten apple.
For completeness of information, in this guide I will also talk to you about how you can take a picture of the Mac screen, through very easy and intuitive tools that will allow you to take a snapshot of yours Desk. Are you ready to get started? Yup? Very good. As usual, before we begin, I wish you a good read.
How to take photos from the Mac - Take photos from the webcam
Photo booth
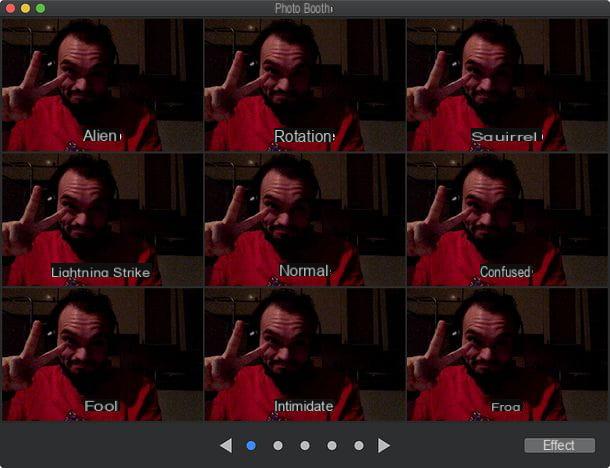
If you want to learn how to take a photo from your Mac, the first step you need to take is to start Photo booth. It is an application free included "standard" in Mac OS that allows you to take pictures using the webcam of your computer, includes many special effects and is easy to use. You will be able to take a photo from your Mac in no time and without having to carry out elaborate installation procedures of additional software to manage your webcam.
That said, if you want to take a photo from your Mac, using Photo Booth, the first thing to do is launch the application. You can easily find Photo Booth by opening the Launchpad of your Mac. Alternatively, you can search for it with Spotlight by clicking on the magnifying glass icon located in the menu bar (top right) or by pressing the key combination ctrl + space sulla tastiera of the computer.
Done? Very good! At this point, once you have started Photo Booth, click on the button Take a photo located in the small toolbar located at the bottom left (it is the central button, the one with the rectangular icon), get in position and click on the red button in the shape of a camera to take a photo with your Mac's webcam. A three-second countdown will be performed before the shot, while the screen will go completely white during the shot to simulate the light of a flash.
You can also take four photos in sequence and get a photo booth style image. Just click on the button Take four quick photos of Photo Booth (the one on the far left in the toolbar) and press the fateful red button in the shape of a camera. Also in this case a three-second countdown will start and each shot will correspond to a “flash” of the computer screen.
If you want to take a new photo because you are not satisfied, I suggest you take a look at the section dedicated to effects, thanks to which you can embellish your photo with some nice and fun special effects.
Once finished take a photo from your Mac, you will see its preview appear at the bottom of the Photo Booth window. This will allow you to view the shots taken at any time.
In addition to photos, would you also like to make a short video recording using your Mac's webcam? No problem. By clicking on the button Record movie clip of Photo Booth (the third in the program toolbar) and pressing the red button in the shape of a camera placed in the center of the window you can record videos directly from the application without resorting to external solutions.
Finally, as regards the special effects, I point out that you can apply them in real time to both photos and videos by clicking on the button Effects Photo Booth (bottom right) and clicking on the preview of the effect you want to use. There are so many, and you can have fun browsing them all to find the one you like best.
Toy Webcam:
Do you need to take some new photos to update the photo you have on your Curriculum Vitae, but you don't have any recent photos to use where you looked good? You would like to post funny pictures on the Internet special effects but you don't want to install and learn how to use complicated programs for photo editing? Don't worry, you can take a photo from your Mac via the Webcam, using a tool free online which I'm sure you will never be able to do without.
In fact, I want to talk to you about webcam Toy, an excellent free online service that will allow you to take photos from your Mac by applying numerous special effects to them quickly and easily. Why use this tool? I'll tell you right away. IS free, does not require any registration and allows you to share photos taken on the main social networks, namely Facebook, Twitter and Tumblr. I bet you're curious now and can't wait to know how to use it. I got it, right? Okay, then let's see together how to take pictures from the Mac, using Webcam Toy.
Be vuoi scoprire how to take a photo from your Mac all you have to do is go to the Webcam Toy website and click the button Ready? You smile! located in the center of the page. You will then be able to access the service and its virtual camera. At this point, you will need to click on the button Use my webcam and then Allow so that the site is authorized to use your webcam to take the photos you want; then wait a few moments for the image taken via your Mac's webcam to be displayed on the screen.
At this point you can strike a pose, say “Cheese” and then click on the icon in the shape of camera located at the bottom right to take the picture normally through the PC webcam and using this service. Even when using Webcam Toy, a small three-second countdown will be performed before the actual shot is taken.
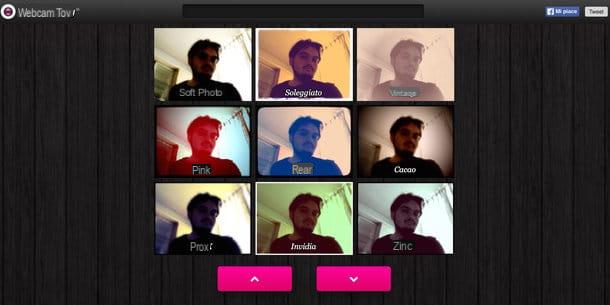
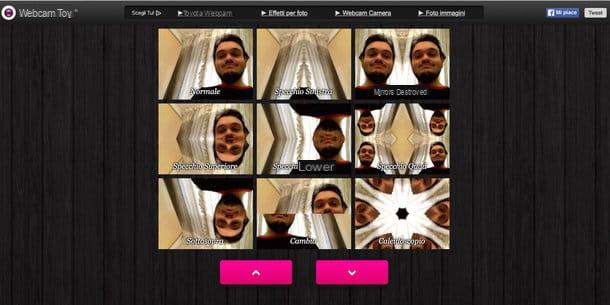
In case you want to give that extra touch of personality to your photo, adding special effects, you can do it. Using Webcam Toy you just need to click on the button Normal. At this point, the button will change the wording to More effects and several thumbnails will appear which, in real time, will allow you to evaluate the artistic effect to add to the photo.
As you can see there are really a lot of them and you can have fun choosing the one you like best. There is for example the split image, the mirror effect and the Fisheye effect. Scroll with the up and down arrows that you find at the bottom of the screen, you will be able to see and apply one of the effects you most appreciate. Once you have chosen the effect to apply to the photo, just click on the icon in the shape of camera to take the photo.
Once you have taken the photo, Webcam Toy will show you the preview of the photo obtained: if you like it, it is up to you to decide whether to share it and if necessary to save it on your PC. To save it on your Mac, just press the button Save that you find in the lower right corner (you can download the photo as a JPG image). Alternatively, you can choose independently whether to share the image on Facebook, Twitter o Tumblr. To do this, simply click on the respective buttons of the social networks that you find under the photo taken.
Now that I discovered Webcam Toy for take a photo from the Mac, I bet that you would like to have this tool always at hand. I got it right? For this reason I want to point out that, if you use the Google Chrome browser you can connect to this page of the Chrome Web Store and add Webcam Toy to the Chrome extensions. To do this, just click on the button Add. The extension allows you to add a quick link to the site, adding the service icon to Chrome's application list for quicker startup.
How to take photos from the Mac - Take screenshots
Screenshot
In case you want to take photos from the Mac and the subject is no longer you, but the Desk of your computer, you can take a picture of the Mac screen using the application Screenshot. It is a very simple application to use and which is already available “standard” in macOS. It allows you to take screenshots of the entire Mac screen, portions of it or specific windows. It also allows you to make videos to record what happens on your computer screen.
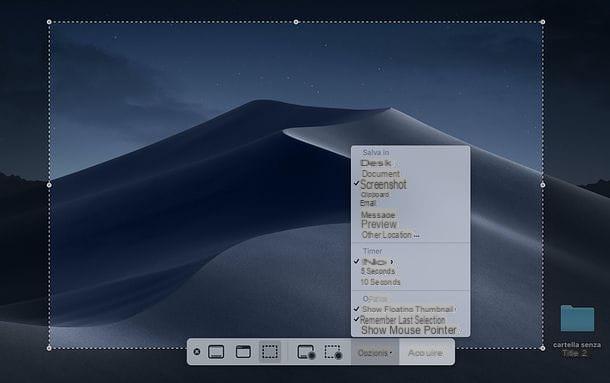
To start Screenshot, select the application icon from the folder Other of Launchpad or press the key combination cmd + shift + 5 on the Mac keyboard. Then choose the action you want to perform using the toolbar that is shown on the screen: the first three buttons of the bar are used to take a screenshot of the Mac screen, to do it screenshot of a window specific and to take a screenshot of a portion of the screen chosen by the user; the fourth and then the button are for record a video of the Mac screen or a portion of the same, while clicking on the button options you can choose if include the mouse pointer in catches, if show the floating thumbnail of the screenshots after their creation (in order to modify them "on the fly", with the editor included in Quick Look), if you set a timer to delay taking screenshots and more. Once you have adjusted all the options, you can take your screenshots by simply clicking on the button Acquire Snapshot.
If you are using a version of macOS earlier than 10.14 (Mojave), you can use Screenshot, but in a more basic version, which does not support video capture or offer advanced options for screenshots. How does it work? I'll explain it to you right away.
apri Screenshot looking for his icon from Launchpad on the Mac (located in the Other). Then click on the app icon, the symbol consists of a pair of scissors and a Mac window. Alternatively, if you really can't find the application, you can click the button with the shape of a magnifying glass located in the upper right part of the menu bar. The named search tool will open Spotlight: typing Snapshot in the window that will open, you can open the Instant application with a click, by clicking on the first result that you will find in correspondence with the item Il migliore.
The operation of Snapshot it's really that simple. Once the application has started, click on its icon that appears in the top bar and click on the item Shoot. At this point you will have several options that will be shown to you, through which you can take a picture of the Mac screen.
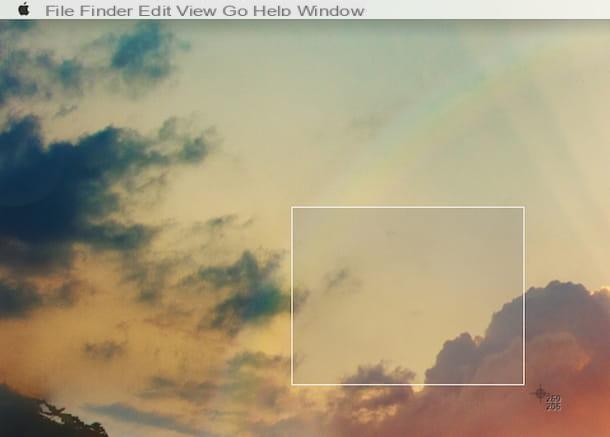
- Selection: option that allows you to take a screenshot of a portion of the screen.
- Window: You can take screenshot of a single window.
- Screen: allows you to take a screenshot of the entire Mac screen.
- Screen with timer: this option is used to create a screenshot 10 seconds later than when you give the command.
Then independently choose the option you want most and, once you have taken the screenshot, you will be able to see a preview of the image through the application Preview. To save it, select the entry Save from the menu Fillet that you find at the top and then press on Save, once the destination path of the screenshot has been chosen.
How to take a photo from the Mac