Scrolling through the Facebook, you came across a beautiful one 3D photo posted by one of your friends. You were pleasantly impressed by the content you saw and you wouldn't mind being able to create a similar one: the problem, however, is that you don't know how to do it. That's the way it is, right? Then don't worry, because you are in the right place at the right time!
In the next paragraphs of this guide, in fact, I will explain you step by step how to make 3D photos on Facebook. Contrary to what you may think, succeeding in the operation in question is not at all complicated: just have a device compatible with this function of the well-known social network and, in a few taps, the game is done. Alternatively, it is possible to proceed from a PC, even if the procedure to be followed in this case is a little longer and more complex to follow.
If you're ready to get started, I'd say don't waste any more time chatting and taking action. Come on: make yourself comfortable, take all the time you need to concentrate on reading the next lines and, more importantly, try to implement the "tips" that I will give you, so as not to have problems in making 3D photos to share on Facebook. There is nothing left for me to do, except wish you good reading and have fun!
Preliminary information

Before seeing in detail how to make 3D photos on Facebook, let me provide you with some preliminary information that you absolutely must know before proceeding. What am I referring to? The fact that, as mentioned at the beginning of the tutorial, to use the function in question you need to have a device compatible with it.
As for the view Android, the devices that support 3D photos on Facebook are as follows: Samsung Galaxy Note 8, Note 9, S9 +, S10, S10E, S10 +, S10 5G and Galaxy Fold; Google Pixel and later models, Pixel XL and later models and, finally, various smartphones marketed from 2014 onwards (especially if they have a dual-camera configuration). Here you can find the updated list.
On the front iPhone, on the other hand, the "iPhone bys" that support 3D photos on Facebook are those starting from 6s and all subsequent models (therefore also iPhone 7 and 7 Plus, iPhone 8 and 8 Plus, iPhone X, Xs, Xs Max, iPhone 11 , 11 Pro and 11 Pro Max, iPhone SE 2020, etc.). Here you can find the updated list.
As for the slope desktop, there is no need to talk about compatibility, as the creation of three-dimensional photos takes place through the creation of one depth map that anyone can create using software suitable for the purpose: later I will explain better what it is.
Also know that 3D photos cannot be edited, it is possible to share only one three-dimensional photo at a time and, at the time of writing, it is not possible to add this type of content to albums. Also, it is not possible to sponsor posts on Facebook that contain a 3D photo (if it is published on a Facebook page).
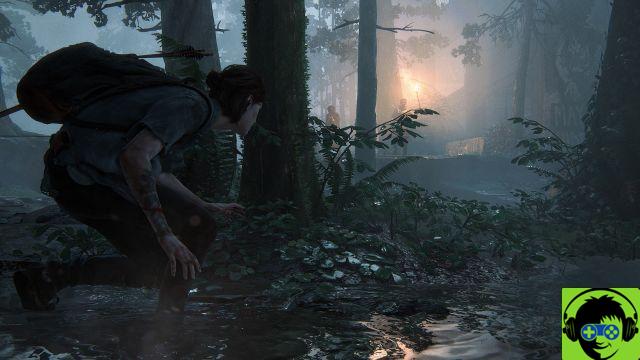
As for the choice of the photo to make three-dimensional, I suggest you use one in which the subjects are distant from each other and well defined, so as to facilitate the image processing by the Facebook algorithm and obtain an appreciable result. Having clarified these aspects, I would say that we can finally proceed!
How to take 3D photos Facebook Android
Iniziamo questa disamina for sale how to take 3D photos on Facebook from Android. To do this, you need to upload a photo already saved on the device and, once uploaded to Facebook, you need to press the button that allows you to make it three-dimensional.
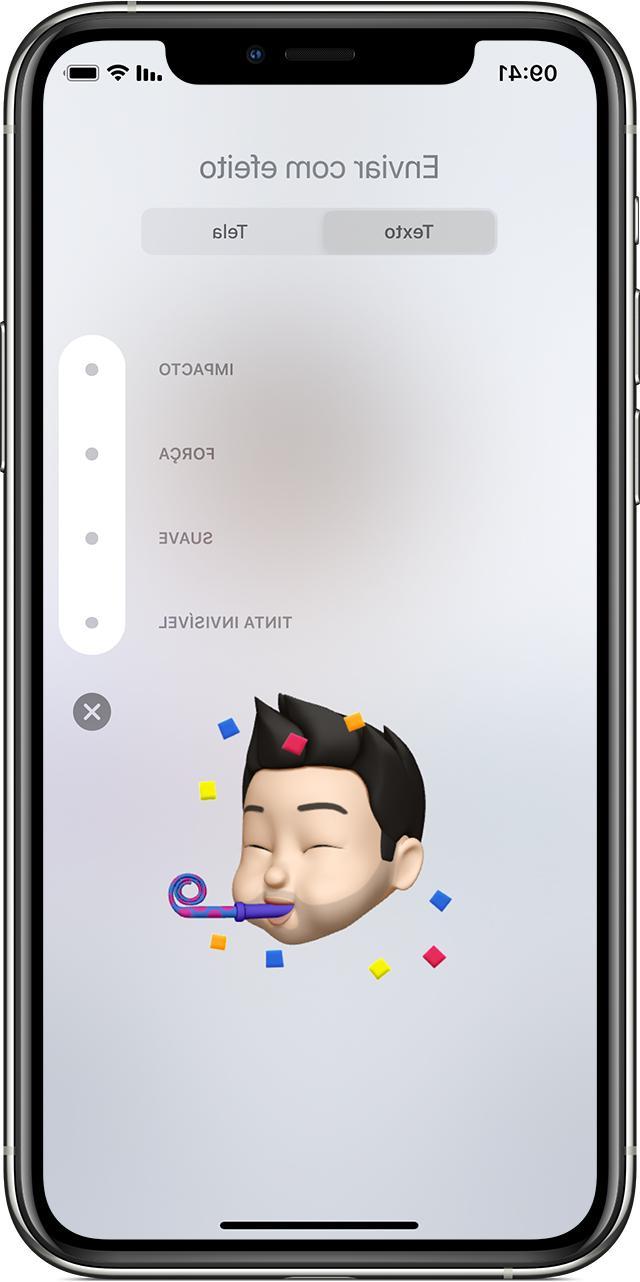
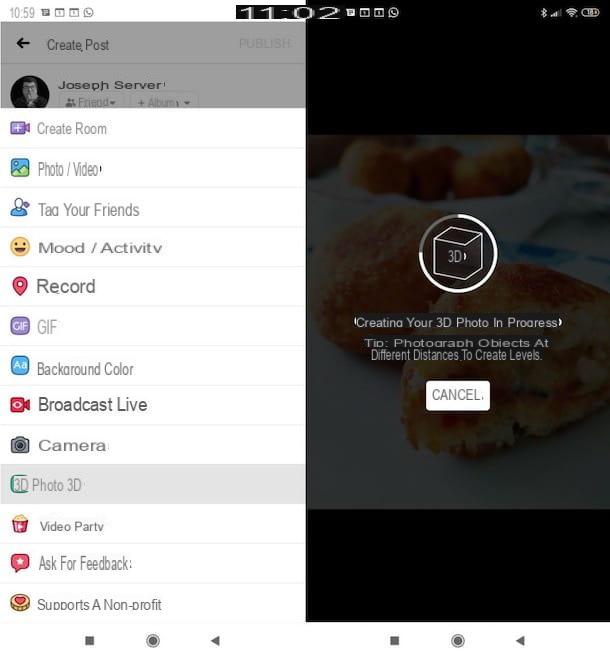
First, therefore, access Facebook from its official app, tap on the text field What are you thinking about? present on the main Facebook screen (top) and, if you don't already see the menu below, press the item Add to your post / Create a post. Then choose on the item Photo 3D contained in the menu, to choose the photo to upload in 3D.
for pages and groups you can follow the same procedure, but by clicking on the fields Create a post e Write something… instead of "What are you thinking about?".
Once you have selected the image, wait for it to be processed by the Facebook algorithm and rendered three-dimensional. After processing, tilt the device to try the applied 3D effect in real time and, if you are satisfied with the result, press on the item Share o Public to post the content. Easier than that ?!
Come fare foto 3D Facebook iPhone

The procedure that allows you to create a 3D photo on Facebook from iPhone it does not differ much from the one I explained to you in the chapter on Android.
If you have not already done so, log in to Facebook from its official app, tap on the text field What are you thinking about? to post the photo on your profile, press the button Create a post if you want to publish it on your page or click on the text field Write something… if you have decided to share it in a group.
Now, press on the voice Photo / video present in the open menu, tap on thepreview of the photo to make three-dimensional and press on the item end (top right). Now, hit the button Make it 3D located at the top of the image and wait for the Facebook algorithm to process it, making it three-dimensional.
When you are ready, if the final result satisfies you, you can publish the content by tapping on the item Share or on that Public (in alto to destra).
How to make 3D photos Facebook PC
As for the creation of three-dimensional photos on Facebook by acting as PC, things get slightly more complicated. On the Web version of the social network, in fact, there is no function that makes the photos 3D automatically (at least not at the time of writing).
To proceed, you must therefore create a depth map, which is a black and white image that shows the depth of a 2D image, using external solutions. In this case, the black parts will be recognized as the furthest ones, the white ones as the closest ones, while the shades of gray create intermediate depth levels.
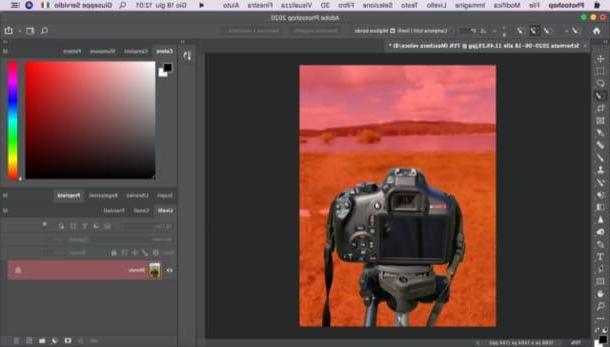
To create a depth map you need to turn to graphics or photo editing software. For this tutorial I have chosen to use Photoshop, which integrates various tools suitable for the purpose. If you haven't downloaded it yet, in this other guide you will find out how to download it for free and test it for 7 days (then it costs 12,19 euro / month).
After starting Photoshop and importing the photo on which you intend to act inside it (just drag it into the program window to do so), recall the Quick Select tool by clicking on the brush with the dashed oval present in the toolbar located on the left (if you do not see it, right click on the symbol of square with arrow or of Magic wand on the left and select it from the opened menu).
Next, set the brush size via the menu at the top (just click on the white dot and choose the size that is considered best to select the subject, through the appropriate one adjustment bar) and hover the cursor over the subject, holding down the left mouse button.
If any unwanted portion (perhaps part of the background) is included in the selection, press the button Other (your Windows) or Option (on macOS) and hover the cursor in the areas to be excluded from the selection, always holding down the left mouse button.
To improve the selection I suggest you take advantage of the quick mask: to activate it, press the Q button on the keyboard, so as to highlight in red all the portions of the photo that you have excluded from the selection.
Then zoom in on the image (via the menu % located at the bottom left) and do a fine job, including or excluding portions of photos from the selection. To do this, you can call it back Brush tool from the toolbar located on the left and, after setting the color black o White (respectively useful for removing or including portions of photos in the selection), “pass it” on the edges of the selection made.
Now, press the again Q button on the keyboard, to remove the quick mask, and create a new layer by clicking on the button capacitor positive (+) lead located at the bottom right. Since the portion of the image you selected above is the closest (being the subject of the photo), you need to color it with White.
To do this, he calls him paint bucket tool from the toolbar on the left, set the color White using the color picker (bottom left) and click inside the selection. Then select the new level containing the subject colored in white, click on the icon folder (bottom right), so as to create a new group, and drag it inside the latter, to include it in the group itself.
Now, create a new layer by clicking on the button capacitor positive (+) lead located at the bottom right, and drag the new layer under the one you created earlier. It recalls, therefore, the Brush tool from the toolbar on the left, click on square located at the bottom left and, in the box that opens, set the Color: Grey to define the closest areas (after the main subject).
Repeat the above steps until you color all the “depth layers” of the photo (remembering to increase the intensity of the black as you move away from the subject).

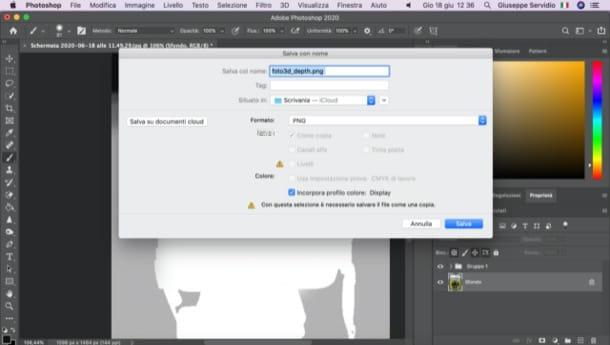
When you have finished the operation, deactivate the display of the group (by clicking on theeye located next to the icon of the folder in the layer panel on the right), select the layer Background, go to the menu File> Save with nome (top left) and, after choosing the name to assign to the file, saves the image as a file PNG o JPG (the only formats supported by Facebook for the function in question), by clicking on the button Save.
Then, activate the previously created group again by clicking on theeye placed near the folder (bottom right), go back to the menu File> Save with nome and, in the appropriate text field, write it same name as the file saved before and add the writing to the latter _depth. Then select the format in which to save the image (which must be the same as the image saved earlier) and click on the button Save.
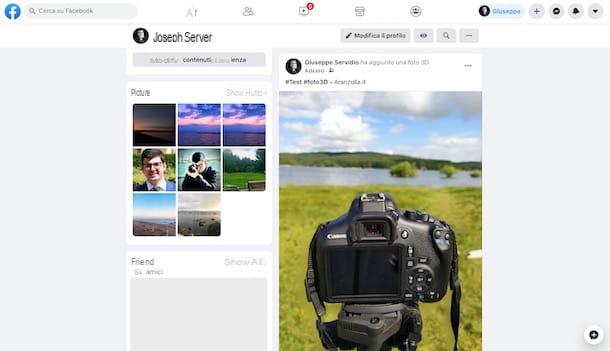
At this point the most is done. You just have to import the two images into Facebook and wait for them to be processed by the social network algorithm. Therefore, log in to Facebook from its main page, click on the item Photo / video located at the top, choose the two files to import (ie the image and its depth map) and wait for them to be processed and "merged" into a three-dimensional photo.
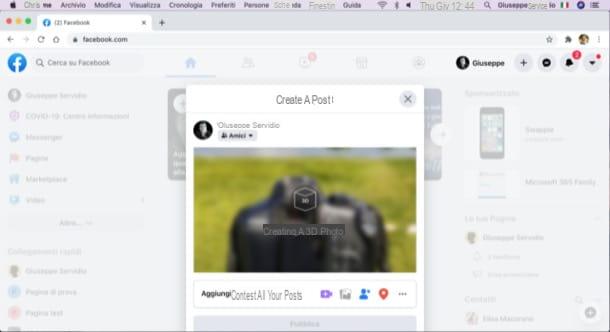
Finally, all you have to do is click on the button Public, so as to proceed with the publication of the three-dimensional photo. Did you see that it wasn't that difficult to do it?
How to make 3D Facebook photos