How to make a concept map in Word from PC / Mac

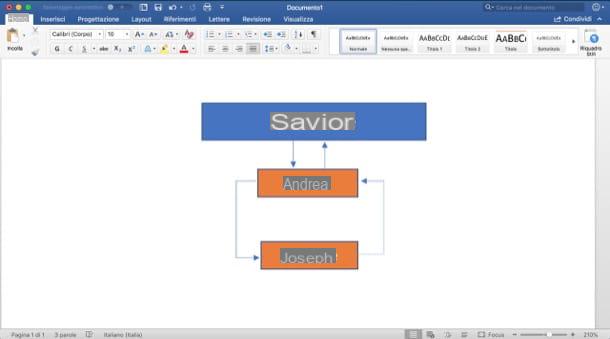
make a concept map on Word from your PC o Mac, you must first start the famous word processor on your computer and then use the geometric shapes and connectors that can be called up from the menu Inserisci. Let's see in detail how to proceed.
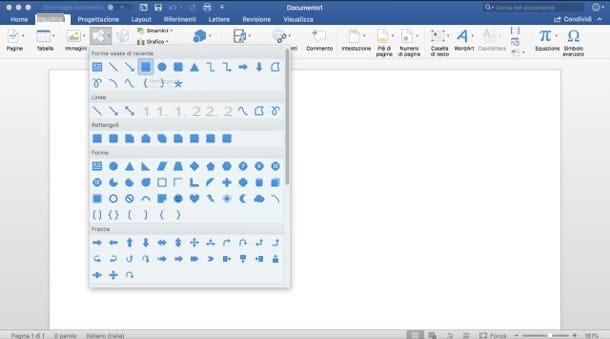
After starting Word, presses on the tab Inserisci located at the top, presses the button Form (the icon depicting the circle, square and rhombus located at the top), select the shape you want to use to make the central knot (eg. Rectangle) and draw it on the sheet: then hold down the left mouse button, move the cursor to make the drawing and release it when you have finished creating the desired shape.

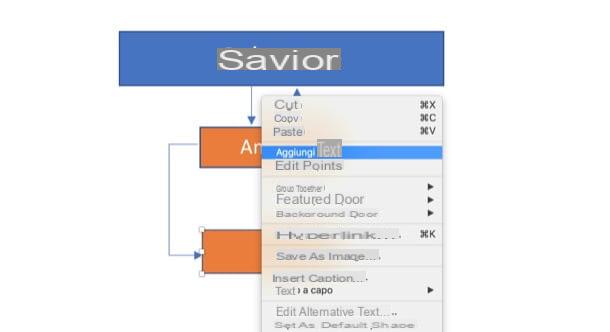
To add some text inside the central node you drew, right click on the shape inserted in the sheet, select the item Add text from the context menu and write the word or phrase (if you want, you can also format the text using the tools on the tab Home).
After making the central node of the map, add the connectors through which to connect it to the other nodes on the map. Press, therefore, on the board Inserisci (if necessary), click the button Form and use one of the connectors in the section Tiers (Eg. Connector 5) to connect the central node to the secondary ones that you are going to draw following the procedure I indicated in the previous lines. To change the appearance of a node, then left click on it and use i squares and shot that appear on it to change its size and curvature.
To complete the concept map, all you have to do is repeat what I have shown you so far: draw a new node using one of the shapes made available in Word and connect it through the connectors and lines available in the program. To add text to the nodes, then, you have to right click on them, select the item Add text from the context menu, enter the desired word or phrase and that's it.

If you want, you can also change the appearance of the shapes you used to create your concept map: select one of them, press the button Shape format that appears in the toolbar at the top and changes the color and appearance of the selected shape using the options and buttons available. As soon as you are satisfied with your work, save it by selecting the item Save with name ... from the menu Fillet.
Alternatively, if you want, you can save the concept map as a template and reuse it to create new documents by selecting setting the option Word template (* .dotx) in the drop-down menu Save eat or, if you are using a Mac, by selecting the item Save as template from the menu Fillet.
How to make a concept map in Word from smartphones and tablets

want make a concept map on Word directly from the smartphone or from tablet? To proceed, you must first install on your Android device (also on alternative stores) iOS / iPadOS the official Word app which, as you may already know, can be used for free on devices with a display of dimensions equal to or less than 10.1 " (for larger devices, on the other hand, a subscription is required Microsoft 365).
Once the Word app has been installed and started on your smartphone / tablet, log into your Microsoft account and decide whether to start creating a new document by pressing the button New or whether to modify an existing one by tapping the button apri and then selecting the file from the device memory or from one of the supported cloud storage services.
Once you have chosen whether to modify an existing document or whether to create one from scratch, you have to make another choice: draw the concept map using the geometric shapes of Word or draw it by hand using the touch screen technology of mobile devices to your advantage. Let's see how to proceed in both cases.
make the concept map using geometric shapes, do the following.
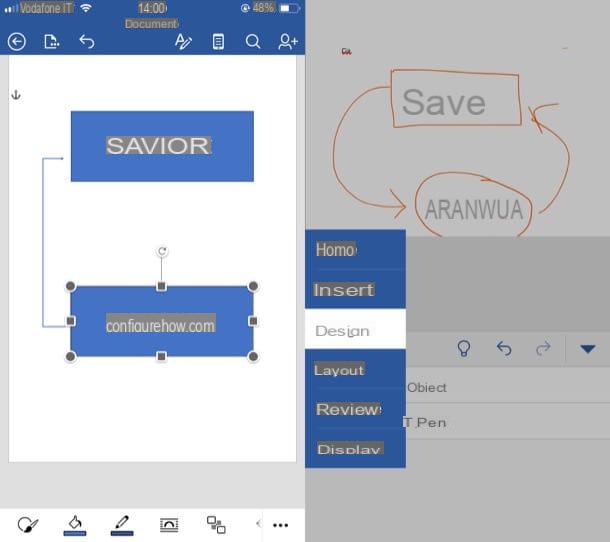
- Yes smartphone - tap on the tab Home placed at the bottom left, presses on the card Inserisci from the menu that opens, press on the item Form located at the bottom, select the shape you want to use to draw the main node of the map and resize and move the shape inserted in the sheet using the shot and squares placed on its perimeter. Then presses the Insert button appeared below, select the connector you want to insert in the map by choosing one of those in the section Tiers e usa i shot and squares places on the connector to resize it. To add text inside the shapes inserted in the sheet, tap on one of them and select the item Add text from the menu that opens. Now all you have to do is repeat the operations I indicated to you to finish the map and that's it.
- Yes tablet - presses on the voice Inserisci, fai tap sul pulsating Form (the icon with the square and circle located at the top), select the shape to use to make the central node of the map and then resize it using the shot and squares placed on its perimeter. Then press the button Inserisci located at the top left, select the connector you want to use to join the central node to the secondary ones and repeat these operations for all the nodes and connectors that you will need to complete the job. To insert text inside a node, then, tap on one of the added shapes, press on the item Add text from the menu that opens and type the text you want to insert.
drawing the concept map “by hand” using touch screen technology, do the following.
- Yes smartphone - tap on the tab Home placed at the bottom left, presses on the card Design from the menu that opens, press on the item Start Inking, select the pen you want to use and draw the concept map.
- Yes tablet - presses on the card Design located in the top menu, check that the switch is next to the wording Finger drawing is moved up ON, choose the pen you want to use and draw the concept map. Easier than that ?!
As soon as you have completed your work, save it by pressing on the item Save o Export from the menu Fillet (l'icona del sheet located at the top left).
How to make a concept map in Word


