


How to make an organization chart with Word on PC / Mac
As I mentioned in the introduction of this tutorial dedicated to how to make an organization chart with Word, the desktop version of Microsoft's video-writing program (available for Windows e MacOS), allows you to easily create graphs of this type using the tool SmartArt which, unfortunately, is not included in its mobile version (but more on that later). Now, let's not waste any more time chatting and let's take action immediately: start Word on your computer, so we can discover together how to best use it for the creation of organization charts worthy of being defined as such.
After starting Word on your computer, press the template Blank document present in the initial screen of the program, so as to start the creation of a new document, and then presses on the card Inserisci placed at the top. In the menu that appears at the top of the window, press the button SmartArt, so as to recall the tool that allows you to create complex graphic elements, such as organizational charts.
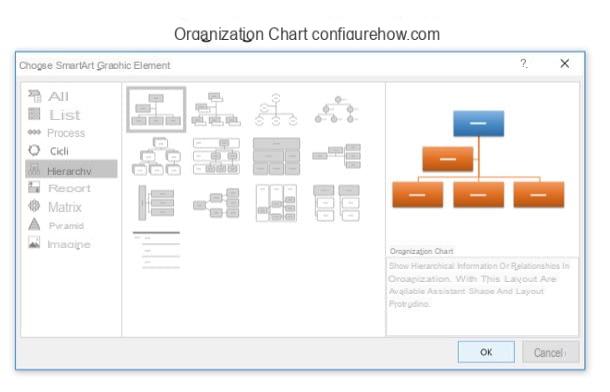
In the window that opens, select the type of element you want to insert in your text document: All, to view all available graphic elements in a single window; Lists, if you want to use templates in list format; cycles, if you want to use graphs that represent cycles of information; Hierarchies, if you want to create a “classic” organization chart; Relations, to view the models that allow you to highlight the relationships existing between two or more elements of the graph; Matrices, if you want to create matrix charts; Piramide, if you want to make a pyramid chart or Images, if you want to create a chart composed mainly of images.
I suggest you use the templates in the section Hierarchies, because not only are they simple to use but they are practically perfect for creating organizational charts in a few steps (the others are more useful in other contexts). After selecting one of the 13 models available in the section in question (Organization chart, Organization chart with name and position, Semicircle organization chart, etc.), presses the button OK to confirm the choice made.
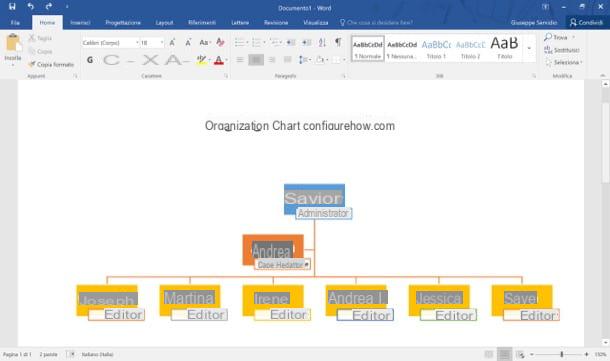
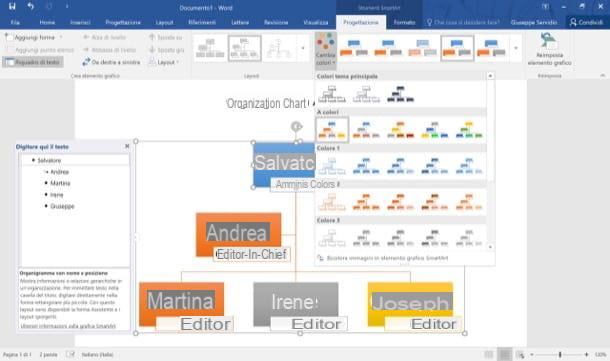
You should now end up with a basic organization chart in the center of the worksheet. To change the writings inside each rectangle of the organization chart, just click on the items [Text] that are inside them or, if you prefer, use the box Type your text here which appears on the left to enter the names and / or offices to be illustrated in the graph. To change the appearance of the organization chart - colors, box layout, etc. - you can use the buttons and menus on the tab Planning in Word.

To add or remove rectangles from the organization chart, however, you must first select one of them and then, after opening the tab Planning, press the button Add shape located at the top left and, in the menu that appears, select one of the options available: Add shape after to add a rectangle to the right of the selected one; Add shape first to add a rectangle to the left of the selected one; Add shape above to add a rectangle above the selected one; Add shape below to add a rectangle below the selected one, and so on.
You can also move a component (i.e. a rectangle) of the organization chart to a higher or lower hierarchy by using the buttons Level up e Lower the level placed in the upper left, and move items from left to right (or vice versa) by clicking on the appropriate button located at the top left of the Word toolbar. After completing your work, save the document you created by pressing the button Fillet located at the top left and then selecting the item Save / Save as from the menu that appears. Easier than that ?!
If you want to make an organization chart with Word and use Office 2003 or earlier, the mechanism is practically identical to the one I illustrated earlier, with the only difference that the option to create the organization charts is found in the menu Insert> Diagram and the options to modify it are all located within a toolbar that appears together with the organization chart itself. Good job!
Please note: there is also an online version of Word, which can be used for free from the browser, but unfortunately it does not include WordArt or other tools necessary for the creation of organizational charts. Unfortunately, I cannot recommend it for the purposes of this tutorial.
How to make an organization chart in Word on smartphones and tablets
You want to make an organization chart in Word from smartphone or from tablet? I'm sorry to tell you, but as I mentioned earlier, unfortunately you won't be able to count on the SmartArt tool. That doesn't mean you won't be able to make a mobile org chart - you can use Word's forms and conductors for that purpose - but it just means it'll be a little more cumbersome to get the job done, that's all. If you're ready to get started, launch the official Word app on your Android, iOS or Windows 10 Mobile device and let's get started!
Please note: the Word app for mobile devices can be used free of charge on all devices with dimensions equal to or less than 10.1 ″; for larger devices, however, it is necessary to subscribe to Office 365, which starts at 7 euros per month.
Smartphone
If you are acting from one smartphone, after starting the Word app, presses the button (+) New located at the bottom left and then tap on the model Blank document to start creating a new document. Then press the button (...) located at the bottom right and, in the menu that opens, tap the button Home located on the left and select the item Inserisci give the menu check if you press.
At this point, tap the button Form, select the crafts you want to use to create the various boxes of the organization chart and connectors, tap on it and then move it within the document by placing it in the point you prefer.
To add other shapes, press the button Inserisci, select the shape you want to add, place it inside the document and repeat this operation for all the boxes and connectors of the organization chart. To insert text inside the various boxes that make up the organization chart, instead, double tap on each of them and add the text you want to show in the graph. When finished, press the back arrow to choose the name for your file.
Tablet
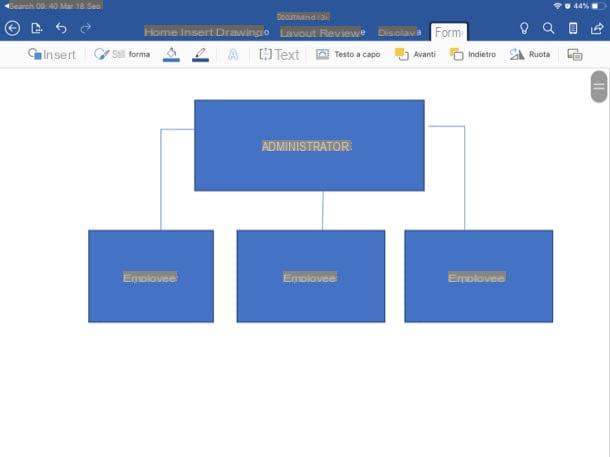
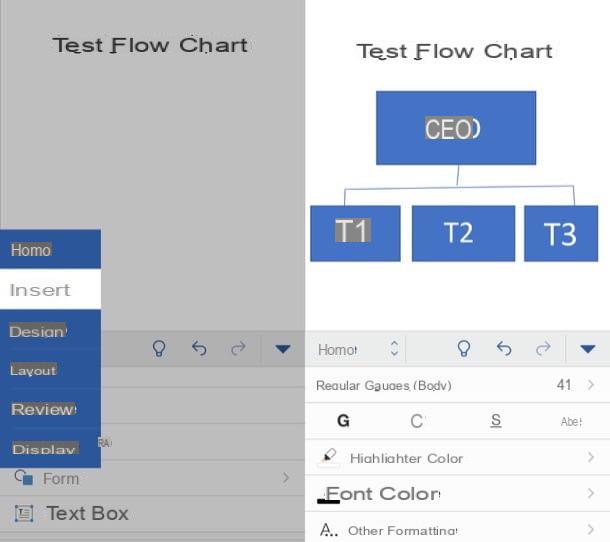
If you are acting from a tabletinstead, after starting the Word app, press the button (+) New located on the left sidebar and then tap on the model Blank document to start creating a new document. Then he presses on the card Inserisci give the menu check if you press on the button Form (l'icona del circle with square at the top).
Select, therefore, the crafts you want to use to create the various boxes of the organization chart and the connectors, tap on it and then move it within the document by placing it in the point you like best and then add other shapes to complete the structure of the chart by pressing the button Inserisci. To insert text inside the various boxes that make up the organization chart, instead, double tap on each of them and add the text by typing it on the keyboard. When finished, press the back arrow to choose the name to be assigned to the file just created.
How to make a Word organization chart


