


Also thanks to some of my guides, such as the one dedicated to the use of programs such as GIMP, you have learned the basic rules of photo editing, as well as how this powerful free photo editing software works. However, there are still many features that you don't know how to exploit and you would like to fill these gaps, so as to master the program even better.
Now, for example, you would need to create an image by superimposing two photos and applying transparency effects to them, but you don't have the faintest idea of the steps required to complete such a feat. Don't panic, just ask. Here is a guide on how to overlay photos with GIMP that is just waiting to be read and put into practice. You'll see, just follow a few simple tricks to be able to overlay photos.
So, what are you doing still standing there? Courage: make yourself comfortable, take all the time you need to concentrate on reading the next lines and, above all, try to put into practice all the indications I am about to give you. There is nothing left for me to do but wish you good reading and, above all, have fun!
Download GIMP

Before I give you some "tips" on how to overlay images using GIMP, I want to explain how to download and install the program on your computer, if you have not already done so.
First, you need to connect to this page of the GIMP website, press the red button Download x.xx.x and then you have to click on the orange button Download GIMP x.xx.x directly which is located on the right, immediately after the entry GIMP for Windows o GIMP for macOS (depending on the operating system you use).
Once the download is complete, you must open the installation file you obtained and follow the instructions given on the screen to complete the setup. If you use a PC Windowsfor example, open the file .exe that you downloaded and presses on the buttons Yes, OK, Install e end.
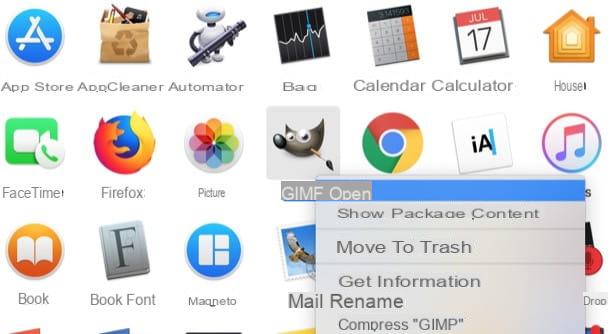
A Macinstead, drag GIMP in the folder Applications macOS, right-click on the program icon and select the item apri from the menu that opens twice in a row, so as to “override” the restrictions that Apple applies to programs from non-certified developers. Obviously, this operation only needs to be performed the first time GIMP starts.
If you are using a Mac and you are unable to download the program installation package because the message "There is no macOS package yet, sorry. Please check back later”Under the heading GIMP for macOS, most likely the latest version of GIMP has not yet been released for macOS. Since it may take several weeks before this happens, I recommend that you visit the page containing the download links for previous releases of GIMP to install one of the previous versions of the program.
In case you are not yet clear how to download GIMP, take a look at the in-depth analysis in which I explain in greater detail all the steps to do to succeed: there you will find all the explanations you need.
Overlay photos with GIMP
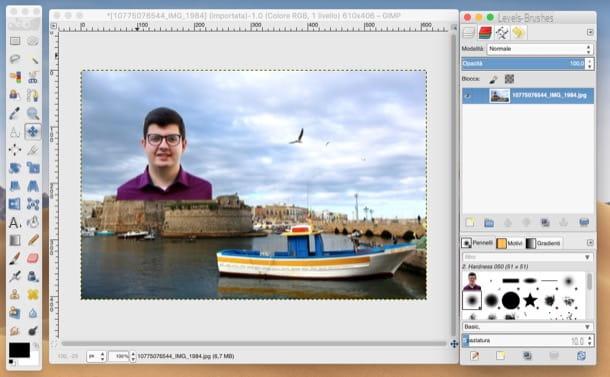
If you want to learn a overlay photos with GIMP, the first step you have to take is to start the program and import the two images you want to superimpose into it, by going to the menu File> Open… and selecting the files you want to work on. Once both photos have been uploaded, go to the second image window (the one you want to overlay the other) and press the key combinations Ctrl + A e Ctrl + C (its Windows) oppure cmd + a e cmd + c (on macOS) to select and copy it.
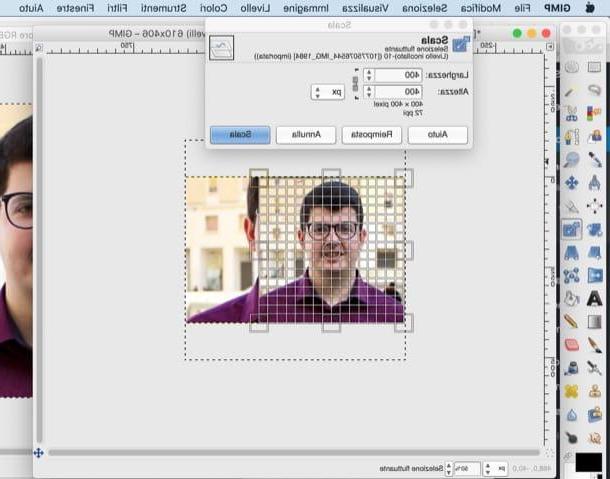
Switch, therefore, to the window of the first image (the one to use as "background") and press the key combination Ctrl + V (your Windows) or cmd + v (on macOS) or, again, select the item Paste from the menu Modification to paste one photo on top of another. If needed, match the two images using lo scale tool (l'icona del square with arrow located in the toolbar located on the left of the screen) and the move tool (l'icona della cross with arrows going in the four directions) on the image just pasted, respectively to resize and move the photo in the foreground.
At this point, you should have superimposed the two photos perfectly, but doing so will cover all or part of the background image. The next step will therefore be to change the type of display of the foreground photo, so that the background becomes visible as well. To do this, you need to unleash your creativity and choose the best setting for your image.
Translated into layman's terms, you have to select the level of the foreground photo from level control panel located on the right and select the modality display the level you prefer from the appropriate drop-down menu. You can choose between Fencing, Strong light, Weak light, Difference and many other ways to apply the layer: select the one that gives you the image overlay effect that best suits your creation.
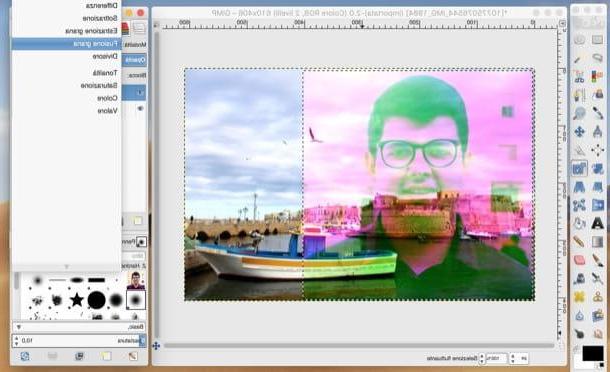
Later, you can "file" some imperfections by changing the level of Opacity of the foreground layer using the appropriate adjustment bar located in the layer control panel (top right) and delete any excess elements with the tool eraser.
Do you want to overlay two photos with GIMP, in the sense that you want to cut out a subject present on an image and paste it on another, so as to create a real photomontage? This is also possible. To do this, you must first select the item Toggle Quick Mask from the menu Select and then choose it Path tool by clicking on the icon fountain pen from the toolbar located on the left. Then trace as precisely as possible the edges of the subject you want to cut out: to do this, just repeatedly click on the edges of the subject you want to cut out, so as to insert the connection anchors, distancing them slightly from each other.
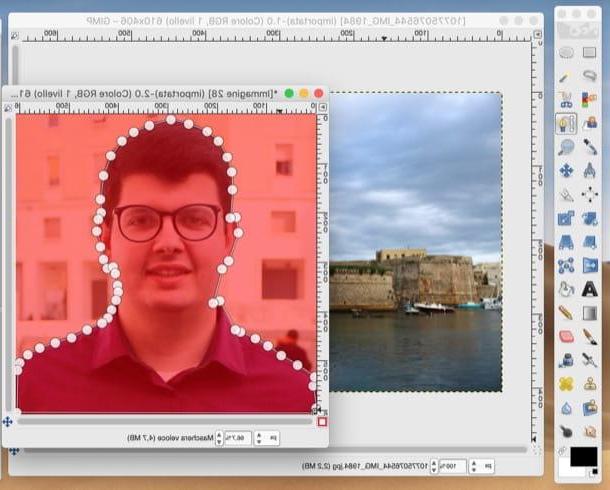
Now, disable the quick mask by selecting the item again Toggle Quick Mask from the menu Select, presses on the voice Selection from the path from the menu Select to transform the path into a real selection and then choose the item Invert (always from the menu Select), so as to invert the selection just made.
To obtain an optimal result, I suggest you then "soften" the selection a little: to do this, select the item Gradient from the menu Select di GIMP and, in the window that opens, set 3,000 as a value Shaded selection of and presses the button OK to save the changes made. Delete, therefore, the background of the photo by pressing the key Del / Backspace on the keyboard and paste the image you have cut out on the photo you have decided to use as a background (if you don't know how to copy and paste the image, follow the steps I indicated at the beginning of this chapter).
When finished, if you are satisfied with the result, you can save your image by selecting the item Export from the menu Fillet and then choose the folder in which to save the photo, give it a name, choose the format in which to export it and that's it. Did you see that it wasn't that difficult to superimpose photos using GIMP?
How to overlay photos with GIMP


