


Due to a moment of distraction, your smartphone fell to the floor and, unfortunately, its display was completely shattered, so you must necessarily consider buying a new one or, if you are lucky enough, to send that one as warranty. damaged. Your biggest concern, however, are the photos contained in the smartphone's memory: you fear that these may be irretrievably lost, so before you even acted, you went to Google in search of an efficient way to secure and copy them. for example, on the computer.
How do you say? Did I really hit the spot? Perfect, with this guide I will be happy to help you: in the lines to come, in fact, I will show you some effective methods for recover photos from a broken phone in no time at all, usable both in the event that the smartphone is no longer able to turn on, and when the device continues to work but the display is practically unusable.
So, after having heaved a long sigh of relief, make yourself comfortable and take a few minutes of your time to devote to reading this guide: I can guarantee you that, with a little patience and the right tools, the result will be able to fully satisfy you. . At this point, all I can do is wish you happy reading and wish you a big good luck for everything!
How to recover photos from a broken phone that won't turn on
If it is your intention to recover photos from a smartphone that, unfortunately, is no longer showing any signs of life, then I must immediately warn you that you will hardly be able to access its memory using a do-it-yourself method: to do it, you would probably need of precise tools to be able to first extract and then read the phone's flash memory. In this case, you could for example bring the device to assistance and request the recovery of the data contained within, but I must warn you that it is an expensive operation and that, not always, it is successful.
Do not despair, however, all is not lost: you may be able to solve this annoying problem using some "tricks" suitable for the purpose. For example, you can try to bring your smartphone back to life beforehand battery replacement, to access the photos (or a copy of them) through the microSD or, again, download them directly from in cloud. In the following lines I will explain how to do it in each of the three cases.
Battery replacement
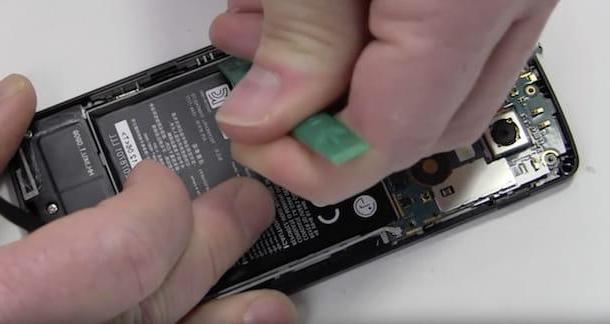
A smartphone that suddenly stops working without "external" reasons (accidental falls, contact with liquids, and so on), could be attributable to a battery completely worn out (or even broken), so much so that it is no longer able to retain the energy necessary even for the ignition sequence alone.
In this case, you could try to give "new life" to the smartphone by replacing the battery itself: if the latter is removable, you can buy a new one by going to a shop. articles for mobile phones or, if you prefer, you can get one online, even on Amazon if you wish. Otherwise, if the battery on your phone is not removable, you have to go to a authorized service center and request a replacement or, if you are practical enough, proceed independently with the replacement of the battery. For more information on the latter subject, I urge you to consult my specific guide on the subject.
Whatever your choice may be, make sure you choose quality components, without relying on solutions from dubious origins, albeit much cheaper: a defective battery can seriously damage the phone or the user and, moreover, cause short circuits or explosions in the charging phase. Make your choice with the awareness of what I have just told you.
In any case, once the battery is replaced, try to turn the phone back on as usual: with a little luck, the new battery should do its duty and allow the device to start up smoothly. Once you have "saved" your phone, I still recommend that you create a backup of your photos and update it from time to time: in this way, you can be sure that, should problems arise, your personal shots will still remain with you. In this regard, I suggest you take a look at my guides on how to transfer photos from Android to PC and how to transfer photos from iPhone to PC, in which I have covered the topic in detail.
Photo recovery from microSD
If the smartphone in your possession is equipped with expandable memory and, previously, you had followed my dedicated tutorial and moved the photos to the microSD, there is a very good chance that you will be able to recover them all: in fact, if the phone has stopped turning on completely (and has not suffered factors that can damage the hardware, such as contact with liquids or exposure to extreme temperatures), the data saved on the microSD may have remained intact.
In this case, you can easily retrieve them and move them to another device, which could be a computer: therefore, without further ado, extract the microSD from the broken phone by intervening on the appropriate one removable trolley, which you can pull out by inserting the hook supplied in the dedicated hole (usually placed on one of the “outer” edges of the phone), or by sliding it out of the housing located near the battery (for phones that have a detachable rear part). If you don't know how to do it yourself, you can refer to the user manual of the device or do a quick Google search by typing the phrase how to remove microSD [phone brand and model].
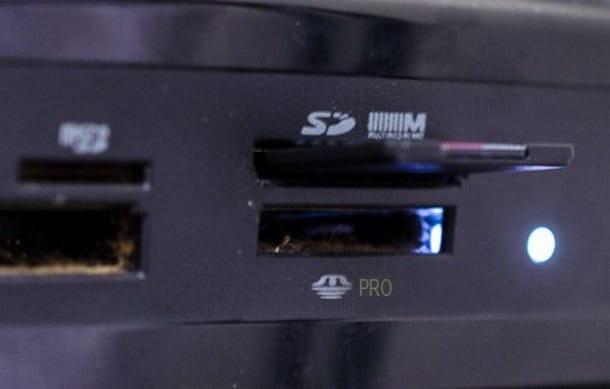
Once the memory card has been extracted, insert it into its adapter (if you do not have it, you can buy it at a physical store of electronic items or online, for example on Amazon) and connect the latter to the computer, inserting it into the special slot on the case (for desktop PCs) or on one of the side shells (for laptops).
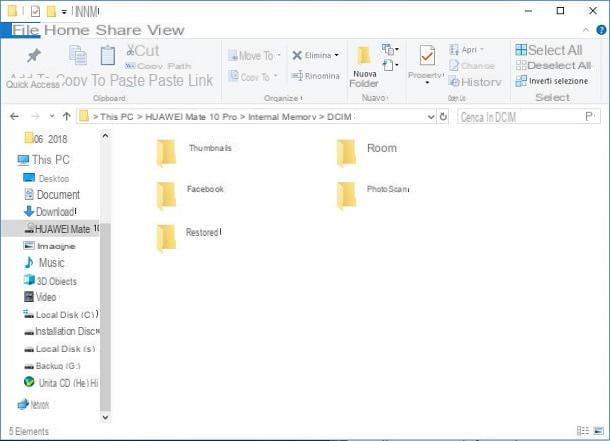
Once this is done, wait a few moments for the external memory to be correctly recognized by the operating system, then start the relative file manager (File Explorer di Windows o Finder di MacOS), select the icon for the memory card you just connected and copy your photos to your computer from the folders where they are saved: you can find the images and videos captured by the camera in the folder DCIM, photos received via WhatsApp in the directory WhatsApp > Media > Pictures, images downloaded from the Internet to the folder Download and so on.
If you have never carried out this operation before and you just don't know how to read the SD card on your computer, you can take a look at my themed article, in which I was able to explain all the steps in detail. to accomplish.
Photo recovery from the cloud
Normally, the first time you set up an Android or iOS smartphone, the operating system asks you for permission to automatically backup your photos and videos (as well as some other personal data) using the services, respectively. Google Photos e iCloud: If you had configured these settings properly, your device's photos were most likely automatically copied to the cloud, ready to be downloaded at any time.
This is really good news, as the data saved on the cloud can be recovered from practically any other device, provided, however, that you remember the credentials to access the respective services: theaccount google you configured the phone with, for Android, or theApple ID to iOS. If you have forgotten them, you can get them back by following the instructions I gave you in my guides on how to recover Google account and how to recover Apple ID.
Once you have obtained the login credentials, you can connect to the cloud space of your interest by following the instructions provided below, depending on the service active on your smartphone.
- Google Photos - connect to the main page of the service and type, where requested, the username and password of the Gmail account that you used to use on the broken phone: at this point, you should view the photos saved on the phone in the central part of the window, divided by date. To download one or more photos, select them with a click of the mouse (press the key Shift on the keyboard to make a multiple selection), presses the button (⋮) located at the top right and choose the option Download among those proposed.
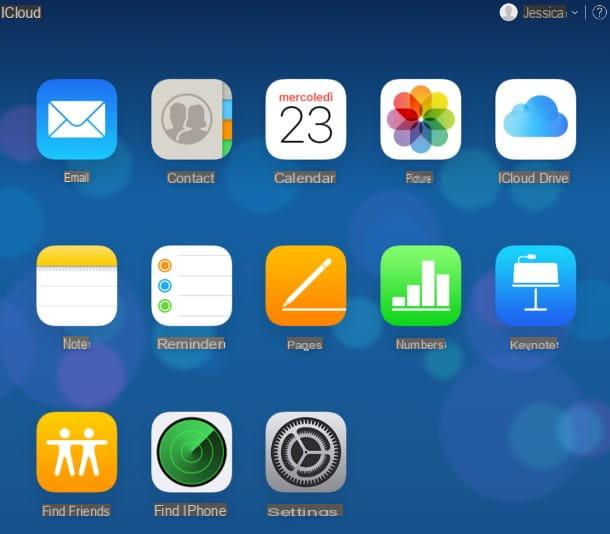
- iCloud - connected to the website of the service, log in via theApple ID active on the broken smartphone (by entering the email and password in the appropriate fields) and then click on the icon Gallery placed on the screen that opens. You can download one or more images by clicking on the ones that interest you (by pressing the button Shift on the keyboard to make a multiple selection), then click on the button cloud with down arrow located at the top right.
How to recover photos from a broken screen phone
The phone turns on properly, but it does screen is damaged and can no longer recognize the "touch" of the fingers in some areas? Then you should breathe a sigh of relief, since the situation may not be so serious: below, in fact, I am going to propose some solutions that could "compensate" for the compromise of the screen, helping you to recover the photo from a broken phone in a very short time.
Before we go any further, though, I suggest you remove the SIM card from the device, in order to avoid other "mishaps" due to the obligation to enter the PIN code: if you do not know how to do it, I suggest you contact the user manual of the phone, or do a Google search using the phrase how to remove SIM [phone brand and model].
"Standard" procedure
If the phone screen is damaged by cracks but the touch panel is still functional, so you can enter the unlock code or pattern when starting the device, you should not encounter any particular problems: after unlocking the smartphone, you can connect it to the computer via the cable supplied and save the data in the same way as you would in normal conditions.
Basically, what you need to do is access the folder DCIM, WhatsAppMedia or any other folder on your smartphone that contains photos via the operating system file manager (File Explorer to Windows, Android File Transfer to MacOS), are these poisons are Android, or act through iTunes, if, instead, you are using an iPhone.
How do you say? Don't know how to do it? Do not worry, I am not going to abandon you on the most beautiful: in fact I have created a tutorial on how to connect the phone to the computer especially for you, in which I have illustrated to you in great detail all the steps to take to establish the connection between the two devices. .
Use a USB mouse or keyboard
The phone turns on but the touch is unfortunately compromised, therefore, you are not able to correctly enter the terminal unlock code / pattern and start the system completely, so it is impossible for you to follow the steps described above?
If you have a phone Android, you can solve the problem by using a mouse or one USB keyboard (those "commonly" used on computers), to be connected to the device via an adapter USB OTG. For your information, the OTG technology is used to connect peripherals such as the operating systems dedicated to smartphones and tablets mouse, keyboards and mass storage devices (external drives and USB sticks, for example).
To use this technology, you need to get an adapter specially designed for the purpose, paying attention to the type of connection required by the phone you have: USB-C, for the latest Android devices, or microUSB, for older phones or for low-to-mid-range phones. You can buy these adapters at mobile phone stores or online - I'll show you some of them below, available on Amazon.
Vedi offers your AmazonOnce you have the adapter, you must connect the "thinner" end to the appropriate port located on the smartphone (the same one you use to connect the charger) and connect the USB mouse or keyboard to the other end of the adapter: if everything went as expected, you should be able to use the external device right away, without having to apply additional configurations. If you do not have a USB mouse or keyboard to use for the purpose, I invite you to consult my dedicated buying guides to receive a "tip" on the matter.
Anyway, after unlocking the device, unplug the OTG adapter, connect the cell phone to computer and perform image recovery using the instructions I gave you earlier.
Unfortunately, on the iPhone, it is not possible to carry out the same procedure due to the lack of mouse support from iOS.
Use Find My Device (Samsung only)
You have a branded smartphone Samsung? Then I think I have good news for you: you may be able to unlock your phone screen right away even using the service Find my device (Find my mobile) made available by the Korean company and accessible from any browser. By doing so, you would not need to intervene via an OTG connection, as I showed you earlier.
If you have never heard of it, you should know that the aforementioned service is designed to carry out operations aimed at finding or securing a lost or stolen Samsung device, such as the location, the possibility of make it ring o restore the telephone remotely and, not least, that of unlock the screen.
Before going ahead, however, it is good that you are aware of a fundamental aspect: in order for you to unlock the phone via Find My Device, the smartphone must necessarily be connected to the Internet, the dedicated function must already be active on the phone (operation which can be completed by accessing the menu Settings> Lock screen and security> Find my device) and you must remember the credentials of theSamsung account that you used in the configuration phase.
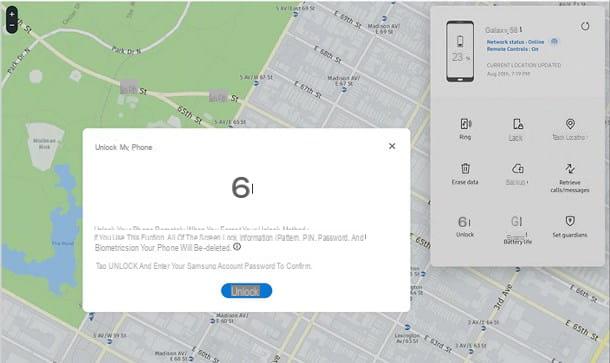
Having clarified this detail, it's time to take action: first, turn on the defective smartphone and wait for the operating system to be fully started, then connect to the "Find my device" website, press the button Log in and insertion il username and Password Samsung account in the required fields.
Once logged in, click onphone icon displayed on the map, then on the icon Unlock located in the right side menu and, when prompted, type a second time the password of your Samsung account as a security confirmation: if everything went smoothly, the service should cancel the phone lock and delete all the information relating to the phone from it. previously set code or sequence.
When this happens, you can connect the device to your computer and save the photos of your interest using the steps described above.
Use a Custom Recovery
With a bit of luck, it is possible that your smartphone is equipped with a small system independent of Android, called Custom Recovery: this, among other things, is designed to manage extremely delicate parts of the operating system, providing the user with the tools necessary to perform particularly complex operations that, otherwise, could not be completed.
Devices subjected to the root procedure are certainly equipped with Custom Recovery (essential for installing apps SuperSU / SuperUser, essential for obtaining elevated access privileges), but not only them: some manufacturers, in fact, make available the “factory” Custom Recovery, in order to facilitate technical interventions and diagnostic operations by authorized personnel.
If your smartphone is equipped with a Custom Recovery, you can try to recover photos stored in memory using ADB, the platform made available by Google to communicate, in particular situations, an Android device and the computer to which it is connected.
These poisons are Windows, you need to get the drivers first ADB and install them on your computer: first of all, then, connected to this website, click on the button Download and wait for the installation file (eg. UniversalAdbDriver.msi) is completely downloaded: after starting it, press the button Next three times and, to finalize the installation, click on the buttons Yes e Close. If you have a Machowever, this is not necessary, as the ADB drivers are already included in the operating system.
As a second step, you need to install the program Fastboot, the tool that allows you to intervene on your smartphone via the Recovery installed in the system: if you are using Windows, you can download Fastboot by connecting to this website, clicking on the link Download Version X.y.z Portable corresponding to the section Downloads and then on the buttons Click Here to Start Download e Primary Download.
Once the download is complete, extract the zip file you just obtained in a convenient folder (e.g. on the desktop), go to the same and, holding down the button Shift, right click with the mouse in an empty part of the window and select the item Open PowerShell Window Here / Open Command Prompt Here from the menu that appears on the screen.
If, on the other hand, you are operating from a Mac, you can install Fastboot by intervening directly via the command line: first, open the terminal calling it from the folder Other of Launchpad (l'icona a forma di rocket attached to the Dock), type in it the command ruby -e "$ (curl -fsSL https://raw.githubusercontent.com/Homebrew/install/master/install)", press the key Submit on the keyboard and, when prompted, enter the Password Mac administration tool and wait for the process to complete (it may take a few minutes).
When this happens, you can complete the Fastboot setup by issuing the three commands that I illustrate below, each followed by pressing the key Submit.
brew tap caskroom/cask brew cask install android-sdk brew cask install android-platform-tools
Once the Fastboot installation is complete, shut down the broken phone entirely and boot it into recovery mode by pressing and holding the keys simultaneously Power+VolumeSu. Once started, connect your device to your computer and, if you are on Windows, move to the window of PowerShell / Command Prompt that you had previously opened; if you are using MacOS, open the terminal.
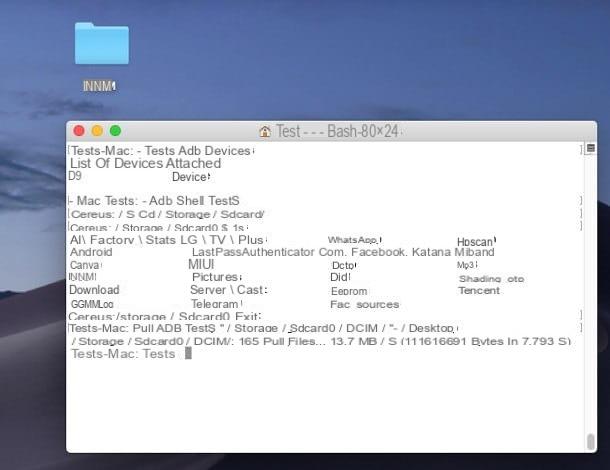
From now on, the instructions are identical on both operating systems: first type the command adb service, followed by pressing the key Submit, to view the devices connected to the system: at this stage, you should see the serial number of the connected phone.
Once this is done, issue the adb shell command to access the adb operating console and then the ls command to see all the folders contained in the Android memory: you can move to the folder of your interest (eg. /storage/sdcard0, which represents the internal memory area dedicated to data and contains both the folder DCIM that folders Download e WhatsApp) by issuing the command cd / storage / sdcard0 /. After taking note of all the folders to download and their paths, exit the ADB console by typing the command exit, but leaving the PowerShell, Prompt or Terminal window open.
At this point, you can proceed to copy the photos using the pull command "/ folder / of / Android" "/ folderDelPC": for example, to transfer the DCIM folder to the desktop of Windows, you have to type the command pull "/ storage / sdcard0 / DCIM" "% USERPROFILE% Desktop"; to transfer it to the desk of Macinstead, you must issue the pull command "/ storage / sdcard0 / DCIM" "~ / Desktop". Repeat the operation with all the folders you want to transfer and, when you're done, quietly close the PowerShell, Prompt or Terminal window.
If you intend to deepen the ADB topic, I suggest you read the thematic guide available on the xda-developers website (in English).
How do you say? In spite of everything, you weren't able to solve the problem? As a last resort, you could try to recover photos from the microSD or the cloud, following the same instructions I gave you in the previous chapter of this tutorial.
How to recover photos from a broken phone


