


Have you deleted some important photos you took with your digital camera? I understand your concern but, instead of standing here despairing, roll up your sleeves and try to remedy the situation: perhaps all is not lost! If the photos were saved on the SD card inserted in the camera and if the portion of memory on which the images were stored has not yet been overwritten, that is, it has not yet been occupied by other data, you may be able to recover your precious shots.
Come on, take out the memory card from your digital camera, insert it into your computer and try to follow my tips on how to recover photos from SD. If good luck is on your side, you will be able to complete the mission easily! I'll tell you right away that to carry out the operation in question you just need to take advantage of some simple programs specially designed for this purpose, available for both Windows and macOS, and, in most cases, totally free.
How do you say? The photos you are interested in recovering were saved on an SD card but the latter was inserted inside your smartphone and were therefore taken with the mobile phone camera? It makes no difference! Even in this case, in fact, you can try to recover them using the resources in question, as well as tools specially designed for the mobile side and usable directly from there. To find out more, continue reading, you will find everything explained in detail below.
Programs to recover photos from SD
First, let's figure out how to go about it recover photos from SD using some ad hoc programs running on both Windows that of MacOS. You can find them indicated and explained right below. Don't worry, they are not difficult to use, not even for those who, a bit like you, don't really consider themselves a great expert in IT and new technologies, you have my word.
Disk Drill (Windows / macOS)
Disk Drill is one of the best solutions for recovering deleted data. It is available for both Windows that for MacOS and supports a wide variety of graphics files, including RAW files of cameras, images JPG, PNG, BMP, GIF and much more. It also supports restoring and rebuilding of videos, documents, music, archives and many other different file types. In addition to the SD / microSD cards, allows you to recover data from cameras, camcorders, hard drive ed SSD (both internal and external), smartphone e tablet Android, iPhone and iPad USB sticks and other devices, including unformatted ones.
It also has a function that allows you to avoid accidental deletion of data by storing it in a reserved area of the disk (Recovery Vault) and monitor disks via technology S.M.A.R.T., which allows you to know in advance when there are problems on a drive and, therefore, allows you to get your data sheltered in time.
Disk Drill is free to download and use in a version that allows you to recover up to 500MB of data: to remove this limitation and access other advanced functions, you need to purchase the full version of the program with prices starting from around 94 euros.
To get Disk Drill, then connected to the download page of the program for Windows or macOS and click on the button Scarica free. Once the download is complete, if you use a PC Windows, april il .exe file downloaded and complete the setup by clicking on the buttons in sequence Install it., Yes e spear.
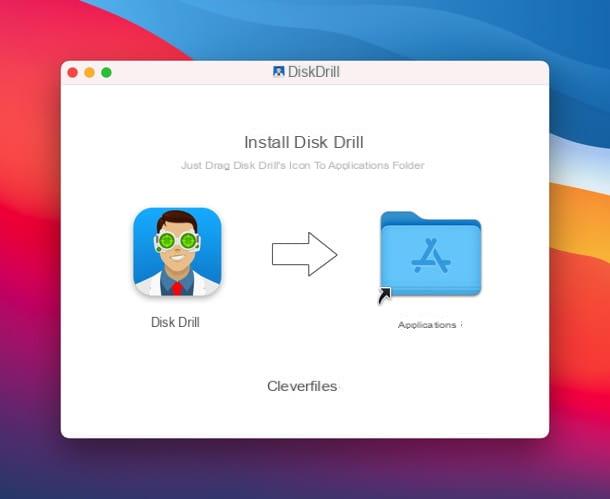
If you use a MacInstead, open the .dmg file obtained and simply drag theDisk Drill icon in the folder Applications say macOS.
At this point, regardless of the operating system you use, boot Disk Drill, click on the button for to accept the conditions of use of the program, read the initial presentation, choose whether to activate the Recovery Vault data protection feature e / o if share anonymous usage data with the developers and click the button let's begin.
Su Mac, at this point you have to type the administration password computer and you need to authorize Disk Drill in System preference, by clicking on the icon padlock located at the bottom left, by typing the again Mac password and ticking off two o'clock boxes related to the program.
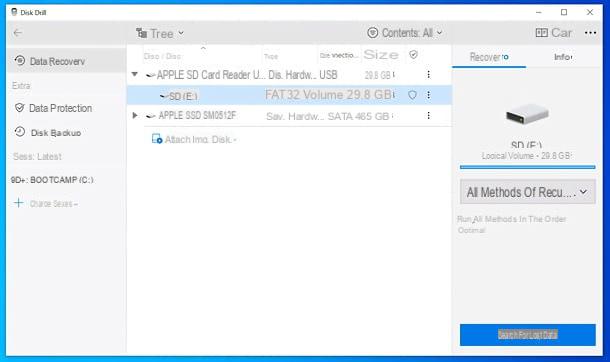
Now you just have to select theunit and possibly the partition relating to SD from which you intend to recover the photos; then move to the right drop-down menu to select the recovery method to be used between All methods of recovery (recommended, as it is the most complete), Fast analysis, In-depth analysis, Search for lost partitions, Allocate existing file system data e Protected data not deleted. Then click on the button Search for lost data and wait for the scan results.
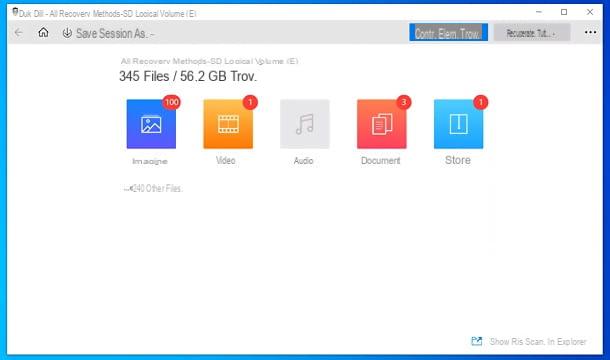
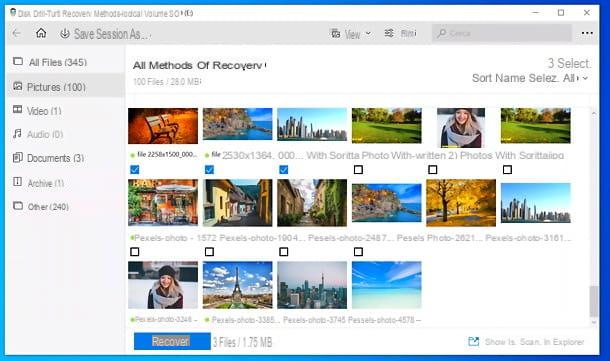
Disk Drill will show you a window with the count of images, video, audio, papers, Archives e other files found in real time. Without having to stop scanning, you can view the list of images recoverable from the program by clicking on the appropriate icon.
By default, Disk Drill will show you the list of folders containing recoverable images, which you can preview by clicking on theicona dell'occhio mail in their correspondence. If you want to make your work easier and directly view thumbnails of recoverable images, expand the menu Vista located at the top right and sets the visual style Icon and files. Also, by accessing the menu filters (always located at the top right) you can filter the search results based on parameters such as dimensions e date of cancellation.
Once you have found the photos to recover, select the relevant ones boxesclick on your button Recover located in the lower right, indicates the destination path and start saving by clicking on the button OK.
To recover the files, the scan must no longer be in progress: in this regard, I would like to point out that you can stop and resume Disk Drill scanning at any time using the appropriate buttons at the top left, with the possibility of save the session and resume it later by opening the relevant file or quickly resume the most recent session by selecting it from the software sidebar.
For more details on how Disk Drill works and on the many functions offered by the program, I refer you to the official website.
EaseUS Data Recovery (Windows / macOS)
The first among the useful software for recovering deleted photos from SD cards that I invite you to consider is EaseUS DataRecovery. It is a free tool usable on both Windows and macOS that allows not only to recover any deleted images but also videos, documents and various other types of files. It is able to act on memory cards but also on hard drives, pendrives and various other media. Note that it allows you to recover a maximum of 2 GB of data, for larger quantities it is necessary to buy the paid version of the software (costs 103,64 euros).
To download the program on Windows, connected to its official website and click on the button Scarica free. When the download is complete, open the file drw_setup.exe obtained and presses on the buttons Si e OK. In the window that now appears on the desktop, click on the buttons NEXT, Accept, Confirmation e Install and complete the setup by pressing the button Complete.
Stai using MacOS, connected to this other section of the program's website and presses the button Free trial. A download complete, apri il package .dmg ricavato, trascina l'icona del software nella cartella Applications macOS, right-click on it and select the item apri twice in a row, to start EaseUS Data Recovery going around the limitations that Apple imposes on non-certified developers (an operation that must be performed only at the first start).
Now that, regardless of the operating system, you see the main program window on the screen, select the drive for the memory card che trovi in corrispondenza della sezione External devices and start the analysis by clicking on the button Scan located at the bottom right.
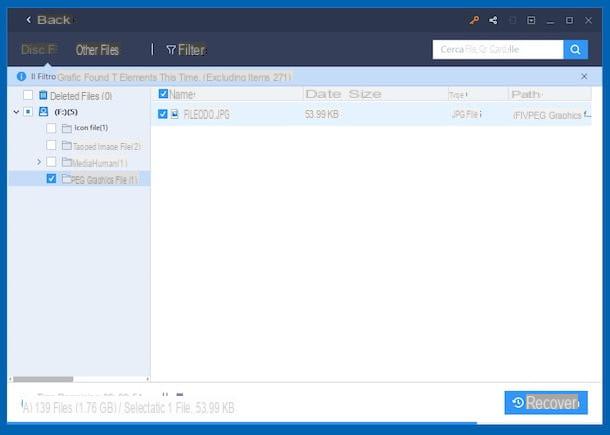
Once the analysis procedure is complete, you will be able to view the complete list of all the files that EaseUS Data Recovery was able to locate. To view only the images, click on the item Filter located at the top and select Graphs from the menu that opens. Then select the reference format from the menu on the left and put a check mark in correspondence with the elements you want to recover, in the right part of the software window. If you want to preview it first, double-click it.
Finally, press the button Recover located at the bottom right, indicate the location on your computer where you want to save the photos and press the button Bene. Once the recovery procedure is complete, the window will open automatically File Explorer relative to the location you have chosen to save the photos recovered from the SD card.
PhotoRec (Windows/macOS)
Another tool I want to suggest you try PhotoRec. It is a free and open source application for data recovery. To be precise, it is used to restore photos, videos and other types of files from various types of media. It works on Windows and macOS (as well as on Linux) but the variant for Microsoft operating systems is the only one that has a graphical interface, which is why I have chosen to tell you only about the latter in this passage. Note that the program is supplied in conjunction with TestDisk, a software mainly used to restore lost partitions and make damaged disks bootable again.
To download it on your computer, connect to the official website of the program and click on the item 64-bit Windows (if you are using 64-bit Windows) or on that Windows (if you are using 32-bit Windows). Once the download is complete, open theZIP archive which contains the two programs, extract the contents into any folder, start the executable qphotorec_win.exe and click on the button Si.
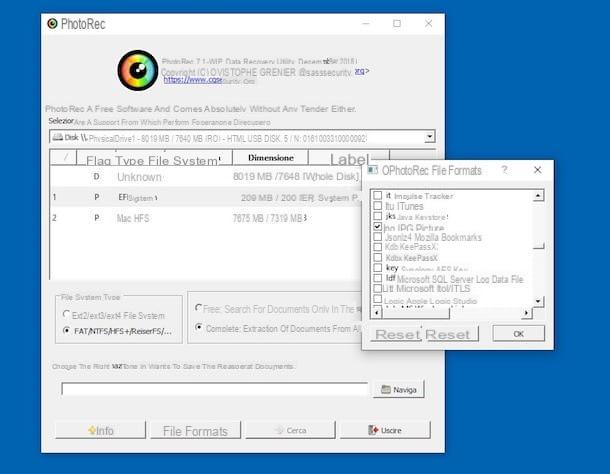
In the window that opens on the desktop, expand the drop-down menu located at the top to select the unit related to SD card reader of your computer. Then choose the primary partition of your SD card, put the check mark next to the items FAT / NTFS / HFS + / ReiferFS e pulsing sul pulsating You may also like... to select the folder to export photos recovered from PhotoRec.
Then click on the button File formats, pigia sul pulsating Restore and select the types of files to recover: in this case, since we are dealing with photos, I suggest you select JPG, PNG e RAW, but of course you can choose as many file types as you like.
Finally, click on the buttons OK e Search and wait for the program to recover all the images still available on the SD card. Easier than that?
Recuva (Windows)
Recuva is an excellent free (but not open source) program for recovering deleted files in a Windows environment. You can use it to recover photos from SD but also to restore work documents, music, videos and many other types of files from hard drives, USB sticks and external drives. It was developed by the same software house as CCleaner (I told you about it in depth in my tutorial on how to download and use CCleaner).
To download it to your PC, connect to its official website and click on the button first Download Free Version, then on the button free Download and, subsequently, on the link CCleaner.com.
When the download is complete, start the installation package named rcsetupxx.execlick on your button Siselect l 'cityno from the menu for choosing the language located in the upper right part of the window that opens, remove the check mark relating to the installation of any extra accessory programs (Eg. Google Chrome) and presses the button install placed in the center. Then press the button Run Recuva.
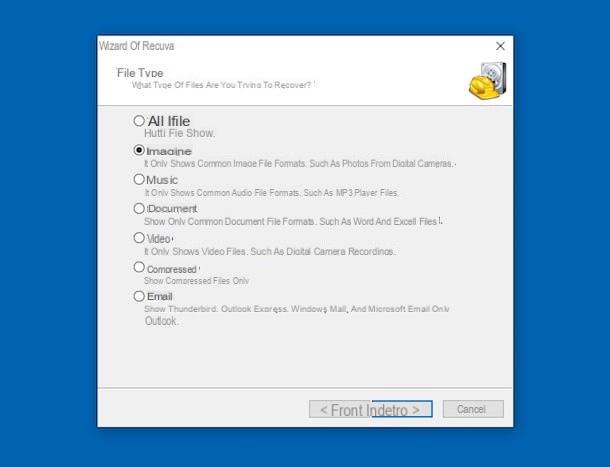
Now that you see the Recuva window on your desktop, click on the button NEXT. So put the check mark next to the item Images, still presses the button NEXT e seleziona l'opzione Your multimedia card or iPod.
To conclude, click on your button NEXT, put the check mark next to the item Enable deep scan and click your bottone starts, in order to start the search for all recoverable photos on the SD card.
Within a few seconds a window will open with the list of all the images found by the program that can be recovered. Then select the files you want to restore (the intact elements are those of which you can see the thumbnails, the others are unfortunately unreadable), press the button Recover and choose the folder in which to save the files.
Lazesoft Mac Data Recovery (macOS)
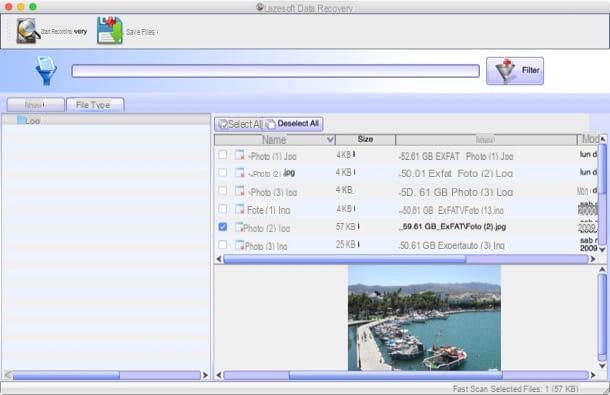
Do you use macOS and the programs to recover photos from SD that can also be used on Apple-branded computers that I have already told you about, haven't you satisfied? Then try Lazesoft Mac Data Recovery. It is free, easy to use and allows you to recover virtually any type of deleted file from hard drives, memory cards and USB sticks.
To use it, connect to the program's website and click on the button Free Download Now, in order to download the application to your Mac.
When the download is complete, open the package .dmg ottenuto e trascina l 'icona dell'applicazione in the folder Applications of macOS. Then right click on it and select the item apri for two consecutive times, in order to start Lazesoft Mac Data Recovery, however, going around the limitations of Apple towards non-certified developers (operation that must be carried out only at the first start). Then, type the Password of your user account on macOS and click on the button OK.
In the window that now opens on the desktop, select the option Undelete, click on the item related to memory card which contained the photos that have been deleted and that you want to recover and click the button Start Search. Then wait for the memory card analysis procedure to start and complete.
You will then be able to find the deleted items identified by expanding the folder Lost File Results present in the left sidebar, while on the right you will be shown the complete list of reference files. If the photos to be recovered are not in the folder in question, try looking for them in the one named Lost or in the relative source folderby selecting the respective paths from the sidebar.
Finally, put the check mark next to the names of the photos to restore (the preview is shown below), click on the button Save Files and indicate the folder where you want to save the selected items.
If this can help you, I point out that by going to the tab File type (in the left part of the program window) you can view the files that Lazesoft Mac Data Recovery has recovered based on their extension, while using the search bar located at the top you can search for the images that interest you by name.
App to recover photos from SD
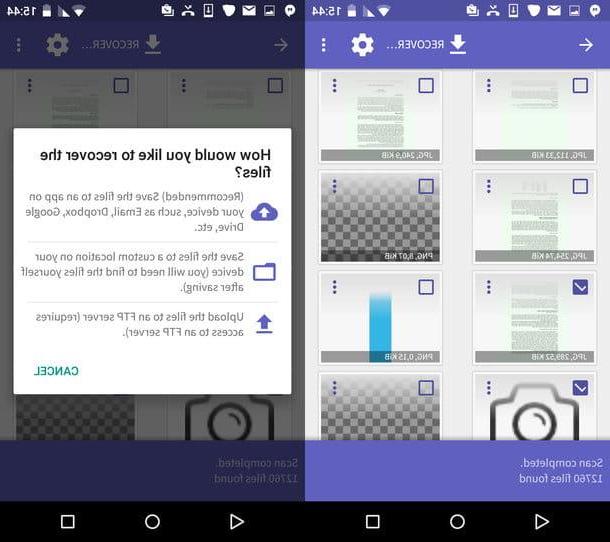
You have a smartphone or tablet Android with microSD support? Then know that you can recover photos deleted from the card without necessarily having to use the computer, using some specially designed applications. You ask me which ones? Well, the ones that I have indicated below are, in my humble opinion, the best in the category. Put them to the test now and you will see that you will not regret it.
- DiskDigger - it is one of the most effective apps belonging to the genre. It is free, in the basic variant that allows only the recovery of images, otherwise you have to buy the paid version at a cost of 3,37 euros. In addition, it has a pleasant user interface and performs the task for which it is intended in an excellent way.
- Undeleter - another useful app to recover photos from SD. Compared to DiskDrigger it is a bit slower in finding files but it is still able to perform the task it is intended for. You can download and use it for free for image recovery only, while for other types of files you need to make in-app purchases starting from 4,38 euros.
If you think you need more details about the resources I told you about, I suggest you read my tutorial on how to recover Android photos and my post on how to recover deleted photos from mobile.
Please note: both apps in question need the permits of root. If you need to learn more, I recommend reading my guide on how to root Android.
Article created in collaboration with Cleverfiles.
How to recover photos from SD


