


You need to zoom out a photo you downloaded to yours Mac, and then post it online but you don't know how to do it? Do you need to resize a series of images for your website but, having recently moved to Mac, you don't know which programs to use? Don't worry, I'm here to give you a hand.
If you give me five minutes of your free time, I can explain how to resize a photo with Mac thanks to some very easy-to-use solutions, some included "standard" in your computer's operating system and others available at no cost on the Internet. All you have to do is choose the application that best suits your needs among those reported in the guide and start using it right away, I assure you that it is a very simple operation.
For the tutorial I used macOS 10.14 Mojave but the information you find below is valid for all versions of the Apple operating system, even the older one. So don't worry - no matter what Mac model and version of macOS you have, you can easily accomplish your goal. Happy reading and have fun!
Preview
If you need to know how to resize a photo with Mac, I would advise you to start with a tool included "standard" in macOS: I am referring to Preview, the application with which photos and documents in PDF format are opened by default, which includes a convenient function for resizing images that I think is right for you.
To zoom out or zoom in on a photo with Preview, open it by double clicking on it. If Preview is no longer the default program to open photos on your Mac, right click on the image you want to resize and select the items Open with> Preview give the menu answer.
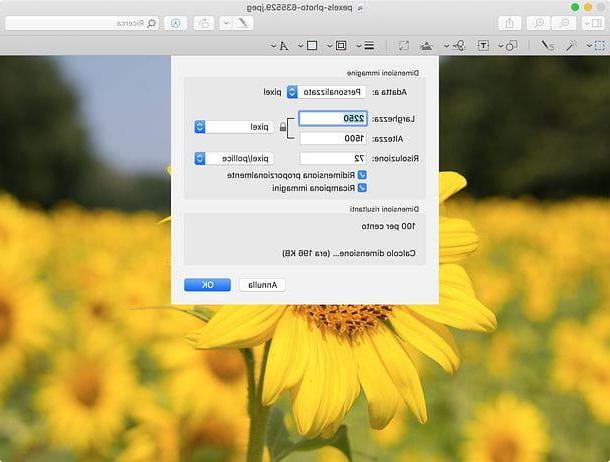
At this point, select the voice Adjust size from the menu Instruments which is at the top of the screen and, in the window that opens, set the option pixel in the drop-down menu next to the lock icon. Then type in the field Width o Height the dimensions (in pixels) you want to apply to the image and click on the button OK per salvare i Cambiomenti.
If you do not want the program to automatically adjust the aspect ratio of the photo based on the width or height value you specify, click on the padlock so that it "opens".
To resize images using standard formats (eg. 800? 600 o 1024? 768), go to the menu instead Tools> Adjust Size and select the desired resolution from the drop-down menu Fit to.
You can also invoke the command to resize images using a keyboard shortcut (cmd+shift+r) and easily crop the photo by selecting the portion to keep with the mouse and clicking on the option Cut out contained in the menu Instruments. The resized photo will be automatically saved in place of the original one. To save the final result in another file without altering the original photo, go to the menu File> Export and choose the format and name in which to save the photo.
Automator
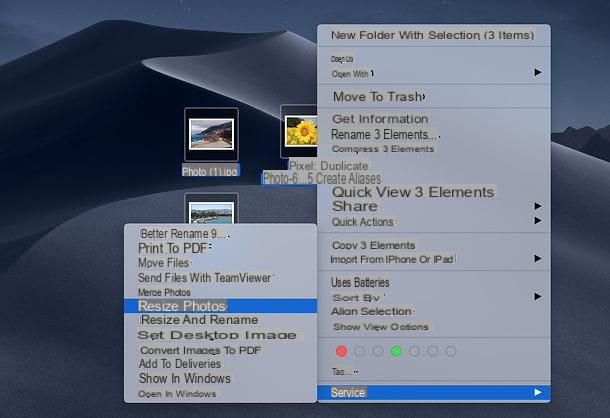
If you don't want to resize a photo with Mac individually but need a solution that can shrink or enlarge multiple images at once, I recommend you try Automator. If I had never heard of it, it is a powerful integrated utility "standard" in macOS, which allows you to create "programs" to automate the execution of certain operations. Among the many things that you can do with it, there is also the creation of a script to resize the images through the context menu (then through a simple right click on them).
To create the "little program" by which to resize multiple images in macOS, start Automator clicking on the relative icon in the folder Other of the Launchpad or by searching for the application in Spotlight. Once this is done, double click on the icon Quick action to start creating a new quick action.
In the window that opens (the main Automator screen), select the item Finder from the left sidebar and double-click the action first Get specified Finder items and then on that Copy Finder Items (in this way the original images will be preserved and the resized ones will be saved on the Desktop, or in the folder that you will indicate in the drop-down menu A of the Automator action). Then select the item Gallery from the side menu and double-click the action Resize images.
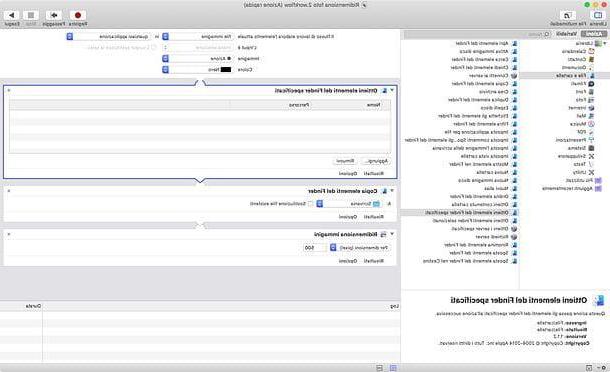
At this point, type the number of pixels you want the images resized with Automator to assume (in width) in the appropriate text field (next to the item By size (pixels), select the option image file give menu to tendin The workflow processes the current item (at the top of the window), so that the "little program" appears in the context menu of macOS only by selecting images, and proceed with saving your script.
To do this, go to the menu File> Save (above), type the name you want to assign to the action (ex. Resize photo) in the field that appears on the screen and give Submit.
Mission accomplished! Now you can close Automator, select the photos you want to resize via the Finder, right click on any of them and select the name of your script (ex. Resize photo) from the menu Services. The photos will be automatically resized in series and saved on the desktop, or in the folder you indicated in your "little program".
XnConvert
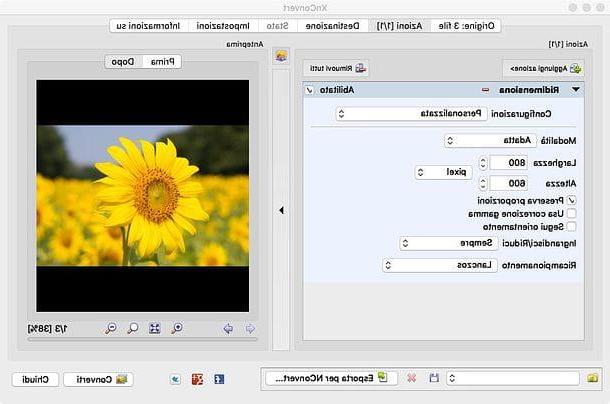
Does Automator seem a bit too complex to use? Then you could turn to XnConvert: a free program that allows you to work on photos in series by performing a wide range of operations (resizing, rotating, adding text, etc.). All completely free.
To download the program on your computer, connect to its official website and click on the button Mac DMG 64bit found at the bottom of the page. When the download is complete, open the dmg package you got, drag XnConvert in the folder Applications macOS and start the program by double clicking on its icon and responding apri to the warning that appears on the screen (this step is only necessary at the first start and is used to bypass macOS restrictions on applications from non-certified developers).
Once started XnConvert, go to the card Origin and drag all the photos you want to resize into it. Then go to the tab Actions, click here Add action and select the item Image> Resize from the menu that appears. Then set all the parameters you want to use to reduce or enlarge the photos in the menu below (Width, Height, etc.) and click on the button Converted to start the operation.
The images reworked by XnConvert will be saved in the same folder as the source files (with the suffix outcome in their name). To select a different output folder, go to the tab Destination application and click on the button [...]. You can also resize the photos so that the part exceeding the desired resolution is automatically cropped, just select Resize canvas rather than Resize within the framework of Actions.
Apple Mail
Do you want to resize images to be able to "lighten" them before sending them by email? In this case, if you use Apple Mail, the default client for managing e-mail on macOS, you can avoid any preliminary step and resize photos directly in Mail, using a special function of the software.
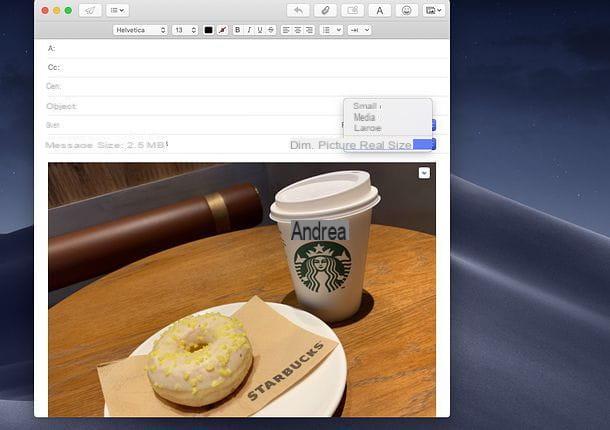
If you drag photos into an email message into Mail and expand the drop-down menu Image size, which is located at the top right, you can in fact choose whether to send the files in real size (so in original size), fit small, half o great.
Once you have chosen the setting of your preference, click on theairplane (top left) to send the message and that's it: Mail will automatically resize the attached photos and send them to the recipient in "lightened" format. Convenient, right?
How to resize a photo with Mac


