


In the computer world, as well as in real life, you must always use the right tools for the operations you need to perform. This means that to perform small photo editing operations you don't necessarily have to turn to Photoshop, on the contrary. It is often better to use more practical, simpler and faster software.
For example, if you need to resize images to publish on the Internet, you don't have to rush to download a professional photo editing program. You can take advantage of the very common Paint, which is integrated in all versions of Windows and allows you to enlarge or reduce digital photos in an extremely easy and fast way. If you don't believe it, follow the directions I'm about to give you and find out how to resize a photo with Paint on all popular editions of the Microsoft operating system.
The indications for the most recent versions of Windows, i.e. Windows 10, Windows 8.x and Windows 7, are the same (the Paint interface is the same on all three editions of the operating system), while for Windows Vista and Windows XP you need to follow a slightly different procedure. Find everything explained below. Happy reading and have fun!
Windows 10/8.x/7
If you want to learn how to resize a photo with Paint and you use a computer equipped with Windows 10, Windows 8.x or Windows 7, the first step you need to take is to click on the button Home (the flag icon located in the lower left corner), search Paint in the menu that opens and click on the first search result (the palette icon with the brush above).
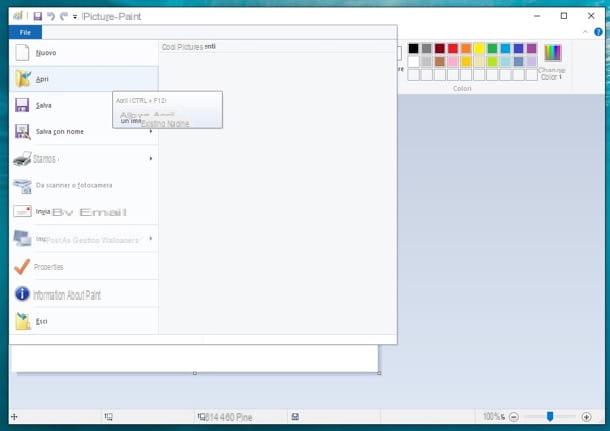
In the window that opens, you need to select the item apri from the menu Fillet (top left) and you need to select the image you intend to resize. All major graphic file formats are supported, such as JPG, PNG, BMP and GIF.
At this point, click on your button Resize located on the tab Home of Paint (the icon with the two squares located at the top left) and choose how to adjust the resolution of your photo.
You can resize the image by specifying the percentage of size to reduce or expand it or set a custom size in pixels. In the first case, put the check mark next to the item Percentage, specify the size you want the photo to assume in the field Horizontally o Vertically and click on the button OK to save the changes. In the second case, instead, put the check mark next to the item pixel, type the size you want to apply to the image in the fields Horizontally e Vertically and click on OK but I will modify it.
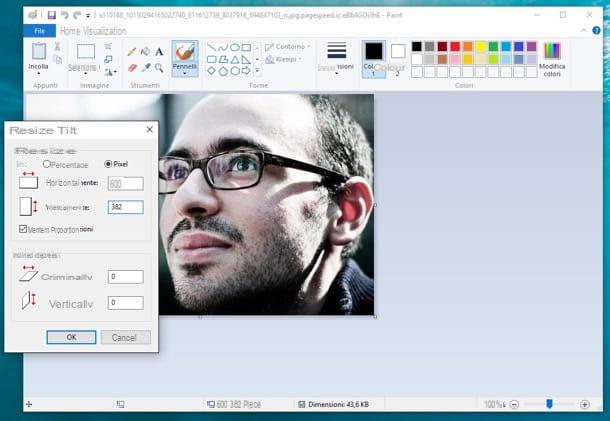
By default, Paint resizes photos while keeping their original aspect ratio. If you want to disable this feature, remove the check mark from the item Maintain proportions and specify the size to which to shrink or expand the image. Easy, right?
To save the final result by overwriting the source image, click on the del icon floppy disk which is located at the top left. If you want to save the image as a new file instead, click on the button Fillet collocato in alto a sinistra and selects the voice Save with name give the menu check if you press.
Windows XP / Vista
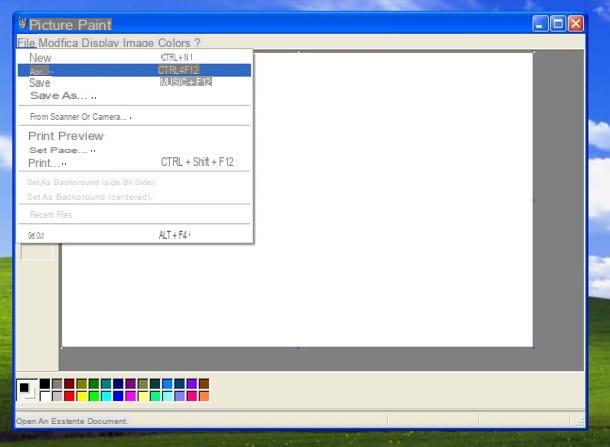
resize a photo with Paint on Windows XP or Windows Vista, start the program by going to the menu Start> All Programs> Accessories and select the item apri from the menu Fillet present at the top left of the window that opens.
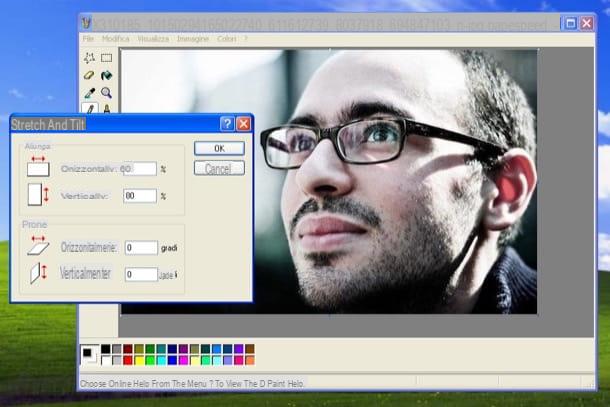
At this point you have two options at your disposal. If you want to reduce or increase the percentage of image size, select the item Stretch / Tilt from the menu Image, type the size you want the photo to assume in the fields Horizontally e Vertically and click on OK per salvare I modified it.
If you prefer to specify precise measurements to apply to the image, select the item Attributes from the menu Image. In the window that opens, put the check mark next to the item pixel, cm o Inches (depending on the unit of measurement you prefer to use), type the dimensions you want the photo to assume in the fields Width e Height and click on OK to apply the changes.
Another quicker but inaccurate way to resize photos in Paint is to select them by pressing the key combination Ctrl + A/Ctrl + 5 on the keyboard and use the mouse to reduce or increase the size of the image.
At the end of the operation, to save your photos edited with Paint you have to do is select the item Save with name from the menu Fillet (Or Save if you want to overwrite the original image with the resized one).
Mac
I use a Mac? In this case you cannot rely on Paint, which is a software exclusive to Microsoft operating systems, but you must use Preview, which is the photo and PDF viewer included “standard” in macOS.
To resize a photo with Preview on Mac, open it by double clicking on it and select the item Adjust size from the menu Instruments which is located at the top.
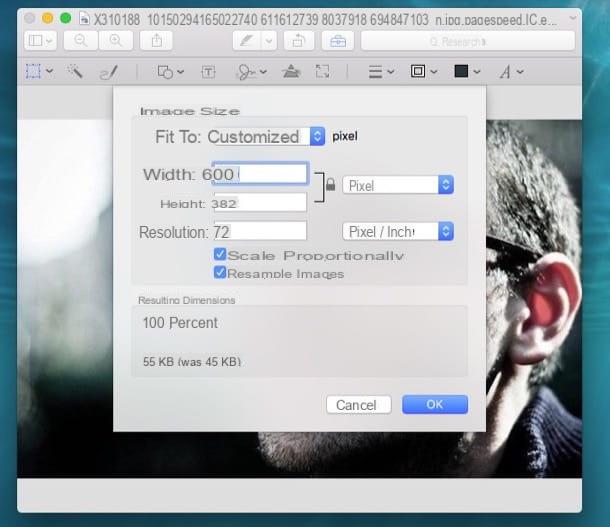
In the window that opens, use the drop-down menu on the right to select the unit of measurement you want to use to adjust the size of the image (eg. pixel, inch, cm o percent), type in the size you want the photo to assume width ed height e pulsing sul pulsating OK per salvare i Cambiomenti.
If you do not want resize the image proportionally, that is, you do not want to link the width and height dimensions of the image, remove the check mark from the appropriate option. The changes will be automatically saved to the source file. If you don't want this to happen, select the entry Export from the menu Fillet (top left) and choose the folder in which to save the new photo.
Resize multiple photos in batch
Paint allows you to resize only one photo at a time. If you want to change the size of several images at the same time, rely on one of the programs to resize photos that I reported to you in my post dedicated to the topic: there are really something for all tastes and needs.
How to resize a photo with Paint


