You would love to embellish some photos by giving them a drawing effect but, not being very good at graphics, you do not know if there is some easy-to-use tool that you can rely on for the purpose in question. Given the circumstances, I would say that thanks to this guide you can find bread for your teeth. Look what a coincidence: today I just want to talk to you about how to stylize a photo using ad hoc programs, apps and online services.
No special technical skills are required, mind you. The only thing you need is just a few minutes of free time all to yourself and a pinch of creativity, nothing else. Furthermore, the tools I'm about to tell you about are (almost) all free, but no less efficient than the much more noble paid solutions, such as Adobe's Photoshop.
Then? What are you still doing standing there? Take a few minutes of free time all to yourself, position yourself comfortably in front of your trusted computer (or take your mobile phone) and immediately start concentrating on reading everything listed below. I am sure that in the end you will be able to tell yourself very happy and satisfied with what you have learned and that, even, you will be ready to provide useful advice in this regard to all your friends who are interested in the same topic. What do you say, we bet?
XnSketch (Windows / macOS / Linux)
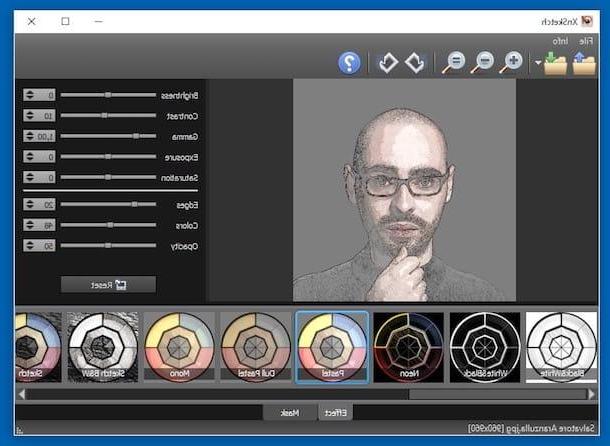
The first tool to stylize a photo that I invite you to put to the test is XnSketch. It is a no-cost program for Windows, macOS and Linux that allows you to apply cartoon and drawing effects to images, giving incredible results. It is very easy to use and also integrates various options through which to make further customizations to lights, contrast, etc.
You ask me what to do to be able to use it? I'll point it out to you right away. First, go to the program download page and click on the button Zip Win 32bit or Zip Win 64bit to download, respectively, the 32-bit or 64-bit version of the program for Windows. Next, extract theZIP archive just got it and run the file XnSketch.exe present inside.
If what you are using is a Mac, visit the page on the Mac App Store Online dedicated to XnSketch and press the button See in the Mac App Store. In the Mac App Store screen that appears on the desktop, then click on the button Ottieni / Installa and, if necessary, also enter the password relating to your Apple ID to proceed with the download and installation of the software, then recall the application by pressing on the relative icon that has been added to the Launchpad.
Now that, regardless of the operating earthquake in use, you see the software window on the screen, drag the photo you want to stylize inside it or click on the button with the folder and the blue arrow which is at the top left to select "manually" the image on which you want to go to act.
Then select one of the effects available in the lower part of the window, corresponding to the section Effect, and adjust (if you want) the options relating to brightness, contrast, etc. by moving the appropriate sliders on the right. If, on the other hand, you need to rotate the photo or change the zoom level, use the buttons on the toolbar at the top.
If you want, you can also add a mask to the image. To do this, just select the tab Mask from the bottom of the window and click on the one you like best from the list that is proposed to you. You can view all the changes in real time, by previewing the photo on the left side of the XnSketch screen.
Once the changes are complete, save the final result by clicking on the button with the folder and the green arrow and indicating the output format and location on your computer.
PhotoSketcher (Windows/macOS)
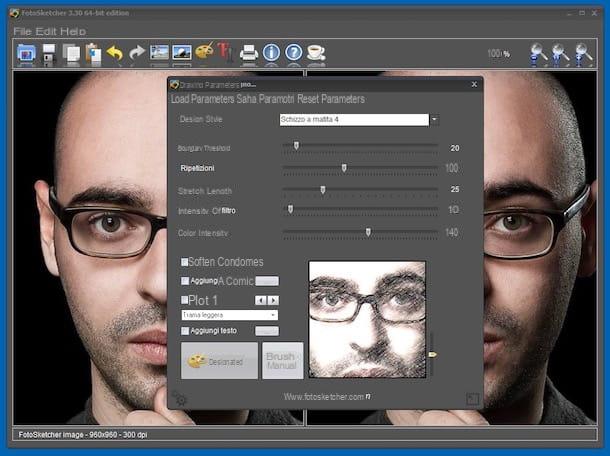
As an alternative to the above program, to stylize a photo you can appeal to FotoSketcher. This is another free program available for both Windows and macOS, thanks to which it is possible to transform photos into real works of art by giving them the effect of watercolor, that of an oil painting and much more. It also includes many useful tools for adjusting contrast, saturation and so on. In short, why not put it to the test right away?
To download it on your computer, connected to this page of the official website of the program and click on the link FotoSketcher 32-bit Windows Portable or on that FotoSketcher 64-bit Windows Portable if you are using, respectively, Windows 32 or 64 bit. If, on the other hand, you are using a Mac, click on the link FotoSketcher OS X.
When the download is complete, if you are using a PC Windows open the .exe file just got it, while if you're using a Mac extract theZIP archive obtained and drag the program icon inside it into the folder Applications macOS, then launch the application via the Launchpad.
Now that, regardless of the operating system used, you see the main window of FotoSketcher on the screen, drag the image you want to stylize on it or click on the button with the blue folder and the photo which is at the top left and select "manually" the image on which you want to go to act.
Next, click on the button with the icon of palette which is on the toolbar and choose from the menu Drawing style attached to the additional window that appears the effect you intend to apply to the photo among the many available. By hovering the mouse pointer over it, you can also preview it before making your selection.
Then adjust the other parameters related to the stylization of the image by moving the sliders next to the items as you see fit Contour threshold, Repetitions etc., adjust the additional settings related to the texture, the contours and the frame and press on Draw!.
In a few moments, you will therefore see your edited photo appear in the right part of the window. If you want, you can make further changes using the button for cropping and the button for adding text that you always find on the toolbar. To increase or decrease the zoom, use the appropriate buttons with the magnifying glasses located at the top right.
When you have finished editing, save the stylized image by clicking on the button with the floppy disk at the top left and indicating the format and the output position from the additional window that appears.
NeuralStyler (Windows/Linux)
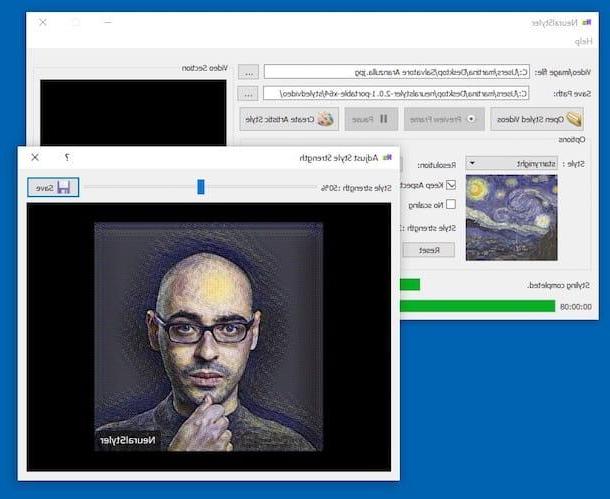
Another great program you can refer to to stylize a photo quickly and easily (but effective!) Is NeuralStyler. It is a free software for Windows and Linux that does not require installation to work and that allows you to transform photos (as well as videos) into real painted paintings, with different painting styles inspired by the great artists of all time (Picasso, Much, Van Gogh etc.). The only thing that needs to be taken into account is that it applies a watermark to the final images.
To download the program on your computer, connect to the application's website and press the button Downloa it for free, then click on the button to proceed with the download that you find in correspondence with the logo on Windows in the new web page that appears.
When the download is complete, extract the compressed archive obtained in any Windows location and start the file NeuralStyler.exe contented to the internal suo.
Now that you see the program window on your desktop, click on the button [...] next to the item Video/image file and select the photo on which you are interested to go to act. Now choose the type of effect you want to apply to the image from the drop-down menu next to the item Style, indicates the final resolution using the drop-down menu next to the wording Resolution and adjust the intensity of the chosen effect by moving the mouse cursor on the bar on the right.
Finally, indicate whether you want to keep the original aspect ratio of the image or not by checking the appropriate items, choose the folder in which to save the output file by pressing the button [...] next to the item Save Patch: e pulsing sul pulsating Create Artistic Style per I will proceed.
A new window will open on the screen that will show you the final result and that you can save on your computer by pressing the button Save. And There you go!
Photo2Stencil (Online)
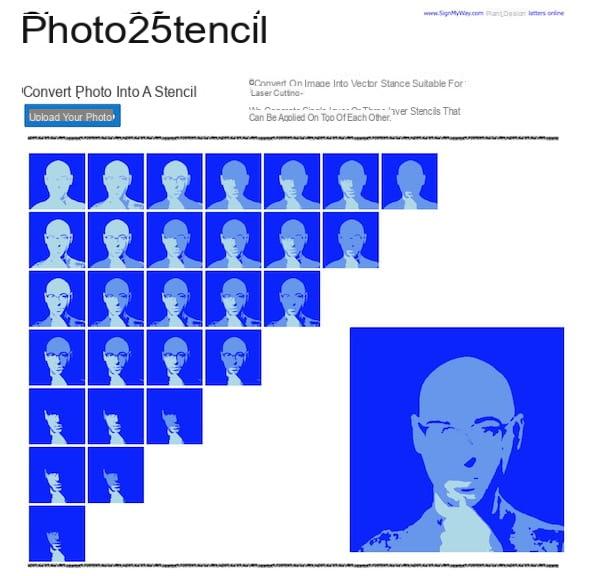
Don't you want to download new programs on your computer and would you like to know if there is any online application useful for the purpose in question? Of course. Among the various solutions available, I personally suggest you consider using Photo2Stencil. It is an online application thanks to which you can transform your photos into drawings in a free, easy and fast way. The final result can be downloaded in the form of an SVG file (therefore vector graphics, infinitely zoomable without loss of quality).
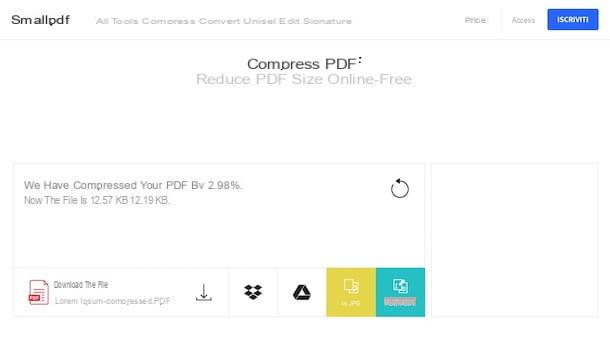
To use the service, connected to its home page, click on the button Upload your photo and select the photo on your computer that you want to stylize. Once uploaded, choose which of the various stylization options that are proposed to you you prefer by clicking on the relevant preview.
Then scroll down the displayed page and indicate which stylized image to download between the two proposed results by clicking on the relative button Download .SVG! adjacent. That's all!
Pho.to (Online)
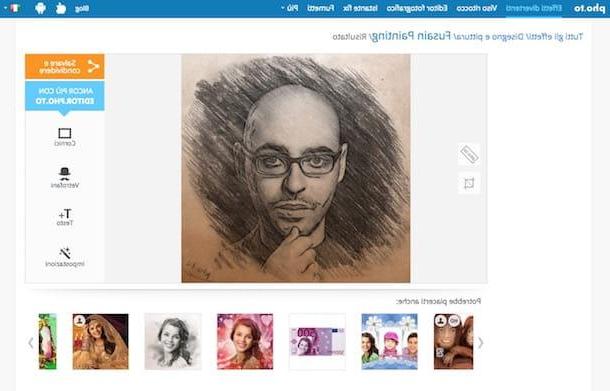
Another online service that you can consider to stylize your photos is Pho.to. It is a portal chock full of interesting effects that can be applied to images to turn them into comics, pencil drawings, paintings and much more. It's free, super easy to use, and works with any web browser.
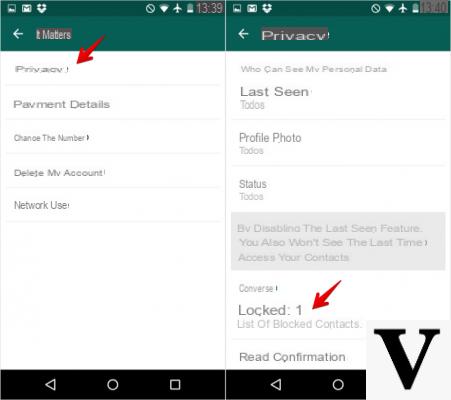
To use it for your purpose, connect to the page of the site dedicated to artistic effects and select the effect you prefer among the many available in the list. Next, click on the button from the computer to load the image you want to act on directly from your PC. If, on the other hand, the photo to be stylized is found on the net, click on the button of URL and indicate the relative link, while if it is on Facebook click on the button from Facebook and upload it from there.
In a few moments, you will then be shown the final result. You can download the photo immediately by clicking on the button Save and share at the top right and choosing whether to download the image locally, whether to post it on social media etc., or you can make further changes to the photo using the ad hoc commands on the right.
App to stylize a photo
And what about the mobile side? What are the solutions available to stylize a photo? A legitimate question, indeed more! If this interests you, below you will find listed and explained those that in my opinion represent the best applications belonging to the category in question, available for both Android and iOS. Put them to the test now and you will see that you will not regret it!
- MomentCam Cartoons & Stickers (Android / iOS) - Nice app that allows you to turn photos into comics and cartoons quickly and easily. The end result seems to have been achieved without. It also includes some very useful functions to further modify the image.
- Prisma (Android / iOS) - One of the most popular apps ever to stylize images. It stands out from all the others for the extremely realistic final results that it is able to return.
- PicsArt (Android / iOS) - Great photo editor in mobile sauce that includes everything you need to make any image exceptional and to apply various effects. It also includes many useful effects for the purpose in question. Stra-recommended!
- Pixlr (Android / iOS) - Considered among the best free (basic) apps to edit photos from your smartphone, Pixlr's strong point is definitely the hundreds of applicable effects and overlays, in addition to the classic standard editing features. It goes without saying that it is fully part of an article on how to stylize a photo.
For more details about the above apps and to learn about other applications that can come in handy in this regard, I invite you to read my article on the best photo editing apps and my post on photo editing apps. You will certainly appreciate them.
How to stylize a photo