


For a few days now, you have an annoying problem on your Mac that you just can't solve. To try to cope with this, you asked a computer-savvy friend to help you out and this, to better understand your problem, suggested that you take pictures of the Mac screen.
If you are reading this guide right now, however, it is most likely because you don't know how to deal with your friend's request. Did I guess? Good. If this is indeed the case, know that you have no reason to worry, I can help you out. In fact, in the following lines I will go to show you some useful solutions that you can use directly and comfortably on your computer to take pictures of the Mac screen.
Depending on what your needs and preferences are, you can choose to take photos of the entire screen or portions of the latter or, again, individual windows. For completeness of information, then, in the last part of the guide I will also explain how to customize the screenshots made. Enjoy your reading and have fun!
Take full screen photos on Mac
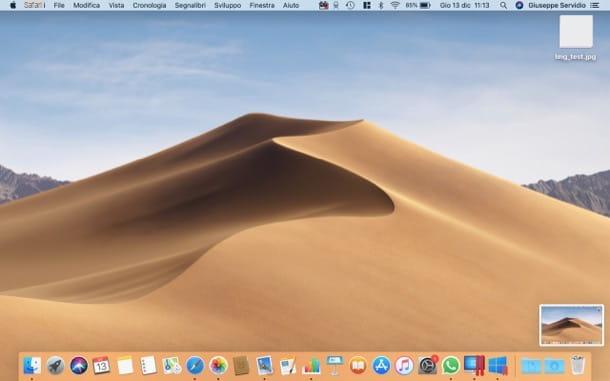
If you are going to understand how to take pictures of the entire Mac screen, know that you can do this by using some predefined key combinations. To proceed, in fact, all you have to do is press the keys at the same time cmd + shift + 3 on your computer keyboard: an image in PNG format with the “photo” of the desktop will be automatically saved on the desktop of macOS.
It is then possible to create screenshots and copy them directly to the system clipboard instead of saving them as images on the desktop: this is an operation that can be particularly useful when you want to quickly paste the screenshots of a program or desktop photos into a text document, email, or in other apps.
To copy the screenshots to the macOS clipboard, just use the same key combinations seen previously by adding the key ctrl. So, if you want to copy the desktop snapshot to the clipboard, you have to press cmd+ctrl+shift+3 and you can then paste it into a document by simply pressing the keys cmd+v.
If your Mac is upgraded to macOS 10.14 Mojave (or later), after taking the screenshot, a thumbnail of it will appear in the lower right corner of the screen. By pressing on the thumbnail, you can change the screen capture by adding texts, arrows, writings and so on using the controls located at the top left.
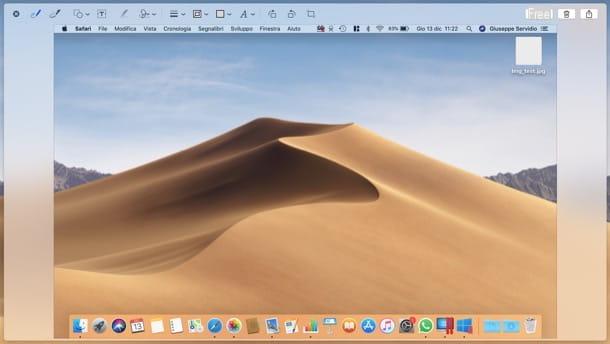
Also from this screen, you can press the button Share (l'icona del square with arrow) to share the screen with other users or press the button Delete (l'icona della dustbin) to trash it. To save the screenshot locally, however, you have to press the button end.
In case you don't want to make the thumbnail in question appear every time you make a screen capture, press the buttons at the same time cmd + shift + 5 to call up the tool Screenshot (which I will talk about shortly in a dedicated chapter), press the button options and then uncheck the item Show floating thumbnail And that's it.
Take photos of portions of the screen and individual windows on Mac
If instead of taking a picture of the entire Mac screen you want take pictures in portions of the screen, you have to press the key combination cmd + shift + 4 on the keyboard and mark the area you want to capture by holding down the left button of the mouse (and then releasing it to take the shot).
The combination of keys that I have just indicated can also be used when you want to take the screenshot of individual windows, but in this case, instead of selecting the portion of the screen to be captured with the mouse, press the space bar on the keyboard and then click on the window you want to capture. The resulting image will have a shadow effect.
Whether you have decided to photograph portions of the screen or single windows, know that in both cases you can decide to save the screenshot directly on the desktop or copy it to the clipboard by holding down ctrl while capturing the screen.
I also remind you that, if your Mac is updated to macOS 10.14 Mojave (or later versions), after taking a screenshot, a thumbnail of the latter will appear in the lower right corner and by clicking on it you can edit and share it, such as I have already explained to you in the previous chapter.
Screenshot Utility
If you have difficulty using the keyboard shortcuts I told you about in the previous chapters and you want to take screenshots using only the mouse, you can use thescreenshot utility, included in macOS. Thanks to it, it is possible not only to take screen captures, but also to adjust some advanced parameters of the latter and even record videos of what is done on the Mac.
To use Screenshot, open the Launchpad (l'icona del rocket present your bar Dock), open the folder Other and click the application icon. Alternatively, you can recall it simply by pressing cmd + shift + 5 on the keyboard.
Once the Screenshot utility has started, you should see its toolbar, which is split in two by the divider | placed in the center of the same. To the left of the divider are the buttons Capture the entire screen, Capture the selected window e Acquire selection which, respectively, allow you to take a screenshot of the entire screen, of a selected window or of a selected portion of the screen. For your information, there are buttons on the right of the divider Record the entire screen e Record your selection which allow, respectively, to record a video of the entire screen or only a portion of it.
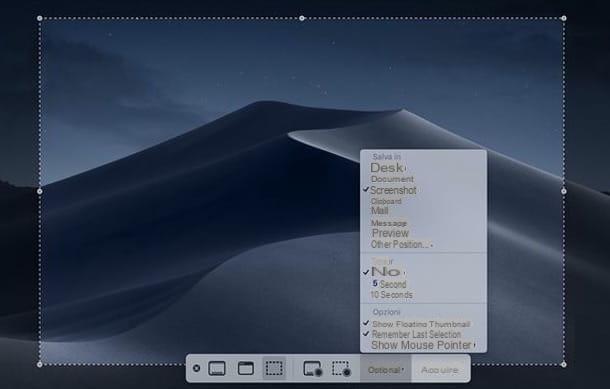
Before taking the screenshot, you can edit some options capture / recording by pressing the appropriate button on the right, so as to choose whether show the mouse pointer, show the floating thumbnail after capture, set a timer to delay the screen capture and select the location to save the screenshot (ex. Desk, Documents, etc.). After setting all these preferences and choosing the capture mode you like best, press the button Acquire to photograph the screen and that's it.
The information I have just given you is valid for macOS versions equal to or higher than 10.14 (Mojave). If not, you can use a less "powerful" version of Snapshot, which does not allow you to register and adjust preferences related to making the screenshots I mentioned earlier.
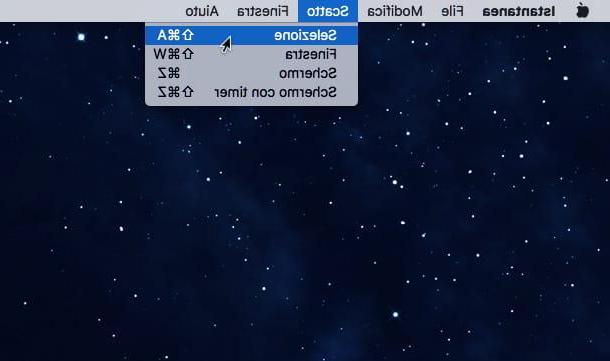
After starting the application, presses on its icon on the Dock and select one of the four options that are proposed to you after clicking on the item Shoot in the menu bar (top left): Selection to take a screenshot of a portion of the screen; Window to photograph a single window; Screen to take a screenshot of the whole screen or Screen with timer to create a screenshot with a 10 second delay.
Once you have taken the screen capture, the application should automatically open Preview and you can save the image by selecting the item Save from the menu Fillet.
Advanced controls for taking screen shots on Mac
As well as as I have already indicated to you in the previous chapters, know that you can customize and further modify the screenshots obtained by entering specific commands in the terminal.
Depending on what your needs are, through the Terminal, you can in fact change the default saving format of screenshots, disable their shading and / or change the name and destination folder of your Mac screen images.
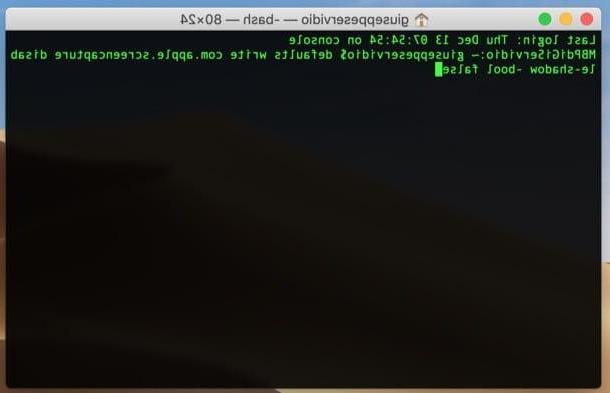
If you are interested in making this kind of changes to your screenshots, open the application terminal (you can do this by searching for it in Spotlight or by clicking on its icon in the folder Other of Launchpad) and issue the commands shown below.
- To change the file format in which macOS saves screenshots, give the command defaults write com.apple.screencapture type format, where instead of format you have to type the extension of the file format in which you intend to save the screenshots. Formats are supported JPG, BMP, TUF, TGA, JP2, PICT e PDF.
- To turn off shading of screenshots, use the command defaults write com.apple.screencapture disable-shadow -bool true. If you have second thoughts, you can restore the shading using the command defaults write com.apple.screencapture disable-shadow -bool false.
- To change the destination folder of the screenshots, instead, give the command default write com.apple.screencapture location cartella. Instead of folder you must enter the full path of the folder in which to save the images.
- To set the default snapshot name, use the command default write com.apple.screencapture name “nome file”. Instead of file name, you have to type the name you want to assign to the screenshots (if the name consists of a single term you can also avoid using quotation marks).
In all cases, to make the changes effective, log out of your user account or restart the process SystemUIServer giving the command killall SystemUIServer in the Terminal. Easier than that ?!
Take photos of entire web pages on Mac
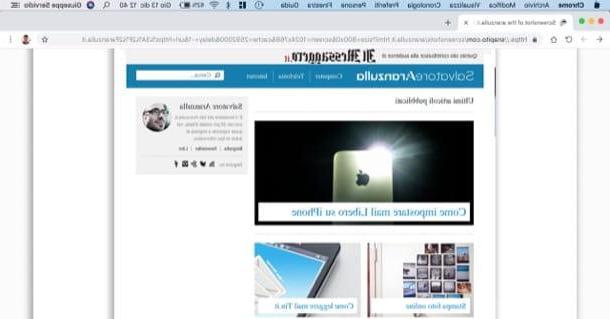
You need capture entire web pages on Mac? Unfortunately, the integrated "standard" tools on macOS do not offer a function capable of doing such a thing, but you can still resort to third-party solutions. Among these it is impossible not to mention the very famous Snapito, a free web service that works without installing anything and without having to register.
To use it, connected to its home page, type theURL of the Web page you want to photograph entirely in the appropriate text field and presses the green button Snap. In a few moments, you will see the preview of the image you have obtained appear on the screen and you can download it locally by pressing on the item Download Original Screenshot. Semplice, see?
Customize screenshots on Mac

In conclusion, let's see how to customize screenshots on Mac. If your computer is updated to macOS 10.14 Mojave, you can do this by pressing on the thumbnail of the screen capture and then using the buttons and options that are shown to you in the window that opens (as I have already explained to you in the initial chapter).
If you took a long time to click on the thumbnail in question after making the screenshot or you are using a version of macOS earlier than 10.14 (Mojave), you can proceed with Preview, the application available “standard” on all Macs and which allows you to view / edit both images and PDF documents.
To edit a screenshot with Preview, double-click on it and wait for the program window to open. To edit the screenshot you can use all the main editing tools present in the program toolbar and in the menu bar.
For example, you can adjust the size of the images by selecting the item Adjust size ... from the menu Instruments or insert lines, squares and writings in the screenshots by first clicking on the icon pencil (top right) and then on the desired tool in the toolbar that appears in the program window.
When you are satisfied with the result, you can export your edited screenshot as a PNG, JPG or PDF file by selecting the item Export ... from the menu Fillet. Note that if you are using a version of macOS equal to or later than Lion, you can count on the autosave function that records all changes made to an image directly on the original file.
If Preview does not satisfy you, you can customize the screenshots made on Mac by turning to some third-party solution, such as Skitch di Evernote, a free application that can be downloaded directly from the Mac App Store.
How to take Mac screen photos


